How to install marble mosaic floor tile is a practical skill that can elevate the look of your home while saving on installation costs. These elegant tiles are popular for bathrooms, kitchens, and entryways because they offer a timeless appearance, excellent durability, and a high-end finish that enhances any space.
At SF Marble & Granite Inc., we believe in empowering homeowners with the right knowledge to take control of their home improvement projects. Learning how to install marble mosaic floor tile not only gives you creative freedom but also allows you to enjoy the satisfaction of a custom floor crafted by your own hands.
Table of Contents
ToggleUnderstanding Marble Mosaic Floor Tile and Its Applications
Before diving into how to install marble mosaic floor tile, it’s important to understand what makes it such a popular choice. Made from authentic natural stone, marble mosaic tiles combine timeless elegance with long-lasting performance. Unlike laminate flooring, which only mimics the look of stone, marble offers genuine texture, veining, and depth that elevate any room’s style. These tiles come in various finishes, such as polished marble for a glossy look or honed marble for a matte, slip-resistant surface ideal for areas where slippery floors are a concern.
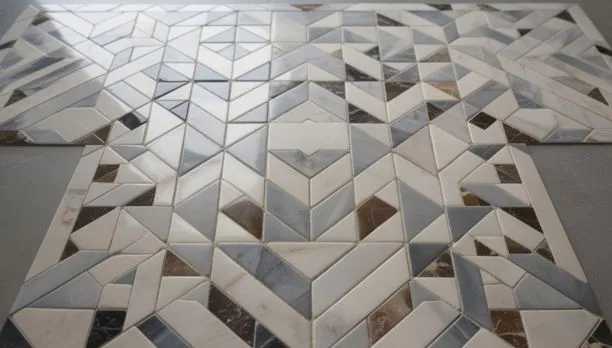
Popular shapes and patterns for marble mosaic tile include:
- Hexagon – Perfect for modern bathroom floors and backsplashes
- Basket Weave – Adds traditional charm to classic interiors
- Herringbone – Stylish and dynamic for kitchen floors and entryways
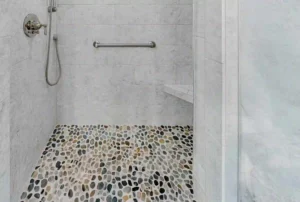
- Penny Round – Great for curved surfaces like shower floors
- Chevron – Bold and directional, ideal for statement walls
Whether you’re planning to upgrade your bathroom, refresh your kitchen backsplash, or begin tiling mosaic floor sections in your home, marble mosaics offer both visual appeal and functional durability. At SF Marble and Granite, we recommend choosing patterns and finishes based on your space, usage, and personal style. Understanding your options before installation ensures your flooring project turns out beautifully and performs for years to come.
Surface Preparation
Before beginning to install marble mosaic floor tile, your surface must first be clean, flat, and dry. Ignoring this step may result in loose tiles or water damage in areas such as bathrooms or kitchens. Whether you’re using a stylish blue hexagon tile or matching it with green countertops, a level surface is the foundation of a long-lasting floor.
Key prep steps before installing mosaic floor tile:
- Sweep and clean the floor thoroughly
- Use a level to check for uneven spots
- Fix dips with a floor-leveling compound
- Add a cement backer board over wood subfloors
- Waterproof areas like showers and wet zones
At SF Marble and Granite, we always recommend prepping carefully just like you would when placing granite countertops near Indianapolis. A solid base ensures your marble floor stays beautiful and secure for years to come.
Cutting Marble Mosaic Tiles
Cutting marble mosaic floor tile requires some careful steps. Since marble is a natural stone, it may be more susceptible to chipping if handled carelessly; nonetheless, this should not prevent installation. Whether you’re working with grey marble sheets or aiming for a classic marble checkerboard look, clean and precise cuts are key to a polished finish.
Tips for cutting mosaic tiles without damage:
- Use a wet saw with a diamond blade for smooth, straight cuts
- Use tile nippers for small or curved areas carefully
- Cut slowly to reduce pressure and avoid chipping
- Mark cut lines with a pencil or painter’s tape
- Wear safety goggles and gloves while cutting
- Practice on a spare tile before the final cut
Understanding how to put mosaic tiles around tricky areas like corners or pipes can help you avoid costly mistakes and reduce your overall installation cost. At SF Marble and Granite, we advise taking your time during this step of your project. A precise cut will not only add aesthetic value to your design but will also ensure your marble tiles fit securely and comfortably together.
You May Also Read: Swimming Pool Tile Grout Repair
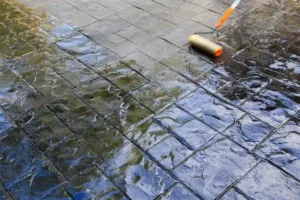
Sealing the Marble Tiles
One often-overlooked step in how to install marble mosaic floor tile is sealing the surface. Marble is a luxury stone, but it’s also porous, meaning it can easily absorb moisture, stains, or cleaning chemicals if not sealed correctly. Whether you’re working with black marble, white mosaics, or any other finish, sealing helps protect your investment and keep the tiles looking new.
Key points for sealing floors with marble tiles:
- Always seal marble before grouting to avoid staining
- Use a penetrating sealer made for natural stone
- Apply the sealer evenly with a sponge or cloth
- Allow the first coat to dry fully before applying a second
- Re-seal every 6–12 months for long-term durability
- Avoid using wax-based sealers that can dull the surface
Sealing isn’t optional when learning how to put mosaic tiles or finishing up your DIY marble project, and at SF Marble and Granite, we advise sealing your floors immediately after installation and following a regular maintenance schedule to preserve their beauty and protect your marble mosaic floor from high-traffic areas or moisture exposure. Proper sealing helps ensure the protection of high-traffic or wet environments like bathrooms.
Final Cleaning and Maintenance Tips
Once you’ve completed the process of how to install marble mosaic floor tile, the next step is proper cleaning and maintenance. Marble is a beautiful but delicate surface that needs special care to keep it looking its best. Like in countertop installation, the finish matters and so does how you treat it afterward. To clean marble floors safely, the goal is to preserve shine while avoiding anything that might damage the stone.
Simple ways to keep your marble floor clean and protected:
- Use a soft mop or microfiber cloth for daily dusting
- Wipe up spills immediately to prevent staining
- Only use pH-neutral stone cleaners avoid vinegar or lemon-based products
- Avoid abrasive scrubbers or harsh chemical sprays
- Use rugs or mats in high-traffic areas to prevent wear
- For a deeper quartz clean style finish, buff the surface gently once dry
Maintaining a marble floor isn’t difficult; it just requires consistency. After learning how to install marble mosaic floor tile, protecting your work ensures the effort pays off for years. At SF Marble and Granite, we always recommend setting up a simple routine to clean marble properly, so your floors stay as stunning as the day they were installed.
When to Hire a Professional Installer
While many homeowners enjoy learning how to install marble mosaic floor tile, there are situations where calling in a pro is the smarter move. Not every project is DIY-friendly, especially when you’re dealing with large spaces, uneven subfloors, or intricate tile patterns that require precise cuts and alignment.
You may want to hire a professional if:
- The installation area is large or heavily used (like a kitchen or entryway)
- The subfloor is uneven or damaged and needs leveling
- You’re using a detailed tile layout or a custom pattern
- You have limited time or no prior tiling experience
- The job includes both flooring and marble floor installation on walls or wet zones
Professionals bring experience, the right tools, and an eye for detail that can make a big difference in how your finished floor looks and performs. At SF Marble and Granite Inc., we handle every step with care, from surface prep to sealing so you don’t have to worry about costly mistakes or do-overs. When the goal is a long-lasting, high-quality result, hiring experts ensures your marble floor is installed right the first time.
Final Thought
Learning how to install marble mosaic floor tile involves several important steps, from prepping the subfloor and laying out the design to cutting, sealing, and maintaining your marble tiles. When done right, this project brings timeless beauty, durability, and a personal touch to your home. With proper planning, the right tools, and attention to detail, even DIY homeowners can achieve stunning results.
At SF Marble and Granite Inc., we’re here to support your journey, whether you’re installing it yourself or need expert help with full marble floor installation services. Ready to transform your space with the elegance of marble? Contact us today for professional guidance, product selection, or a free estimate on your next tile project.
FAQs
Do I need to seal marble mosaic tiles before or after installation?
Yes, sealing is essential both before grouting and after installation. Since marble is a porous material, pre-sealing helps protect the surface from grout stains and moisture damage. After the tiles are set and grouted, applying another layer of sealer will ensure long-term durability and stain resistance. At SF Marble and Granite Inc., we recommend using a high-quality penetrating sealer designed specifically for natural stone.
What is the biggest challenge when learning how to install marble mosaic floor tile?
The most common challenge is getting an even, level surface, especially when working with mesh-backed sheets and small tile pieces. If your subfloor isn’t flat or if the mortar is applied unevenly, tiles may shift or sit at different heights. Cutting around corners and curves can also be tricky. For large or complex areas, hiring professionals like SF Marble and Granite Inc. can help avoid these problems and ensure a flawless finish.
Can I use marble mosaic tiles in wet areas like bathrooms or showers?
Absolutely! Marble mosaic tiles are an excellent choice for wet areas like shower floors, bathroom walls, and backsplashes. However, proper waterproofing and sealing are crucial. Always use a honed finish to reduce slipperiness, and apply a moisture barrier beneath the tile. If you’re unsure about waterproofing steps during how to install marble mosaic floor tile, our experts at SF Marble and Granite Inc. are here to guide or handle the installation for you.