Granite countertop installation can transform the look of a kitchen or bathroom, offering a durable and attractive surface that enhances both the appearance and value of your home. With its heat resistance, scratch resistance, and longevity, granite has become a favorite choice for homeowners. This comprehensive guide will walk you through the benefits, preparation steps, tools, and materials required, as well as the installation process and maintenance tips to keep your granite countertops in top condition.
Benefits of Installing Granite Countertops
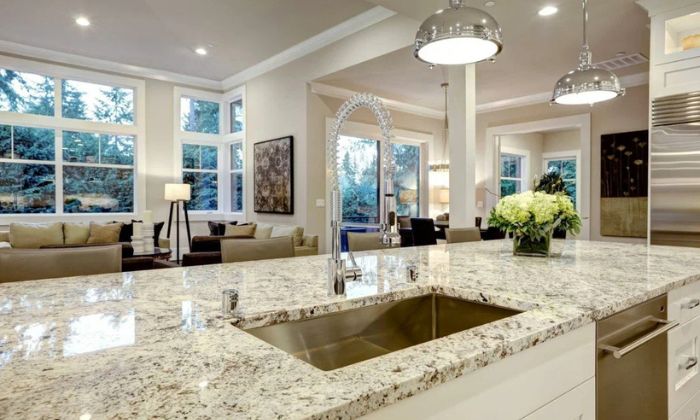
Table of Contents
ToggleLong-lasting and Durable Material
Granite is an incredibly durable and long-lasting material, ideal for countertops. With proper care, it can endure for decades without significant wear, making it highly resistant to common kitchen issues like scratching, chipping, or heat damage. Its natural hardness ensures it withstands daily use, while routine maintenance keeps it looking new.
Unlike many other materials, granite’s resilience allows it to maintain its quality and appearance over time, making it a valuable, lasting investment for any kitchen. The durability of granite not only adds functionality but also enhances the aesthetic appeal of your space for years to come.
Enhances the Look and Value of the Home
Granite countertops bring a touch of elegance to any home, with unique colors and intricate patterns that add visual appeal. Its natural beauty enhances the look of kitchens and bathrooms, creating a more refined and inviting atmosphere. Beyond aesthetics, granite is a durable and timeless material that appeals to potential buyers, which can increase a property’s value.
Because it’s resistant to scratches and heat, granite remains in excellent condition over time, making it a worthwhile investment for homeowners looking to elevate their space and boost their home’s market appeal. The process of granite fabrication ensures that each countertop is crafted to perfection, delivering a custom fit and adding even more value to your home.
Heat and Scratch Resistance
Granite is highly durable, with excellent resistance to heat and scratches, making it ideal for kitchens. You can place hot pans directly on its surface without damage, as granite withstands high temperatures naturally. Its scratch resistance means it won’t easily show marks from daily use, adding to its longevity.
However, it’s still best to avoid cutting directly on granite, as this can dull knives and might wear the surface over time. This resilience makes granite a reliable choice for countertops, handling the heat and wear of a busy kitchen while maintaining its beautiful appearance.
Preparation Steps Before Installation
Proper preparation is essential to achieve a seamless granite countertop installation. Here are the preliminary steps to ensure a successful project:
Measuring the Counter Space
To measure counter space accurately, start by noting the length and width of the countertop area, accounting for any sink cutouts, base cabinets, and backsplash needs. Use a tape measure to ensure precision, measuring from wall to edge in all areas to cover the entire surface. This includes any extended sections or overhangs.
Accurate measurements help ensure the new countertop fits perfectly without gaps or issues, especially around edges and corners. Pay special attention to cutout spaces for sinks or appliances, as they require exact sizing for smooth installation. Proper measurements are key to achieving a flawless finish.
Selecting the Right Granite Slab
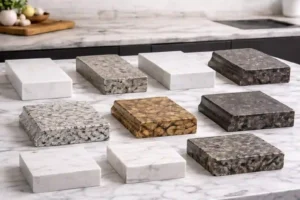
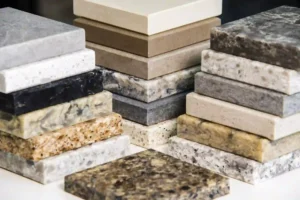
Choosing the right granite slab involves selecting colors and patterns that enhance your space’s aesthetic. Granite comes in modular tiles and full slabs, each offering distinct looks and installation methods. Prices typically range from $50 to $100 per square foot, varying based on the quality, rarity, and origin of the stone.
While modular tiles are often budget-friendly and easier to install, full slabs provide a seamless, luxurious appearance. Assessing durability, finish, and maintenance requirements will help ensure you pick a slab that balances style with practicality for your kitchen or bathroom.
Preparing the Base Cabinets
To prepare base cabinets for granite countertops, first confirm that they are level and structurally sound. Since granite is extremely heavy, the cabinets must be reinforced to bear the weight, which will prevent any risk of cracking or shifting over time. Use a level tool to check the cabinet tops, and make adjustments as needed by shimming or sanding.
Securing the cabinets firmly to the wall can also enhance stability. If necessary, add plywood on top of the cabinets to create a more solid base, ensuring the granite remains secure and damage-free for years to come.
Tools and Materials Required for Installation
To install granite countertops, gather the following tools and materials:
- Granite slab(s) or tiles
- Level
- Shims
- Measuring tape
- Adhesive or silicone caulk
- Grinder or saw for cutouts
- Sealant
- Safety gloves and glasses
Step-by-Step Guide to Installing Granite Countertops
With your measurements taken, granite slab selected, and base cabinets prepared, you’re ready to start the installation process.
Step 1: Transporting and Placing the Granite Slab
Transporting and placing a granite slab requires careful handling due to its weight and brittleness. To avoid breakage, always lift the slab vertically, as holding it flat can cause stress cracks. During transport, secure it to prevent tipping or shifting.
When moving it into position over the base cabinets, place it down gently to avoid damaging both the slab and the cabinetry. Proper handling ensures that the granite reaches its final spot safely, preserving its quality and appearance for the installation process.
Step 2: Leveling and Shimming
Leveling and Shimming involves using a level tool to check if the granite countertop is perfectly even. If the granite is not level, shims (small wedges or pieces of material) are placed under the slab to correct any unevenness. This ensures that the countertop sits flat, preventing gaps and ensuring stability.
Proper leveling is crucial because uneven surfaces can lead to potential damage, poor installation, and an unstable surface for everyday use. Shimming guarantees that the granite countertop is securely and correctly aligned before moving on to the next step of installation.
Step 3: Attaching the Countertop to Cabinets
Attaching the Countertop to Cabinets involves securing the granite slab to the cabinets once it’s leveled. Start by applying a line of adhesive or silicone caulk along the perimeter of the cabinet frame. Then, carefully position the granite slab on top, pressing it firmly onto the base. Ensure it’s aligned properly and evenly.
Allow the adhesive to sit for a few hours to fully set and bond the granite to the cabinets, providing a stable and secure attachment before proceeding with any further installation steps. This ensures durability and stability for the countertop.
Step 4: Creating Cutouts for Sinks and Fixtures
This step involves creating cutouts for the sink and other fixtures in the granite countertop. This is done using a grinder or saw, and precision is key to avoid damaging the granite. Since granite is a very hard material, it requires careful handling to prevent chips or cracks. It’s important to measure accurately before cutting and proceed slowly.
For those without experience in working with granite, it is advisable to hire a professional installer. They have the necessary tools and expertise to ensure the cutouts are done cleanly and safely, preserving the countertop’s integrity.
Step 5: Sealing the Granite Surface
Sealing the Granite Surface is crucial for protecting the granite from stains and moisture. Start by selecting a high-quality granite sealer. Apply the sealer evenly over the entire surface using a clean cloth or applicator. Ensure the sealer penetrates the granite to provide long-lasting protection.
After application, allow the sealer to dry completely before moving on to any further installations or using the countertop. Proper sealing helps preserve the granite’s appearance and durability, preventing damage from spills and moisture. Regular resealing may be necessary to maintain optimal protection over time.
Post-Installation Care and Maintenance
Proper care will extend the life and beauty of your granite countertops. Here’s what to do after installation:
Allowing Time for the Adhesive to Set
Allowing the adhesive to fully set is crucial for ensuring a strong bond between the granite and the surface. After applying the adhesive, it’s important to give it sufficient time to cure typically around 24 hours. This curing process allows the adhesive to harden properly, ensuring that the granite is securely attached and minimizing the risk of shifting or damage.
Rushing this step may result in an unstable installation, compromising the integrity of the countertop or surface. Patience during this phase guarantees a more durable and long-lasting result for your granite installation.
Cleaning and Polishing the Granite
To clean and polish granite countertops, start by using a mild soap and water solution to gently wipe down the surface. Avoid harsh chemicals, as they can damage the granite’s sealant and finish. Once cleaned, apply a specialized granite polish to enhance the stone’s natural shine and protect its surface.
This polish helps maintain the granite’s glossy appearance and offers added protection against stains and scratches. Regular cleaning and polishing not only keep the granite looking beautiful but also extend its longevity and durability. Always follow manufacturer instructions for the best results.
Regular Sealing Schedule
Granite is a porous stone, which means it can absorb liquids and become stained over time. To protect your granite countertops from stains and damage, regular sealing is essential. It’s recommended to seal granite every 12 to 18 months, depending on usage and the type of granite. Sealing creates a protective barrier on the surface, helping to prevent liquids from penetrating the stone.
Regular sealing ensures the longevity and beauty of your granite countertops, keeping them resistant to stains and maintaining their polished appearance. Always check if resealing is needed by performing a water test on the surface.
DIY Installation vs. Professional Installation
Installing granite countertops can be a DIY project if you possess the necessary skills and tools, but professional installation is often the better choice for optimal results. Granite is heavy and requires precise cutting and fitting, especially for tasks like sink cutouts or ensuring a smooth seam.
Professionals have the expertise to handle these complexities, ensuring accurate measurements, proper sealing, and a flawless finish. While DIY can save money, it’s important to weigh the potential risks of mistakes that could lead to additional costs, making professional installation a safer and more reliable option for most homeowners.
Cost of Granite Countertop Installation
The cost of granite countertop installation varies based on factors like granite prices, slab size, labor, and additional features such as a granite backsplash. On average, granite countertops range from $50 to $100 per square foot, with slab prices varying from $50 to $200 per square foot depending on the stone’s rarity and color.
Labor costs typically add $35 to $45 per linear foot. Overall, homeowners can expect to pay between $2,000 and $4,500 for installation, depending on the size and customization of the kitchen, including potential extras like sink cutouts or modular granite options.
Common Mistakes to Avoid During Installation
To ensure a smooth granite countertop installation, avoid common mistakes like improper measuring, skipping the sealing process, and not leveling the countertop. Accurate measurements are crucial to prevent costly errors, so measure each section multiple times before ordering.
Failing to seal the granite makes it prone to stains, so sealing should be a priority after installation. Additionally, ensuring the countertop is level is vital for both aesthetic appeal and structural integrity. Always check for levelness and adjust with shims if necessary to achieve a properly installed, durable countertop.
Why Choose SF Marble & Granite?
At SF Marble & Granite, we pride ourselves on delivering high-quality granite countertop installation with a focus on craftsmanship and customer satisfaction. Our team is experienced in working with a variety of granite colors and patterns to ensure a perfect match for your home. We handle all aspects of the installation, from precise measuring to expert sealing, so you can trust us to deliver a flawless result.
Effortless Upgrades for Your Kitchen
When you choose SF Marble & Granite for Granite Countertop Installation, our expert team handles every detail from precise measuring and slab selection to leveling, secure adhesion, and final sealing so you get a flawless, durable surface without the headache. We deliver premium materials, coordinate all steps efficiently, and minimize disruption, giving you a kitchen that resists heat, scratches, and everyday wear. Trust our full‑service Countertops Installation in Lowell to transform your space with professional care and lasting beauty.
Conclusion
Granite countertop installation is an excellent investment for any kitchen or bathroom, adding beauty, functionality, and value to your home. From selecting the right slab to post-installation care, each step in this process is crucial for a long-lasting, high-quality finish.
Whether you choose to DIY or hire professionals, following these steps ensures a successful granite countertops install that enhances your space for years to come. For expert service and quality materials, contact SF Marble & Granite today to start your granite countertop installation project.
FAQs
How long does a standard granite countertop installation take?
Most installations are completed within 1–2 days, depending on countertop size and any custom cutouts.
What is the typical cost for granite countertop installation?
Expect materials to run $50–$100 per sq ft and labor $35–$45 per linear ft, with total project costs varying by kitchen size and customization.
How often should I seal my granite countertop?
Reseal every 12–18 months, this protects against stains and moisture and keeps your countertop looking fresh.
What tools and materials are required for granite countertop installation?
You’ll need the granite slab, level, measuring tape, shims, adhesive or silicone caulk, sealant, and a cutting or grinding tool for precise cutouts.
Can I install my granite countertop myself, or should I hire a professional?
While skilled DIYers might attempt it, professionals ensure accurate measurements, safe handling of heavy slabs, and expert sealing for a perfect finish.

