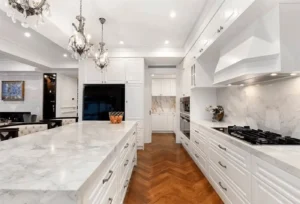
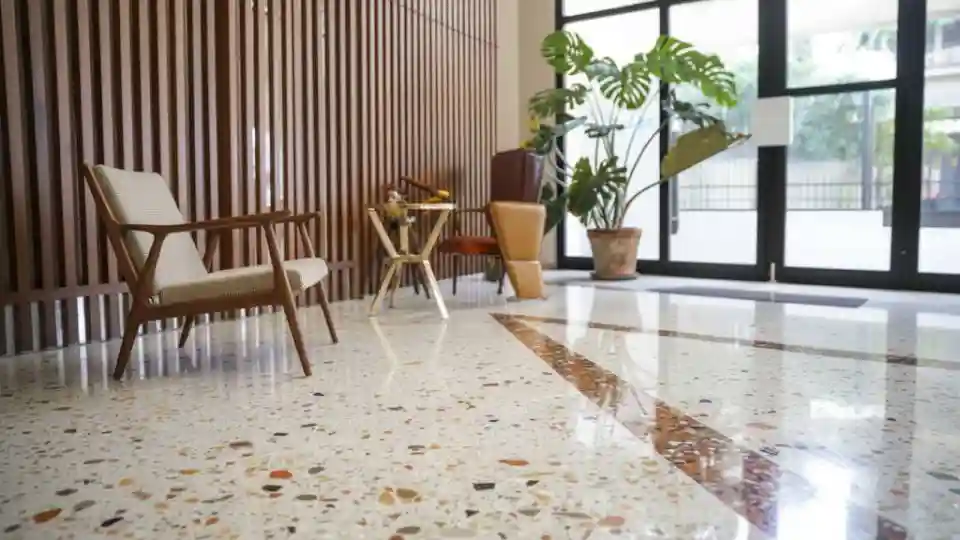
Terrazzo floors are built to last for decades. They look stunning when properly maintained. But years of foot traffic, moisture, and scratches can leave them looking dull and worn. The good news? Most terrazzo floors can be fully brought back to life without replacing them.
That is exactly what terrazzo floor restoration is all about. It is the process of repairing, grinding, polishing, and sealing your terrazzo back to its original beauty. Whether your floor has deep cracks, surface stains, or just lost its shine, this guide walks you through every step.
Table of Contents
ToggleUnderstand the Basics of Terrazzo Restoration
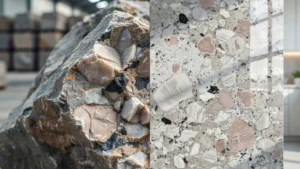
Terrazzo is a composite material. It is made by embedding chips of marble, granite, quartz, or glass into a cement or epoxy base. Once set, the surface is ground down and polished until smooth and shiny.
Over time, terrazzo can lose its luster. It can crack, stain, or become uneven. Terrazzo restoration brings that surface back. It is different from a full replacement. You work with what is already there.
There are two main types of terrazzo:
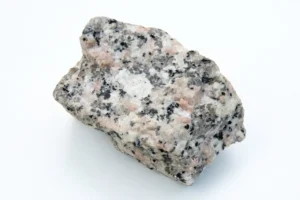
- Cement-based terrazzo: The older, traditional type. Common in buildings from the 1950s to 1980s. It responds well to grinding and honing.
- Epoxy-based terrazzo: More modern and flexible. It handles heavy foot traffic better and is easier to restore.
Knowing which type you have matters. It affects the products and methods used during terrazzo flooring restoration.
Assess the Condition of Your Terrazzo Flooring
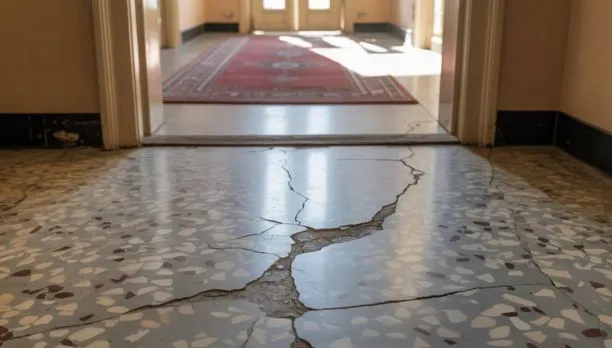
Before any work begins, you need to assess the floor. Walk the entire surface. Look for visible cracks, stains, chips, and dull patches. Check for areas where the surface feels hollow underfoot. That hollow sound can mean the terrazzo has separated from the subfloor.
Take note of any previous repairs. Old patching jobs that do not match the original mix will show up differently after polishing. You may need to redo those patches with a better color-matched material.
A professional assessment can catch problems that are easy to miss. A trained eye will identify subsurface issues that can cause new damage if left untreated.
Signs Your Terrazzo Floor Needs Restoration
Not sure if your floor needs work?
Here are the clearest signs:
- Visible cracks or chips in the surface
- Stains that regular cleaning will not remove
- A dull or hazy appearance instead of a glossy shine
- Uneven or rough patches across the floor
- Discoloration from water damage or chemical exposure
- Loss of the original pattern visibility
If you notice two or more of these signs, terrazzo repair is likely needed. Waiting too long makes the damage worse and raises the cost of terrazzo floors restoration.
Preparation Before Terrazzo Restoration
Good prep work sets the foundation for a great result. Here is what needs to happen before any grinding or polishing begins:
Clear the Space
Remove all furniture, rugs, and objects from the floor. Make sure the surface is fully open and accessible.
Deep Clean the Floor
Use a pH-neutral cleaner to remove dirt, grease, and old wax buildup. Do not use acidic or ammonia-based cleaners. They can damage the terrazzo surface before work even starts.
Identify and Mark Problem Areas
Use painter’s tape or chalk to mark cracks, stains, and damaged spots. This helps the technician focus on the right areas without missing anything.
Check Moisture Levels
Moisture trapped under cement-based terrazzo can cause problems. Use a moisture meter to check the subfloor before restoration. High moisture may need to be addressed first.
You can read about: How to Care for Marble Floor
Repairing Surface Damage
Terrazzo repair is the first hands-on step. Surface damage must be fixed before any grinding begins.
Filling Cracks
Small hairline cracks are filled with a color-matched epoxy or cementitious filler. The filler is mixed to match the original floor as closely as possible. It is pressed into the crack, allowed to cure, and then leveled flush with the surface.
Fixing Chips and Holes
Larger chips require a terrazzo patch mix. This mix includes a binder and matching aggregates like marble chips. After application, the patch cures for at least 24 hours before grinding.
Replacing Divider Strips
Metal or plastic divider strips run through terrazzo floors in a grid pattern. Damaged or missing strips should be replaced before grinding. If left broken, they create uneven edges after the floor is polished.
Done correctly, terrazzo floor repair leaves the surface ready for the next stage. Rushing this step leads to patches that stand out after polishing.
Grinding and Honing the Surface
Grinding is where the real transformation starts. It removes the top layer of the terrazzo, which includes scratches, stains, and surface damage.
Coarse Grinding
This first pass uses heavy-grit diamond tooling, usually starting around 30 to 50 grit. The goal is to remove the damaged surface layer and expose fresh material. This stage can be loud and dusty. Wet grinding is preferred to reduce dust and protect the floor.
Medium Grinding
After coarse grinding, the grit level increases. Medium grits between 100 and 200 begin to smooth the surface. This is also when the true color and pattern of the terrazzo starts to come back.
Honing
Honing uses finer grits, typically 400 to 800. It removes the scratches left by coarse grinding and creates a flat, matte surface. At this stage, the floor looks clean and uniform but not yet shiny.
The number of grinding passes depends on the floor’s condition. Heavily damaged floors need more passes. This step takes the most time in the entire terrazzo floors restoration process.
Polishing Terrazzo Floors
Polishing follows honing. This is where the floor goes from flat and clean to bright and glossy.
Fine Polishing
Polishing starts with 800-grit pads and moves up to 1500 and then 3000 grit. Each pass removes micro-scratches from the previous stage. The surface becomes smoother and more reflective with each step.
Crystallization (Optional)
Some professionals use a chemical crystallization process on cement-based terrazzo. It involves applying a special compound that reacts with the calcium in the floor to create a hard, glassy layer. This method adds extra shine and durability but is optional.
Burnishing
High-speed burnishing with a dry pad brings out the final shine. This step is used after polishing and produces the mirror-like finish that terrazzo is known for.
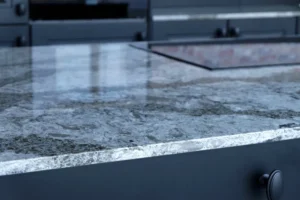
Well-polished terrazzo reflects light beautifully. The aggregate chips become vibrant again, and the full pattern of the floor is restored.
Sealing and Protecting Terrazzo Floors
Sealing is the final step in terrazzo flooring restoration. It protects the surface from stains, moisture, and daily wear.
Choosing the Right Sealer
There are two main sealer types:
- Penetrating sealers: These soak into the pores of the terrazzo. They do not change the look of the floor but create a barrier against moisture and stains. Best for cement-based terrazzo.
- Topical sealers: These sit on top of the surface and create a protective coating. They can add extra shine. Best for high-traffic commercial floors.
Application
The sealer is applied with a flat mop or applicator pad. It needs time to soak in before the floor can be used. Most sealers require 24 to 48 hours before foot traffic is allowed.
Ongoing Maintenance
After restoration, maintain your terrazzo with regular sweeping and mopping with a neutral cleaner. Avoid harsh chemicals. Reapply sealer every one to three years depending on foot traffic.
Proper sealing after terrazzo restoration extends the life of the floor significantly and keeps it looking great between professional maintenance cycles.
Tools and Materials Used in Terrazzo Restoration
Professional terrazzo restoration uses specialized equipment. Here is a quick look at what the job requires:
- Diamond grinding pads: Used for all grinding and honing stages. Grit levels range from 30 to 3000.
- Floor grinding machine: A weighted, motorized machine that holds the diamond pads. Can be wet or dry.
- Industrial wet/dry vacuum: Collects slurry and dust during grinding.
- Epoxy or cementitious filler: Used for crack and chip repair.
- Color pigments and aggregates: Mixed with filler to match the original floor.
- Burnishing machine: High-speed buffer used in the final polishing stage.
- Penetrating or topical sealer: Applied as the last protective layer.
DIY terrazzo restoration is possible for minor surface work. But full restoration involving deep cracks, grinding, and polishing really calls for professional tools and skill.
How Long Does Terrazzo Restoration Take?
The timeline depends on several factors:
- Size of the floor area
- Level of damage and number of repairs needed
- Number of grinding and polishing stages required
- Drying and curing time for fillers and sealers
For a standard residential floor of around 500 square feet, expect the work to take two to four days. Larger commercial spaces with heavy damage can take a week or more. Plan for the space to be off-limits during this time.
Cost of Terrazzo Floor Restoration
The cost of terrazzo restoration varies based on several factors. Here is a general breakdown:
- Basic honing and polishing: $3 to $6 per square foot
- Full restoration with crack repair: $8 to $15 per square foot
- Severe damage with extensive patching: $15 to $25 per square foot
These are general estimates. Prices vary by region, contractor experience, and the specific condition of the floor. Getting two or three quotes before choosing a contractor is a smart move.
Keep in mind that full replacement of terrazzo can cost $20 to $40 per square foot or more. Restoration almost always costs less and preserves the original character of the floor.
Factors That Affect Cost
- Floor size and layout complexity
- Type of terrazzo (cement vs. epoxy)
- Number and severity of cracks or chips
- Geographic location
- Accessibility of the space
Terrazzo Restoration vs. Replacement: Which Is Better?
This is a common question. The answer depends on the condition of the floor.
Restoration is the right choice when:
- The structural integrity of the floor is still intact
- Damage is mostly surface-level
- You want to preserve original patterns and materials
- Budget is a concern
Replacement makes more sense when:
- The subfloor is severely damaged or unstable
- Large sections of terrazzo have broken away
- The floor has been patched so many times it cannot be matched
In most cases, restoration wins. Terrazzo is a durable material. Even floors that look terrible after decades of use can often be brought back with the right restoration process.
Why Choose SF Marble and Granite
SF Marble & Granite has years of hands-on experience working with terrazzo, marble, and natural stone floors. The team understands that no two floors are the same. Every restoration project gets a thorough inspection before work begins.
SF Marble & Granite uses professional-grade diamond tooling, color-matched repair materials, and high-quality sealers for every job. The result is a floor that looks like new and is protected for years to come.
If you are in the Lowell area and need expert stone flooring work, check out our Marble Floor Installation in Lowell, MA service page. SF Marble & Granite handles everything from installation to full restoration with the same attention to detail and craftsmanship.
Final Thought
Terrazzo floor restoration is one of the best ways to bring old, damaged floors back to life. The process takes time and the right tools, but the results speak for themselves. A properly restored terrazzo floor can last another 50 to 100 years with good maintenance.
Whether you are dealing with minor dullness or deep cracks, do not give up on your terrazzo. Start by assessing the damage, work through each stage from repair to sealing, and protect your investment with regular care. And if the job feels too big to tackle alone, reach out to a professional like SF Marble & Granite who knows terrazzo inside and out.
At SF Marble and Granite Inc., we specialize in terrazzo, granite, and marble floor installation with expert care. Contact us today to learn more about our restoration services and let us transform your floors with lasting results.
FAQs
How often should terrazzo floors be restored?
Most terrazzo floors benefit from a full restoration every 10 to 20 years, depending on traffic and maintenance. Light polishing and resealing every few years can extend the time between full restorations.
Can I restore terrazzo floors myself?
Minor cleaning and sealing can be DIY. But grinding and polishing require heavy equipment and experience. Mistakes at the grinding stage are hard to reverse. For any floor with visible damage, professional terrazzo repair is the safer choice.
What is the difference between terrazzo honing and polishing?
Honing creates a flat, matte finish using medium-grit diamond pads. Polishing uses finer grits and finishing compounds to create a reflective, glossy surface. Honing always comes before polishing in the restoration sequence.
Can terrazzo be restored if it has been covered with tile or carpet?
Yes. Many terrazzo floors were covered during renovation trends in the 1970s and 1980s. Once the covering is removed, the terrazzo beneath is often in surprisingly good shape. Adhesive residue and surface damage from the covering can usually be ground away.
Does sealing terrazzo change how it looks?
Penetrating sealers are invisible and do not change the look of the floor. Topical sealers can add a slight sheen. Your contractor can show you samples before application so you know what to expect.
How do I maintain terrazzo floors after restoration?
Sweep or dust mop daily. Mop with a pH-neutral cleaner. Avoid acidic cleaners, bleach, or ammonia. Place mats at entrances to reduce dirt and grit. Reapply sealer as recommended by your restoration contractor, typically every one to three years.