
Maintaining natural stone floors requires the right approach to avoid permanent damage. Dull stone surfaces often look old, but you can restore their original shine with safe, low-cost steps. Taking care of these premium surfaces at home keeps your living space looking beautiful without the high cost of specialized restoration teams.
We promise to show you exactly how to clean and polish marble floors safely using simple manual steps or standard machinery. This guide reviews stone preparation, stain removal, and budget-friendly polishing methods that protect your household surfaces. You’ll learn the exact steps to achieve a smooth, bright finish while keeping your home clean, organized, and physically safe for everyone in the family.
Understanding Marble Countertops and Floors
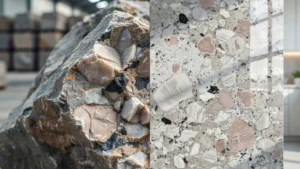
Real marble consists of calcium carbonate, a chemical compound that reacts quickly to everyday acids. This chemical vulnerability means that spilled juice, coffee, or dropped household liquids can create permanent dull marks known as acid etching. Many homes feature natural stone installations in high-traffic spaces, including entryways, bathrooms, and kitchens where daily wear happens constantly.
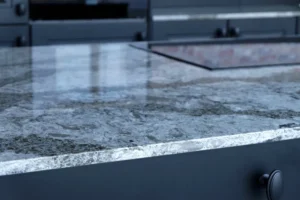
Taking care of these stone surfaces requires a clear understanding of their physical traits. True stone holds temperature well but possesses a porous surface that absorbs standing liquids like a sponge. If you have stone installations elsewhere in your home, such as black marble countertops, you face similar maintenance rules. Those dark, elegant surfaces show white etch marks and cloudy spots even faster than light-colored flooring does.
Treating marble installations with gentle care prevents expensive structural damage over time. Scrubbing too hard with stiff brushes ruins the smooth finish and creates microscopic scratches that catch dirt. We focus on low-impact methods that restore stone shine without demanding intense physical strain or heavy labor from the person doing the work.
Preparing for the Polishing Process
Proper preparation makes floor work much easier and prevents tracking dust through the house. You need to clear the entire room by moving all furniture, floor mats, and loose items out of the workspace. This creates a wide, flat area where you can move freely without tripping over obstacles or tight corners.
Gather all your safety gear and supplies before opening any cleaning solutions or turning on machinery. Place your microfiber cloths, protective gloves, and stone solutions on a stable table nearby so you can reach them without bending down repeatedly. Keeping your workspace organized prevents accidental spills and minimizes physical fatigue during the cleaning process.
Make sure the room has excellent airflow by cracking a window or turning on a ceiling fan. Natural stone maintenance isn’t a race, so plan to work in small, manageable sections rather than tackling the whole floor at once. Breaking the job into tight squares allows you to take regular breaks, keeping the process low-stress and highly controlled.
Polished vs. Honed Marble: Which Do You Have?
The primary difference between honed vs polished marble is the overall surface reflectivity and texture. Polished marble features a glossy, mirror-like finish that reflects light clearly, while honed marble has a flat, matte appearance that resists noticeable scratching. Both styles require entirely different care steps during the maintenance process.
Knowing your specific stone finish changes how you approach the restoration work. Glossy floors look bright but show every single scuff mark and liquid spot when light hits them from the side. Matte floors hide daily wear much better but lose their clean look if oil or fine dirt settles deep into the stone’s open pores.
If your home features black marble countertops in the kitchen, they likely have a highly reflective surface to highlight the deep stone color. Applying a matte, honed technique to a glossy floor by mistake creates patchy, uneven sections that look cloudy. Always check the reflection under direct light to confirm your finish type before starting any work.
How to Clean Marble Floors Before Polishing
You must remove every bit of loose dirt and embedded grime before you begin the actual polishing step. Any tiny piece of sand left on the floor acts like rough sandpaper when compressed by a cloth or machine pad. Follow these clear steps to ensure your surface is completely clean and ready.
Step 1: Dry Dusting the Surface
Run a clean, dry microfiber mop across the entire floor area using long, straight, overlapping lines. Avoid pushing down hard on the mop pole because gentle, steady pressure picks up loose grit perfectly. Inspect the corners of the room carefully where fine dust and loose pet hair tend to pile up out of sight.
Step 2: Mixing the Cleaning Solution
Fill a clean bucket with warm water and add a small amount of a dedicated pH-neutral marble cleaner. Never use generic floor soaps, dish liquids, or multi-surface sprays because they leave a sticky film behind that ruins stone clarity. A correct neutral solution feels slippery between your fingers but does not bubble up like standard soapy water.
Step 3: Damp Mopping the Floor
Dip a soft mop into the mixed solution and wring it out until it’s just slightly damp to the touch. Mop the floor in small sections, making sure water doesn’t pool or sit in the stone joints for more than a minute. We want to lift surface grease without saturating the porous stone structure underneath.
Step 4: Hand Drying the Stone
Grab a dry microfiber towel and wipe the damp sections immediately to prevent any water spots from forming. Letting marble floors air dry naturally allows mineral deposits in the tap water to leave white rings on the stone. Your floor should look completely clean, smooth, and dry before you open any polishing powders or pastes.
How to Polish Marble Floors by Hand
You can polish marble floors by hand using a specialty compound and a soft microfiber cloth to treat minor surface wear. This manual method works best for small rooms, isolated dull spots, or minor chemical etch marks. It allows you to restore stone shine safely without renting heavy, expensive, or complicated power machinery.
To polish marble floors by hand, place a teaspoon of low-abrasive polishing powder directly onto the dull spot. Add three drops of water to create a paste with the consistency of thin lotion. Take a clean chamois or microfiber cloth and buff the paste into the stone using small, tight, circular motions.
Apply light, steady downward pressure as you move the cloth over the damaged area for two minutes. Wipe away the extra paste with a damp cloth to check your progress under a bright flashlight. If the stone still looks a bit dull, repeat the process once more to build up the luster safely.
This gentle manual process is ideal for small bathroom floors or tight areas around door frames. It also works beautifully on vertical surfaces like stone backsplashes or black marble countertops that suffer from acidic splashes. Manual work takes more time, but it gives you total control over the pressure applied to your stone.
How to Polish Marble Floors with a Machine
You can polish marble floors with a machine by utilizing a variable-speed floor buffer equipped with specialized diamond polishing pads. This mechanical approach is highly effective for restoring large room areas that suffer from widespread dullness or light scratches. It delivers a perfectly even, bright shine across the stone surface with minimal physical effort.
Using a mechanical marble floor buffer requires a systematic approach to avoid spinning marks or uneven patches. Start by attaching a medium-grit diamond pad to the bottom driver of your machine to smooth out fine scratches. Run the machine at a low speed, moving it slowly from left to right across your target floor section.
Keep the stone surface wet with clean water while the machine runs to reduce heat and contain fine stone dust. Walk slowly behind the equipment, allowing the weight of the buffer to do the work rather than pushing down on the handles. After completing the first pass, switch to a finer grit pad to raise the stone’s natural reflectivity.
Finish the mechanical process by applying a fine polishing powder to create that final, classic mirror appearance. Vacuum up the wet slurry immediately with a wet-dry vacuum so the dirty water doesn’t soak back into the floor. Rinse the entire area twice with clean water and dry it with clean towels to reveal the restored shine.
Sealing the Marble
Marble is a porous stone, which means it can absorb liquids and oils, leading to stains. Sealing the marble after polishing helps to prevent staining and maintain the shine. While sealing is not mandatory, it’s highly recommended, especially for marble surfaces in high-traffic areas like kitchens.
To seal the marble, apply a marble sealer according to the manufacturer’s instructions. Ensure that the surface is clean and dry before applying the sealer. Allow the sealer to penetrate the surface for the recommended time before wiping off any excess.
Sealing Your Marble After Polishing
Polishing opens up the stone’s pores, which makes it highly vulnerable to absorbing liquids right after the job is done. You must apply a protective layer to block deep stains from oil, water, and dark colored drinks. Choosing the right product ensures your hard work stays protected for a long time.
Avoid cheap topical sealers that sit like plastic film on top of the floor because they peel off and catch dirt quickly. Look for a high-quality penetrating or impregnating sealer designed specifically for breathable natural stone floors. These products sink deep below the surface, coating the individual stone crystals without changing how the floor breathes or looks.
Pour a small amount of the sealer onto a clean applicator pad and spread it evenly across the dry floor. Let the product sit on the stone for the exact number of minutes listed on the container label. Wipe away every bit of unabsorbed liquid with a dry microfiber cloth before it hardens into a sticky residue.
Keep everyone off the treated floor for at least twenty-four hours to let the sealer cure completely. This protective chemical shield buys you valuable time to blot up accidental spills before they can cause deep permanent stains. Sealing doesn’t make marble completely bulletproof, but it provides a critical safety net for busy households.
How Often Should You Polish Marble Floors?
You should polish marble floors every twelve to eighteen months depending on the amount of daily foot traffic the area receives. High-traffic entryways or busy family kitchens might need attention once a year to maintain their appearance. Low-traffic rooms like guest bedrooms or formal dining areas often go three years between polishing sessions.
Setting up a regular marble floor maintenance routine keeps your surfaces looking good without requiring major restoration work. Checking the condition of your floor is simple: drop a tablespoon of water onto the stone surface. If the water beads up nicely, your sealer is working; if it sinks in and darkens the stone, it’s time to seal again.
Daily care reduces how often you need to perform a deep polish on your natural stone floors. Pushing a soft dust mop across the stone each morning removes small rocks that cause fine surface scratches. Using small rugs at exterior doorways catches incoming grit before it ever touches your polished stone surfaces.
FAQs
Can I use vinegar to clean my marble floors?
No, you must never use vinegar, lemon juice, or acidic cleaners on any natural stone surface. Vinegar reacts chemically with the calcium carbonate inside the marble, instantly dissolving the top layer and creating dull etch marks. Stick strictly to water and specialty pH-neutral cleaners to keep your floor safe.
Is it safe to use baking soda to remove stains?
Yes, you can use baking soda mixed with water to create a gentle poultice paste for oil stains. Apply the thick paste directly to the stain, cover it with plastic wrap, and let it sit overnight. The baking soda safely draws the embedded oil up out of the stone’s microscopic pores.
What is the best way to handle wet spills on marble?
Blot the wet spill immediately using a clean, dry paper towel or a soft microfiber cloth. Never rub or wipe the liquid in large circles because that action pushes the spill deeper into the stone. Spreading the liquid over a wider area increases the risk of creating a massive stain.
Why does my marble floor look cloudy after polishing?
Cloudiness happens when polishing paste dries on the stone surface or when you use dirty rinse water. It can also occur if you apply a high-gloss technique to an area that was originally finished as honed marble. Cleaning the area again with a fresh neutral cleaner and drying it thoroughly fixes this issue.
Can cracked marble floors be fixed with polishing?
No, standard polishing powders and diamond pads only fix light surface scratches, dull spots, and chemical etching. Deep structural cracks or broken stone tiles require specialty epoxy fillings or professional replacement to fix safely. Polishing a cracked tile without fixing it first can break the stone even further.