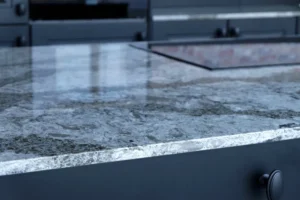
Installing new kitchen countertops transforms the entire look of your kitchen. It is one of the highest-impact upgrades you can make without touching walls or cabinets. Laminate countertops are the most DIY-friendly and can be installed in a day. Stone countertops like granite and quartz require professional fabrication and installation tools most homeowners do not own.
Understanding how to install kitchen countertops correctly means knowing your material, measuring precisely, and following the right steps in order. This guide covers every step from removing the old surface to sealing the final edges so your new countertop looks and performs perfectly.
What You Need Before Installing Kitchen Countertops
Before any tools come out, make sure you have everything ready. A missing material halfway through an install creates problems that are hard to undo.
Tools you will need
- Tape measure and pencil
- Circular saw or jigsaw (for laminate cuts)
- Belt sander or file (for edge finishing)
- Drill and drill bits
- Adjustable wrench and channel-lock pliers
- Caulk gun
- Level (48-inch minimum)
- Safety glasses and work gloves
- Utility knife
- Clamps (C-clamps or bar clamps)
Materials you will need
- New countertop material (cut to size or full sheet)
- Silicone caulk (color-matched)
- Construction adhesive or countertop adhesive
- Plumber’s putty or sink clips (for sink installation)
- Shims (for leveling)
- Screws (for securing countertop to cabinets)
- Sealer (for granite, marble, or other natural stone)
- Backerboard or plywood (if needed for support)
For laminate and tile countertops, this full list applies. For granite, quartz, or marble, the fabricator handles most cutting and edging. Your job is preparation and final installation steps.
Always confirm your material is delivered and undamaged before removing old countertops. Once the old surface is off, you need the new one ready to go.
You can read about: How Much Does It Cost to Install Countertops
Measure the Kitchen Cabinets Carefully
Bad measurements are the number one cause of installation problems. Measure twice before cutting or ordering anything.
How to measure correctly
Measure the length of each cabinet section. Start from wall to wall. Write down every measurement separately for each run of cabinets. Do not assume any two walls are perfectly parallel.
Measure the depth of the cabinet boxes. Standard base cabinets are 24 inches deep. The countertop typically overhangs the cabinet face by 1 to 1.5 inches. Your countertop depth should be 25 to 25.5 inches for standard kitchens.
Check for out-of-square corners. Hold a framing square in each corner. If the corner is not 90 degrees, you need to scribe the countertop to fit. This is common in older homes.
Account for appliance openings. Measure the exact location of your range, dishwasher, and any built-in appliances. These dimensions affect where cuts and seams go.
Add 15% to 20% to your square footage calculation for waste. Cuts, seams, and pattern matching all consume material beyond the base measurement.
Write all measurements on a sketch of your kitchen layout. Bring this sketch when ordering materials or meeting with a fabricator. A clear layout sketch prevents ordering errors that delay your project by weeks.
Remove the Old Countertops
Before installing a kitchen countertop, the old one has to come out cleanly without damaging the cabinets beneath.
Step 1: Disconnect the sink plumbing. Turn off the water supply valves under the sink. Disconnect the hot and cold supply lines. Remove the drain connections. Place a bucket under the P-trap to catch remaining water.
Step 2: Disconnect the garbage disposal. Unplug it from the outlet or turn off the circuit breaker. Twist the disposal counterclockwise off the sink mount. Set it aside.
Step 3: Remove the sink. Undermount sinks are held by clips and adhesive under the countertop. Use a utility knife to cut through the silicone caulk around the sink rim. Release the clips with a screwdriver or wrench. Push the sink up from below or pull it down depending on the mount style.
Step 4: Cut any caulk at walls and backsplash. Use a utility knife to score along the top of the backsplash where it meets the wall. Cut all silicone caulk at wall connections. This prevents tearing the drywall when the countertop is lifted.
Step 5: Locate and remove screws from inside cabinets. Open every cabinet door. Look at the top of the cabinet box interior. Countertops are often screwed down from below through corner brackets. Remove every screw you find.
Step 6: Lift the countertop off. Countertops may be stuck to the cabinet with adhesive. Tap a pry bar gently between the countertop and cabinet. Work along the length to break the adhesive bond gradually. Lift in sections if the countertop is long or awkward.
Protect your cabinet boxes during removal. A damaged cabinet frame adds unexpected repair cost to your project.
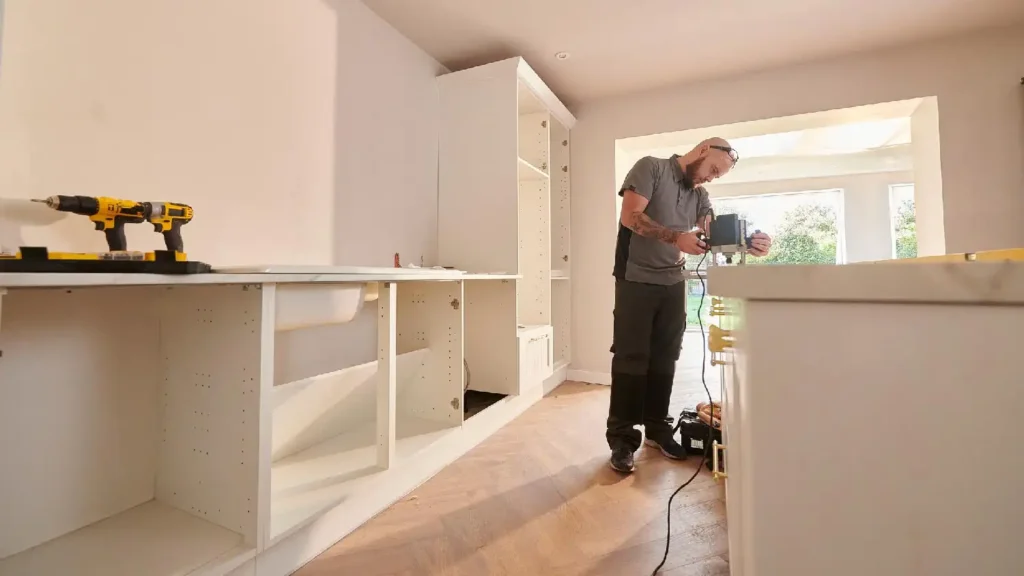
Prepare the Cabinets for Installation
Clean cabinet surfaces are essential for a solid, level install.
Remove all old caulk, silicone, and adhesive from the tops of the cabinet boxes using a utility knife and adhesive remover. Surfaces must be clean and dry before anything new goes on top.
Check that every cabinet is level. Use your 48-inch level across the tops of all cabinet boxes in every direction. High spots cause the countertop to rock. Low spots create gaps.
If cabinets are not level, add shims between the cabinet top and the countertop during installation. For larger level differences, adding a layer of plywood to the cabinet tops and shimming the plywood is more reliable than shimming the countertop itself.
Check that all cabinet boxes are secured firmly to the wall and to each other. A countertop is only as stable as the cabinets supporting it. Tighten any loose screws and refasten any cabinet that has pulled away from the wall.
This preparation step seems minor but directly affects how well your countertop performs and how long it lasts without cracking or shifting.
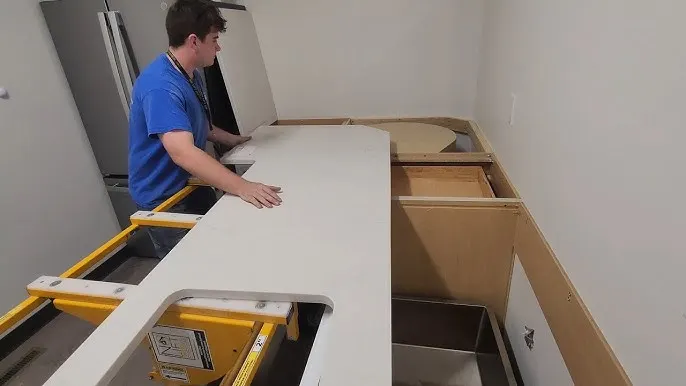
Dry Fit the Countertop
Never apply adhesive before confirming the countertop fits correctly. A dry fit reveals every problem before anything is permanent.
Carry the countertop into position with at least one helper. Stone countertops are extremely heavy. Granite and quartz slabs weigh 18 to 25 pounds per square foot. A single kitchen slab can weigh 300 pounds or more. Never attempt to lift a stone slab alone.
Set the countertop on the cabinets without adhesive. Check the fit at every wall. Gaps larger than 1/4 inch will be visible even under a backsplash. For laminate, gaps can be scribed and trimmed. For stone, the fabricator needs to recut.
Check for level across the full countertop surface. Use your level in multiple directions. Rock the countertop gently to feel for any wobble. Identify which corners or areas need shimming.
Check the overhang at the cabinet front. It should be consistent at 1 to 1.5 inches along the full length. Inconsistent overhang looks unprofessional and is obvious once the countertop is in place.
Mark any areas that need adjustment with a pencil. Make corrections before the final install. For laminate, this means trimming with a circular saw. For stone, go back to the fabricator. Do not try to cut stone slabs yourself without diamond blade equipment.
Cut Openings for Sink and Cooktop
Sink and cooktop cutouts must be done before the countertop is permanently installed. Cutting after installation is possible but far more difficult.
For laminate countertops
Mark the sink cutout using the sink template provided by the manufacturer. Most sinks come with a paper or cardboard template. Tape it in position according to your measurements. Trace the cut line.
Drill a starter hole inside the cut line using a large drill bit. Insert a jigsaw blade into the starter hole. Cut along the marked line, going slowly at corners to avoid cracking the laminate surface. Support the cutout piece from below as you finish the cut so it does not fall and chip the laminate edge.
For granite, quartz, and marble
These cuts require diamond blade wet saws. This is not a DIY task for most homeowners. The fabricator makes all cutouts at their shop as part of the fabrication process. When you approve the template, you mark the exact location of all cutouts. The fabricator handles the rest.
If a cooktop is being installed, verify the cutout dimensions against the cooktop specs. Every cooktop has specific cutout dimensions in the installation manual. A cutout that is even 1/4 inch off in either direction causes fitting problems.
Apply Adhesive and Install the Countertop
With the dry fit confirmed and all cutouts made, you are ready for permanent installation.
For laminate countertops
Apply a bead of construction adhesive along the top edges of all cabinet boxes where the countertop will contact them. Do not apply adhesive to the full surface. Concentrated beads at the cabinet box edges hold the countertop firmly without trapping moisture underneath.
Lower the countertop carefully into its final position. Press down firmly along all contact points. Check the level again immediately after setting. Add shims where needed before the adhesive starts to grab.
From inside the cabinets, drive screws up through the corner brackets into the underside of the countertop. Use screws that are the right length. Going too deep punches through the countertop surface from below. Measure the countertop thickness before choosing screw length.
For mitered corners where two sections meet, apply adhesive to both mating surfaces. Use countertop connector bolts (draw bolts) to pull the joint tight from below. Tighten them evenly and alternately to close the seam without gaps or misalignment.
For stone countertops (granite, quartz, marble)
The installation team handles adhesive application and placement. Your role is to confirm the position before the adhesive sets. Check overhang consistency, level, and seam alignment before they apply final silicone and secure the slab.
Silicone adhesive is used between the countertop and cabinet for stone. It creates a flexible bond that handles minor movement without cracking the stone. Construction adhesive is too rigid for heavy stone and can cause cracking under stress.
Seal Countertop Seams
Seams are where two sections of countertop meet. Every seam needs proper sealing to prevent water infiltration and visual gaps.
For laminate seams
Apply color-matched caulk to the seam. Tool it smooth with a wet finger. Wipe away excess immediately. Laminate caulk is flexible and prevents water from reaching the particleboard core underneath, which swells when wet.
For stone seams
Stone fabricators seal seams with color-matched two-part epoxy. This is mixed and applied at the time of installation. The epoxy is forced into the seam and then planed flat and polished to match the surrounding surface. A good stone seam is nearly invisible when done correctly.
Check every seam from multiple angles after installation. If you see a gap or height difference at a stone seam, tell the fabricator before they leave. Seam issues are much easier to address immediately than after the adhesive has cured.
Caulk at walls
Apply a continuous bead of silicone caulk where the countertop meets the wall and backsplash on all sides. Tool it smooth. This seal keeps water from running behind the countertop and into the wall cavity or cabinet below.
Use paintable caulk if you are painting the wall later. Use silicone caulk where water exposure is high, particularly around the sink area. Silicone holds up to moisture far better than latex caulk.
Install the Sink and Plumbing
With the countertop secured and seams sealed, the sink goes back in.
For undermount sinks
Apply a bead of silicone around the underside of the sink rim. Position the sink in the cutout from below. Apply the mounting clips evenly around the perimeter and tighten them to hold the sink against the underside of the countertop. Do not overtighten. The goal is firm contact, not cracking the countertop.
Let the silicone cure for the time specified on the product. Usually 24 hours. Do not run water through the sink during this time.
For drop-in sinks
Apply plumber’s putty or silicone to the sink rim. Lower the sink into the cutout from above. Connect the mounting clips from below. Wipe away any putty or silicone squeeze-out immediately.
Reconnect plumbing
Reconnect the supply lines to the shutoff valves. Hand-tighten first, then give a quarter turn with a wrench. Do not overtighten brass fittings. Reconnect the drain assembly and P-trap. Turn the water supply back on slowly. Check every connection for drips. Run the faucet and check again under the sink.
Reinstall the garbage disposal by twisting it onto the sink mount and reconnecting the power and drain.
Add the Backsplash
The backsplash goes on after the countertop is fully installed and cured. It covers the gap between the countertop and the wall and protects the wall from splashes.
For a tile backsplash
Apply tile adhesive to the wall with a notched trowel. Set tiles according to your layout plan. Use tile spacers for consistent grout lines. Let adhesive cure according to the product instructions before grouting. Apply grout, press it into all joints, wipe the surface clean with a damp sponge, and let it cure. Seal the grout when fully dry.
For a quartz or stone slab backsplash
The fabricator cuts the slab backsplash sections at the same time as the countertop. Installation involves applying silicone to the wall and pressing the backsplash sections into place. Secure with temporary support until the silicone cures. Grout the joint between the countertop and backsplash with color-matched caulk, not tile grout. Caulk is flexible. Grout is rigid and will crack at this joint under normal movement.
Seal Natural Stone Countertops
This step applies to granite, marble, quartzite, and any other natural stone. Quartz does not need sealing.
Natural stone is porous. Without sealing, liquids penetrate the surface and cause staining. Seal before first use and reseal annually for kitchen countertops.
Apply the sealer according to the product instructions. Most penetrating sealers are applied with a clean cloth, spread evenly across the surface, allowed to absorb for 10 to 20 minutes, and then wiped off before they dry. Apply a second coat for very porous stone.
Let the sealer cure for the full time listed on the product before using the countertop. Most sealers require 24 to 72 hours to fully cure.
Popular stone sealers that professionals use include Miracle Sealants 511, Aqua Mix Sealer’s Choice Gold, and StoneTech BulletProof. All are available at hardware stores and stone supply shops.
Run the water test to confirm the sealer worked. Pour a few tablespoons of water on the surface and wait 15 minutes. Water that beads up means the sealer is working. Water that soaks in means the sealer needs another coat.
Common Kitchen Countertop Installation Mistakes
These are the errors that cause the most problems and add the most cost to kitchen countertop installation projects.
Measuring incorrectly. Off measurements mean material that does not fit. For stone, a remeasure and recut adds days or weeks to the project and may cost extra. Measure multiple times and have a second person verify your numbers.
Not checking cabinet level before installation. Installing a countertop on unlevel cabinets means the countertop is unlevel. It rocks, cracks at stress points, and looks off. Check level during cabinet prep, not after the countertop is down.
Skipping the dry fit. Never apply adhesive before confirming the fit. Problems found during a dry fit take 30 minutes to fix. The same problems found after adhesive is applied take hours and may require professional help.
Overtightening sink clips on stone. Stone countertops crack under point pressure. Tighten sink clips evenly and only until they are firm. Uneven or excessive tightening creates stress cracks around the sink cutout.
Using the wrong caulk. Latex caulk is not appropriate for high-moisture areas around sinks. It breaks down quickly and allows water infiltration. Use 100% silicone caulk at all wet locations.
Cutting into stone without the right tools. Attempting to cut granite or quartz with a standard circular saw blade damages the stone and creates dangerous shards. Always use diamond blade equipment for stone, or let the fabricator handle all cuts.
Not supporting stone during transport. Granite and quartz slabs crack if flexed during transport or installation. Always carry stone slabs vertically, never flat. Support the full length of the slab at all times during handling.
Can You Install Kitchen Countertops Yourself?
The honest answer depends entirely on the material.
Laminate countertops: Yes. Laminate is the most DIY-friendly countertop material. Pre-formed laminate countertops are available at home improvement stores in standard lengths. You cut to size with a circular saw, fit the sections, and secure from below. A motivated DIYer with basic tools can complete a laminate install in one day.
Tile countertops: Yes with patience. Tile installation requires proper substrate preparation, consistent trowel technique, and precise grout application. It is manageable for a careful DIYer willing to watch tutorials and work slowly.
Butcher block: Yes. Butcher block installs similarly to laminate. It cuts with standard woodworking saws, screws down from below, and needs only basic tools. Finishing with food-safe oil is a simple extra step.
Quartz, granite, marble: Generally no for most homeowners. Slabs weigh hundreds of pounds. Cutting requires diamond blade wet saws. Seam work requires experience and specific tools. Mistakes cost thousands in damaged material. Most stone fabricators include installation in their price. That included installation reflects the real skill involved.
Knowing how to install a kitchen countertop yourself is valuable for laminate and tile. For stone, the best DIY move is thorough preparation, good measurement, and hiring a professional for the actual installation.
Best Countertop Materials for Kitchens
Choosing the right material affects installation difficulty, maintenance requirements, and long-term performance.
Laminate: $15 to $40 per square foot installed. Easiest to DIY. Good durability for the price. Cannot be repaired if burned or deeply scratched. Best for budget-conscious kitchens.
Tile: $10 to $30 per square foot installed. Very durable surface tiles. Grout lines collect bacteria and require regular cleaning and sealing. Best for kitchens where budget and a custom look matter.
Butcher block: $35 to $70 per square foot installed. Warm and natural looking. Needs regular oiling. Vulnerable to water damage near the sink. Best for areas away from the sink or for small sections like an island.
Quartz: $55 to $150 per square foot installed. Non-porous, no sealing required, consistent appearance. Cannot handle sustained high heat. Best for busy family kitchens that need low maintenance.
Granite: $40 to $100 per square foot installed. Natural stone, heat resistant, unique appearance. Needs annual sealing. Best for homeowners who want natural material and are willing to maintain it.
Marble: $60 to $200 per square foot installed. The most beautiful natural stone. Prone to etching from acids and staining without sealing. Best for low-use areas or homeowners committed to careful maintenance.
Quartzite: $60 to $120 per square foot installed. Harder and more acid-resistant than marble with a similar look. Still needs sealing. Best for those who want the marble look with better durability.
Why Homeowners Choose Professional Countertop Installation
Most homeowners who research how to install kitchen countertops discover quickly that stone countertops are a different category from laminate or tile. Here is why professional installation makes sense for stone.
Fabrication requires specialized equipment. Diamond blade wet saws, edge profiling machines, and polishing equipment are not standard homeowner tools. Professional fabricators have all of this and use it every day. Their cuts are precise. Their edges are clean and polished. DIY stone cuts with inadequate tools crack slabs and create rough, unfinished edges.
Stone is heavy and brittle. Moving a 200-pound slab without experience and proper equipment is dangerous. Stone slabs crack if flexed during transport. Professionals carry stone vertically on padded carts and never flex the slab during handling.
Seam work requires experience. A good stone seam is nearly invisible. Achieving that requires experience with epoxy mixing, application technique, and polishing. A bad seam is visible every time you look at the counter.
Template accuracy matters. Professional fabricators use digital templating tools that capture every wall angle and dimension precisely. This eliminates the fitting problems that come from manual measurement errors.
Warranty protection. Most stone fabricators warranty their workmanship. DIY installation has no such protection. If something goes wrong during a DIY stone install, the cost is entirely yours.
For Countertop Installation in Lowell, MA, the team at SF Marble & Granite provides complete fabrication and installation services for granite, quartz, marble, and quartzite. Our team handles everything from template to final seal. We use precision digital templating, professional diamond blade fabrication, and experienced installation crews who treat every project like it matters. SF Marble & Granite has installed hundreds of kitchen countertops across the Lowell area and backs every job with a workmanship guarantee. Contact us today for a free estimate on your kitchen countertop project.
Final Thoughts
How to install kitchen countertops successfully comes down to preparation, the right tools, and knowing your material. Laminate and tile are realistic DIY projects. Stone requires professional fabrication and installation for most homeowners.
Measure carefully, prepare your cabinets properly, confirm every fit before applying adhesive, and follow material-specific sealing requirements. Done correctly, a kitchen countertop installation transforms your kitchen and adds lasting value to your home.
For natural stone projects in the Lowell area, SF Marble & Granite is ready to handle every step from slab selection to final installation.
Frequently Asked Questions
How to install kitchen countertops on uneven cabinets?
Use shims between the cabinet top and the countertop to fill low spots. For significant level differences, add a layer of plywood to the cabinet tops and shim the plywood. Never try to bend or force a stone slab to compensate for unlevel cabinets. Stone cracks under that kind of stress.
How long does kitchen countertop installation take?
Laminate installation takes 4 to 8 hours for a standard kitchen. Stone fabrication takes 3 to 7 business days after the template. Stone installation day takes 2 to 5 hours. Full project timelines for stone run 1 to 2 weeks from template to installed countertop.
Can I install a kitchen countertop by myself without experience?
For laminate, yes. For tile, yes with patience. For stone, no. Granite and quartz slabs require specialized cutting equipment and safe handling techniques that most homeowners do not have. Attempting to install stone without experience risks cracking expensive slabs and personal injury.
How do I make a kitchen counter more level after installation?
If the countertop is installed and slightly off level, thin shims can sometimes be inserted from the cabinet interior to adjust. For stone that is off level after installation, the fabricator needs to assess whether correction is possible without removing the slab.
What is the best adhesive for installing a kitchen countertop?
For laminate and butcher block, construction adhesive works well. For stone, use 100% silicone adhesive between the slab and cabinets. Silicone is flexible and handles minor movement without cracking the stone. Never use rigid construction adhesive under heavy stone slabs.
How do I install a kitchen countertop around a corner?
Corner sections need a mitered joint where two pieces meet at a 45-degree angle. For laminate, cut both pieces at 45 degrees and join with draw bolts and adhesive. For stone, the fabricator cuts and polishes both miter faces and joins them during installation with color-matched epoxy.
How much does professional kitchen countertop installation cost?
Labor for countertop installation runs $35 to $85 per square foot for stone depending on complexity. For a 40 square foot kitchen, expect $1,400 to $3,400 in installation labor on top of material cost. Laminate installation runs $15 to $30 per square foot in labor.how to install kitchen countertops