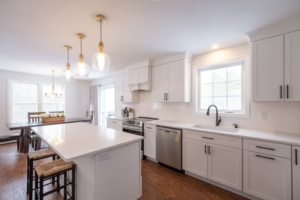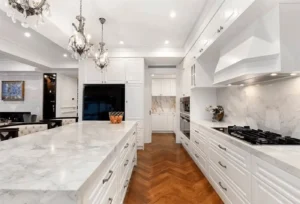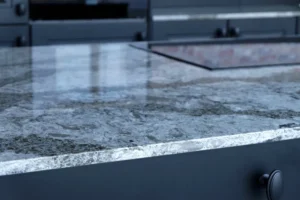

Choosing two flooring materials can feel simple until the tile ends and the wood begins. The seam between them can either look carefully planned or like two floors simply collided. The right Kitchen Tile to Wood Floor Transition Ideas help you create a clean boundary while dealing with height, movement, moisture, and everyday foot traffic.
The best approach starts with the floor itself, not the trim piece. Measure the finished heights, decide where the transition should run, and choose a profile that fits the gap. A flush seam can create a clean modern look, while a reducer, threshold, wood border, or metal profile can solve a height difference without creating an awkward step.
Why Kitchen Flooring Transitions Need Special Planning
A kitchen flooring transition needs planning because tile and wood expand, contract, and sit at different heights. Skip the planning, and you get uneven seams, trip hazards, or cracked grout within a year. Get it right, and the floor reads as one connected space, even though it’s two different materials.
Kitchens see more moisture, more foot traffic, and more temperature swings than any other room. Wood flooring expands in humidity and contracts in dry winter air. Tile doesn’t move the same way. That mismatch is exactly why a kitchen tile-to-wood floor transition needs its own plan, not a generic flooring solution borrowed from a hallway.
Most homeowners don’t think about this until the transition strip starts lifting or the tile edge chips. Planning ahead means choosing the right threshold material, matching subfloor heights, and accounting for expansion gaps before installation starts, not after.
Where Tile and Wood Floors Meet in Kitchen Layouts
Transitions usually sit right along high-footprint zones:
-
Open-Concept Thresholds: Where the kitchen prep area flows into a dining or family room.
-
Pantry and Utility Entrances: Small transitional doorways between storage and cooking zones.
-
Island Boundaries: Perimeter floors where stone or tile wraps around wet zones while timber covers open seating.
Planning these seams keeps your footpaths hazard-free and grounds your living space.
High-Function Areas vs Comfort Zones
Think of your kitchen in two zones. The high-function zone includes the sink, stove, and prep counters, where spills and heat happen daily. The comfort zone is where you eat, sit, or walk through toward the living room.
Tile belongs in the high-function zone. It resists water, heat, and scratches better than wood ever will. Wood belongs in the comfort zone, where it adds warmth underfoot and visually softens the space. This is the logic behind nearly every successful kitchen tile to hardwood transition we’ve installed.
You can read about: Kitchen Countertops Ideas
Why Tile and Wood Are Commonly Paired
Combining materials gives you the best features of both surfaces:
-
Targeted Durability: Waterproof tile shields sinks and stoves, while timber softens adjacent hallways.
-
Visual Zoning: Distinct materials define cooking and dining spaces without building physical walls.
-
Cost Efficiency: Using premium hardwood in lower-risk areas cuts overall renovation expenses while keeping wet zones functional.
When pairing natural wood with adjoining kitchen finishes, incorporating light elements like White Quartzite Countertops keeps the overall palette bright and cohesive across both zones.
How Do I Tile a Transitional Floor? (Step-by-Step Guide)

How do you tile a transitional floor correctly? To tile a transitional floor, calculate height variances, leave an expansion gap, install your underlayment, set tiles up to the seam, and secure a reducer or flush transition strip. This process maintains structural stability and eliminates trip hazards across room borders.
Design Tips to Improve Kitchen Floor Transitions
A good transition does its job without being noticed. A great transition actually makes the kitchen look better.
1. Match the grout to the wood tone
If your wood floor is warm-toned (oak, maple, pine), use a warm-toned grout. If it’s cool-toned (ash, grey-washed wood), use a grey grout. Matching tones ties the two materials together visually.
2. Run floors in the same direction
If possible, run both the tile and wood planks in the same direction toward the longest wall or away from the main entrance. This makes the transition feel natural rather than jarring.
3. Use a thin metal strip for a modern look
Schluter RENO-T or similar metal transition strips give a very clean, contemporary edge. They come in brushed nickel, matte black, brass, and chrome. They’re narrow, low-profile, and durable.
4. Align the transition with architecture
Put the transition line under a doorway, at the edge of an island, or at a structural beam line. Transitions that line up with something architectural feel planned. Ones that appear in the middle of open space feel random.
5. Keep the height difference small
Try to keep the height difference between the two floors under 3/8 inch. Larger differences require bulkier reducer strips that draw the eye and create a bigger trip hazard.
6. Use large-format tile near the transition
Large-format tile (12×24 or larger) reduces the number of grout lines near the transition point. This makes the handoff from tile to wood look cleaner.
Top 10 Kitchen Tile to Wood Floor Transition Ideas
- Straight threshold strip. A simple metal or wood bar bridges the height gap. Fast to install, works in almost any layout.
- Mitered wood-to-tile edge. The wood is cut at an angle to meet the tile directly, no visible strip. Clean look, but needs a skilled installer.
- Curved schluter transition. A rounded metal profile smooths the height change and protects both edges from chipping.
- T-molding for equal heights. Works when tile and wood sit at nearly the same level, common with engineered wood.
- Herringbone wood meeting large-format tile. The busier wood pattern contrasts cleanly against a simple tile field.
- Wide stone threshold using White Quartzite Countertops offcuts. Homeowners with leftover White Quartzite Countertops material often repurpose it as a striking, durable transition slab.
- Diagonal tile-to-wood seam. Instead of a straight line, the seam angles across the floor, often used at kitchen islands.
- Reducer strip for uneven subfloors. Ideal for older homes where the tile sits noticeably higher than the wood.
- Color-matched grout to wood tone. Choosing grout that echoes the wood’s undertone softens the visual break between materials.
- No-strip flush transition. Achieved through precise leveling so tile and wood meet with zero visible seam. The most labor-intensive option, but the cleanest result.
What Transition Strip Material Should I Use?
The material of your strip matters as much as the type.
| Strip Material | Best For | Durability |
| Aluminum | Modern kitchens, high traffic | Excellent |
| Brass / Bronze | Traditional, high-end kitchens | Excellent |
| Solid wood | Matching hardwood floors | Good |
| PVC / Vinyl | Budget installs, DIY | Moderate |
| Marble / Stone | Doorways, luxury installs | Excellent |
Avoid cheap hollow plastic strips. They crack under chair legs and look dated quickly.
Common Mistakes to Avoid
A few simple mistakes can disrupt an otherwise great installation:
-
Forgetting the Expansion Gap: Butt-joining wood against tile causes planks to warp as humidity changes.
-
Ignoring Height Differences: Abrupt vertical drops create tripping hazards for family members and guests.
-
Over-Grouting Seams: Hard grout in expansion joints cracks over time; use flexible, color-matched silicone instead.
-
Clashing Tones: Choosing cool grey tile next to warm, yellow-stained oak makes the space feel mismatched.
Benefits of Thoughtful Kitchen Floor Transitions
Taking the time to install proper transitions delivers long-term benefits:
-
Protects Flooring Investment: Prevents chipped tile edges and warped wood planks along borders.
-
Improves Home Safety: Creates smooth pathways that keep family members safe from stumbles.
-
Elevates Interior Style: Transforms functional seams into intentional design features.
Wood to Tile Transition Kitchen Maintenance Tips
Once your transition is installed, keep it in good shape with these habits:
- Reseal caulk lines once a year in kitchens near the sink. Heat, moisture, and cleaning products break down silicone over time.
- Check for wobble or squeak every few months. If the strip moves, the screw or adhesive has loosened. Fix it early before it pulls free entirely.
- Clean the strip with a soft cloth. Avoid abrasive cleaners on metal strips — they’ll scratch the finish. For wood strips, use the same cleaner you use on your hardwood floor.
- Watch for gaps opening up in winter. Forced-air heating dries wood out, causing it to contract. A gap appearing near the strip is normal but should be sealed if it grows past 1/8 inch.
Final Thoughts
A good kitchen floor transition isn’t just about looks. It’s about protecting two different materials, keeping moisture out, and making a kitchen that works as well as it looks.
The best Kitchen Tile to Wood Floor Transition Ideas are the ones that match how you actually use your kitchen. If you cook a lot, tile near the stove with a clean metal edge strip leading to wood makes sense. If your kitchen is mostly a social space, a decorative threshold bar or stone transition piece adds elegance.
Whatever direction you go, plan before you install. Get the heights right. Choose the strip material carefully. Seal the edges. And if you’re dealing with natural stone whether it’s the tile on your kitchen floor, your backsplash, or a decorative threshold — work with people who actually know the material.
At SF Marble & Granite, we work with homeowners and contractors on stone flooring, transitions, and custom tile installations every day. If you’re in the Massachusetts area and want expert hands on your project, explore our Marble Floor Installation in Lowell, MA service page to see how we can help you get the transition right from the start.
FAQs
What is the best transition between tile and wood floors in a kitchen?
A Schluter metal edge strip or a solid wood reducer are the top two choices for most kitchens. Metal strips look cleaner in modern kitchens. Wood reducers blend better in traditional or rustic spaces. The “best” option depends on the height difference between your two floors and the visual style you’re going for.
Can tile and wood floors meet without a transition strip?
Yes but only when both floors are installed at exactly the same height and you leave a small expansion gap filled with color-matched caulk. This is called a butt joint. It looks clean but requires precise planning before installation begins.
How do I handle kitchen tile next to hardwood when there’s a height difference?
Use a reducer strip. This is a tapered piece that ramps from the higher floor down to the lower one. Reducers come in metal, wood, and vinyl. Choose based on the height difference and the visual style of your kitchen.
What is the standard width for a floor transition strip?
Most standard transition strips are 1.75 to 2.5 inches wide. Wider strips (up to 4 inches) are available for larger height differences or for decorative purposes.
How do you do a kitchen tile to tile floor transition between two rooms?
Use a thin metal or stone threshold bar between the two tile zones. Alternatively, use a contrasting row of accent tile as a visual divider. Grout both sides with matching or complementary grout to tie the two areas together.
How long does it take to install a floor transition strip?
For a single doorway or transition point, a DIY install takes 30 to 60 minutes. Professional installation takes less. Multi-zone transitions in open-plan kitchens may take a half day.
Do I need to leave an expansion gap between tile and wood?
Yes. Always leave at least 1/4 inch between the edge of the wood floor and the tile or the transition strip. This space allows the wood to expand in humid conditions without buckling or pressing against the tile.