Installing marble floor tile in a bathroom involves preparing the subfloor, planning your layout, applying mortar, setting the tiles, grouting, and sealing the surface. This process transforms your bathroom into an elegant space while adding value to your home12. At SF Marble & Granite Inc., we’ve helped countless homeowners in Lowell, MA, achieve stunning bathroom renovations with our expert marble floor installation services.
Why Choose Marble Flooring for Your Bathroom?
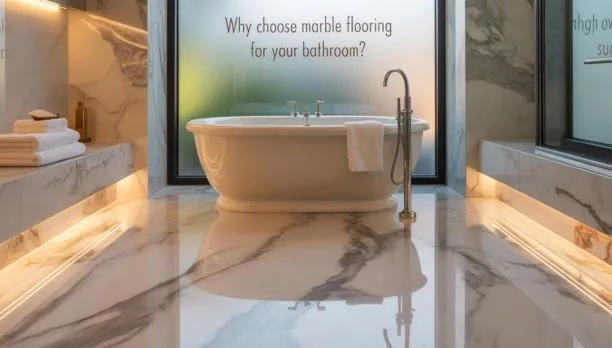
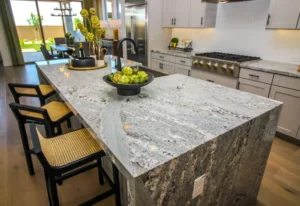
Marble flooring brings timeless elegance and luxury to any bathroom space. The natural veining and unique patterns make each installation one-of-a-kind, instantly elevating your bathroom’s appearance. A bathroom with marble tiles not only looks beautiful but also increases your property value.
Table of Contents
ToggleBenefits of marble bathroom flooring include:
- Natural cooling properties (perfect for bare feet on hot days)
- Unique patterns and veining that create visual interest
- Durability when properly maintained
- Compatibility with underfloor heating systems
- Increased home value
While marble requires some special care, the stunning results make it worth the effort. Let’s explore how to properly install marble floor tile in your bathroom.
Materials and Tools You'll Need
Before starting your marble floor installation project, gather all necessary supplies:
Essential Materials:
- Marble floor tiles
- Thin-set mortar (specifically for marble)
- Grout (unsanded for marble)
- Tile spacers
- Marble sealer
- Cement backer board (if needed)
Required Tools:
- Measuring tape
- Chalk line
- Notched trowel
- Rubber mallet
- Wet saw or tile cutter
- Level
- Grout float
- Sponges
- Buckets
- Safety gear (gloves, goggles, knee pads)
Having everything ready before you begin will make the installation process much smoother. For professional results, consider renting a quality wet saw, as this will give you the cleanest cuts on your valuable marble tiles.
Step-by-Step Installation Process
1. Prepare the Bathroom Subfloor
The foundation of a successful marble floor installation starts with proper subfloor preparation:
- Remove any existing flooring completely
- Clean the subfloor thoroughly, removing all dust and debris
- Check for levelness using a long level
- Fill any low spots with leveling compound
- Install cement backer board if needed for stability
- Ensure the surface is completely dry before proceeding
Remember, any imperfections in your subfloor will eventually show through your marble tiles, so take your time with this crucial step when selecting high-quality marble slabs near me.
2. Plan Your Marble Floor Pattern
Before applying any mortar, plan your marble floor pattern carefully:
- Measure your bathroom dimensions accurately
- Find the center point of the room by snapping chalk lines
- Dry-lay tiles from the center outward to check your pattern
- Consider different layout options like straight, diagonal, or herringbone
- Account for cuts needed around fixtures and edges
- Use tile spacers to visualize grout lines
Popular marble floor patterns include:
- Classic grid (straight layout)
- Diagonal (45-degree angle)
- Herringbone
- Basketweave
- Versailles pattern
Taking time to plan your layout helps avoid awkward cuts and creates a more balanced, professional look.
3. Mix and Apply Thin-Set Mortar
With your subfloor prepared and pattern planned, it’s time to begin installing marble floor tile12:
- Mix thin-set mortar according to the manufacturer’s instructions
- Work in small sections (about 2-3 tiles at a time)
- Apply mortar using the flat side of the trowel first
- Create ridges with the notched side of the trowel
- Keep the trowel at a 45-degree angle for proper coverage
- Ensure consistent mortar thickness
For marble tiles, it’s crucial to use the right type of mortar. Standard thin-set works for most installations, but check your tile manufacturer’s recommendations.
4. Set the Marble Tiles
Now comes the exciting part: setting your beautiful marble tiles.
- Start at the center point where your chalk lines intersect
- Place the first tile firmly into the mortar
- Twist slightly to ensure good adhesion
- Tap gently with a rubber mallet to set the tile level
- Place tile spacers at each corner
- Continue setting tiles, working outward from the center
- Check frequently with a level to ensure evenness
- Cut edge tiles as needed using a wet saw
When installing marble floor tile in a bathroom, work methodically and avoid stepping on freshly laid tiles. Plan your installation path so you don’t trap yourself in a corner.
5. Allow Proper Drying Time
Patience is essential when installing marble bathroom flooring:
- Allow the mortar to cure for 24-48 hours
- Avoid walking on the new tiles during this time
- Keep the bathroom door closed to prevent drafts
- Maintain a consistent room temperature for optimal curing
This waiting period is crucial for a successful installation, as it allows the mortar to properly bond with your marble tiles.
6. Apply Grout
After the mortar has cured, it’s time to grout your marble bathroom floor:
- Remove tile spacers
- Mix grout according to package instructions
- Use unsanded grout for marble to prevent scratching
- Apply grout with a rubber float at a 45-degree angle
- Work the grout into all joints completely
- Remove excess grout from tile surfaces
- Allow grout to set for 15-20 minutes
- Clean tile surfaces with a damp sponge
- Rinse sponge frequently and wring well
Proper grouting creates clean, defined lines between your marble tiles and completes the professional look of your bathroom floor.
7. Seal Your Marble Floor
The final and crucial step in installing marble floor tile is sealing:
- Ensure the floor is completely clean and dry
- Apply marble sealer according to product instructions
- Use a high-quality penetrating sealer designed for marble
- Apply in small sections with a clean cloth or applicator
- Allow proper drying time between coats
- Apply 2-3 coats for maximum protection
Sealing is essential for marble bathroom floors as it protects the porous stone from stains, moisture, and damage. Plan to reseal your marble floor annually to maintain its beauty and durability.
Marble Bathroom Floor Ideas
Looking for inspiration for your marble bathroom floor? Consider these popular design options:
Classic White Marble
White Carrara or Calacatta marble with subtle gray veining creates a timeless, elegant bathroom that brightens the space.
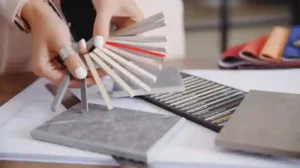
Contrasting Colors
Combine two different marble colors in the same pattern for visual interest. Try pairing light and dark marbles for a dramatic effect.
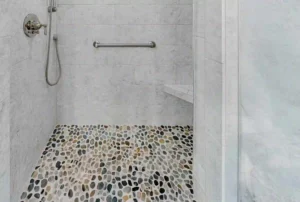
Geometric Patterns
Hexagonal, octagonal, or basketweave patterns add texture and visual interest to your bathroom floor.
Marble Mosaics
Small marble mosaic tiles allow for intricate patterns and can add a touch of luxury to your bathroom.
Mixed Materials
Combine marble with other materials like wood or metal accents for a contemporary look.
When selecting your marble bathroom floor design, consider the size of your space, existing décor, and your personal style preferences.
Maintenance Tips for Marble Bathroom Floors
To keep your newly installed marble bathroom floor looking beautiful for years to come:
- Clean spills immediately to prevent staining
- Use pH-neutral cleaners specifically designed for marble
- Avoid acidic cleaners like vinegar or citrus-based products
- Dust mop regularly to remove abrasive particles
- Use soft cloths or mops for cleaning
- Apply a fresh coat of sealer annually
- Place bath mats near showers and tubs to reduce water exposure
- Consider using furniture pads under any bathroom furniture
With proper care, your marble bathroom floor will maintain its beauty and elegance for decades.
Common Mistakes to Avoid
When installing marble floor tile in a bathroom, watch out for these common pitfalls:
- Ignoring slip resistance (choose honed rather than polished finish for better grip)
- Skipping proper subfloor preparation
- Using the wrong type of mortar or grout
- Failing to seal the marble properly
- Not ordering enough tiles (always order 10-15% extra)
- Rushing the installation process
- Using improper cleaning products after installation
Taking your time and following proper procedures will help ensure a successful marble bathroom floor installation.
Professional Installation vs. DIY
While installing marble floor tile can be a DIY project, consider these factors when deciding whether to hire professionals like SF Marble & Granite Inc:
DIY Pros:
- Cost savings on labor
- Personal satisfaction
- Complete control over the project
Professional Installation Pros:
- Expertise and experience with marble
- Access to specialized tools
- Faster completion time
- Warranty on workmanship
- Perfect cuts and finishing
- Knowledge of proper sealing techniques
For many homeowners, the investment in professional installation ensures the best results for such a significant home improvement project
Transform Your Space with Expert Marble Floor Installation
Ready to elevate your home with the timeless beauty of marble? At SF Marble & Granite Inc., we specialize in professional marble floor installation that brings elegance, durability, and lasting value to your bathroom or any room in your home. Our experienced team handles every step, from careful preparation to precise tile placement and finishing, ensuring your marble floors look stunning and stand the test of time. Let us take the stress out of your project—choose SF Marble & Granite Inc. for flawless results and enjoy the luxury of a beautifully installed marble floor that you’ll love for years to come.
Conclusion
Installing marble floor tile in a bathroom transforms an ordinary space into a luxurious retreat while adding significant value to your home. By following the proper steps from careful preparation and planning to precise installation and sealing, you can achieve professional-quality results.
Remember that marble requires special care both during installation and maintenance, but the timeless beauty and durability make it worth the effort. Whether you choose to tackle this project yourself or hire professionals like SF Marble & Granite Inc., your marble bathroom floor will provide years of enjoyment and elegance.
FAQs
How much does it cost to install marble floor tile in a bathroom?
The cost typically ranges from $900 to $2,100 for an average bathroom, depending on the type of marble, size of the space, and whether you hire professionals. Premium marble installation can cost up to $24 per square foot, including materials and labor.
How long does marble floor installation take?
For an average bathroom, professional installation usually takes 2-3 days, including drying time. DIY installation might take longer, especially for first-timers.
Is marble flooring slippery in bathrooms?
Polished marble can be slippery when wet. For bathrooms, consider honed (matte) marble for better slip resistance, or use bath mats in wet areas.