How to install an undermount sink on granite is a question many homeowners ask when upgrading their kitchens for a sleek and modern look. Undermount sinks have become a popular choice because they create a seamless finish, make cleaning easier, and add a touch of elegance to granite countertops. At SF Marble and Granite Inc., we know that the success of this installation depends on precision and the right techniques. Properly securing the sink to granite ensures long-lasting durability, prevents water damage, and enhances both functionality and style. Whether you’re considering a DIY project or thinking about hiring a professional, understanding the process will help you achieve a safe, sturdy, and polished result.
What Is an Undermount Sink?
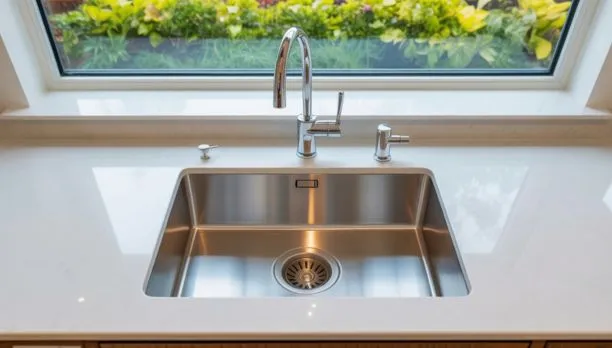
An undermount sink is a modern-style sink mounted below a countertop instead of sitting atop it, creating an inconspicuous appearance that works beautifully with granite surfaces. Homeowners looking to learn how to install an undermount sink on granite should take note that its popularity stems from what makes this style distinct from more conventional options.
Table of Contents
ToggleKey Features and Benefits
- Sleek and seamless appearance with no exposed rim
- Works best with professionally cut countertops
- Easy to clean, as spills can be wiped directly into the sink
- Strong and secure with proper clips and sealant
- Increases the overall value of your kitchen space
When compared to drop-in sinks, undermount sinks stand out for their elegance and functionality. At SF Marble and Granite, a trusted granite stone supplier, we often recommend undermount sink installation to clients who want a durable, stylish, and easy-to-maintain option. Choosing this design not only enhances your granite countertops but also adds long-lasting value to your home.
Tools and Materials You’ll Need
Prior to beginning to install an undermount sink on granite, gathering all necessary tools and materials is the most crucial step. Being organized will streamline the installation process and help ensure a successful finish. Whether you’re working with classic kitchen granite countertops or luxurious gold granite, precision and preparation will give you the best results.
Essential Tools and Supplies
- Safety gear (gloves, goggles) – Protect yourself while working with granite and adhesives.
- Clamps and supports – Hold the sink securely in place during installation.
- Epoxy adhesive and silicone sealant – Provide a strong bond and watertight seal.
- Measuring tape, drill, and mounting clips – Ensure accurate placement and secure attachment.
- Undermount sink and granite template – Guide the cutout and help align the sink perfectly.
Having these materials ready before you install undermount sink on granite will save you time and reduce the chances of mistakes. Every detail matters when working with heavy stone surfaces, and preparation ensures both safety and precision. With the right tools in hand, you’ll be ready to move on to the installation process and achieve a professional finish that looks truly flawless.
Preparation Before Installation
Before starting the process of how to install an undermount sink on granite, it’s essential to prepare properly. Granite is a heavy and durable material, whether you’re working with white, honed, or black finishes. Taking the time to inspect, measure, and clean the area will make the installation stronger and longer-lasting. Skipping these steps can lead to poor alignment, leaks, or damage to your countertop.
Key Preparation Steps
- Inspecting the granite countertop – Check for cracks, chips, or weak spots before beginning.
- Measuring and marking the cutout area – Ensure accurate sizing based on your sink template.
- Checking sink size and cabinet alignment – Confirm that the undermount sink fits within the cabinet frame.
- Cleaning the granite surface for adhesion – Remove dust, dirt, and residue to create a solid bond.
Taking care with these details is the foundation of a successful installation. When considering how to mount undermount sink to granite, remember that precision at this stage saves time and prevents future issues. With the surface clean and measurements exact, you’ll be ready to move forward with confidence and achieve a professional, lasting result.
Step-by-Step Guide: How to Install an Undermount Sink on Granite
Learning how to install an undermount sink on granite requires patience and precision. Granite is a heavy, durable stone, and proper installation ensures both beauty and long-term function. Whether you’re working with granite countertops near Lowell, handling a fresh granite fabrication, or even doing a granite repair, these steps will guide you toward a successful undermount sink installation.
Step 1: Measure and Cut the Opening
Precision is key when working with granite. Use a sink template to outline your cutout on your countertop, so your sink fits seamlessly without gaps or misalignment.
Step 2: Dry Fit the Sink
Before applying adhesives, place the sink into its cutout to check its alignment with the cabinet below and ensure it sits evenly and in line. If faucet holes are required, mark them now to avoid mistakes later.
Step 3: Apply Adhesive and Sealant
Utilize an epoxy adhesive with silicone sealant and apply carefully around the cutout edges, providing both bonding strength and watertight sealing against moisture seepage. This step ensures proper adhesion of granite countertops over time.
Step 4: Secure the Sink with Clips and Supports
Attach undermount sink clips and support brackets to keep the sink securely in place while its adhesive sets, to prevent sagging – an especially crucial factor when installing heavy sinks under stone countertops.
Step 5: Allow Adhesive to Cure
Allow the adhesive to set according to its manufacturer’s recommended drying time. Delay connecting any plumbing until its bonds have completely set before proceeding with drain and faucet installations. After your sink has set properly, check its alignment and ensure it feels secure before moving forward with drain/faucet installations.
Connecting Plumbing Fixtures
Once you’ve mastered how to install an undermount sink on granite, the next step is connecting the plumbing fixtures. This stage ensures that your sink not only looks beautiful under your countertop but also functions perfectly for everyday use. Whether you’ve chosen a sleek pitaya white granite surface or a rustic decomposed granite style, a proper plumbing connection is essential to prevent leaks and maintain durability.
Key Plumbing Steps
- Attaching drain assembly – Secure the drain to the sink opening, making sure it aligns properly for smooth water flow.
- Sealing with plumber’s putty – Apply plumber’s putty around the drain to create a tight, leak-proof seal.
- Connecting water supply lines – Reattach the hot and cold water lines carefully to avoid drips or loose fittings.
Take your time when installing the sink; doing it properly ensures reliable performance for years. With these steps for installing an undermount sink on granite, your kitchen upgrade can become both stylish and highly functional.
Common Mistakes to Avoid
Even after learning how to install an undermount sink on granite, many homeowners run into problems because of simple mistakes. Granite is a strong but unforgiving material, and errors during installation can cause leaks, weak bonding, or even damage that requires costly repairs. Whether you’re comparing quartz vs granite for your kitchen or working with an existing countertop, avoiding these mistakes is key to success.
Frequent Errors During Installation
- Using the wrong adhesive or a weak sealant – Without the proper epoxy and silicone, the sink may loosen over time.
- Skipping support brackets – Failing to use clips and supports can cause the sink to sag or detach under weight.
- Poor alignment leading to water leaks – If the sink isn’t perfectly lined with the cutout, water can seep in and damage the countertop.
Avoiding these mistakes ensures your sink installation remains durable and functional. If errors happen, professionals can cut new templates or even restore damaged granite, but prevention is always better. By carefully following each step of how to install an undermount sink on granite, you can achieve a secure, watertight finish that lasts for years.
Why Choose SF Marble and Granite
When it comes to learning how to install an undermount sink on granite, precision and expertise make all the difference. At SF Marble and Granite, we don’t just focus on countertops; we specialize in complete Granite Installation services that bring lasting quality to your kitchen. Our team understands the importance of accurate measurements, strong bonding, and flawless alignment to ensure your sink and countertop work together seamlessly.
Choosing professionals saves you time, stress, and costly mistakes. With years of hands-on experience, our experts guarantee a polished finish that not only enhances the beauty of your granite but also ensures long-term durability. From selecting the perfect slab to installing and finishing, we guide you every step of the way.
For homeowners who want more than just instructions on how to install an undermount sink on granite, our services provide peace of mind and results you can trust. With SF Marble and Granite, your kitchen transformation is in expert hands.
Final Thought
Mastering how to install an undermount sink on granite comes down to preparation, precision, and proper sealing. From accurate measurements and careful cutting to applying the right adhesive and securing with supports, every step plays a vital role in achieving a flawless finish. When done correctly, the result is a sink that not only looks seamless with your granite countertop but also provides long-lasting durability and functionality.
If you want guaranteed results without the stress of DIY, trust the experts at SF Marble and Granite Inc. Our team specializes in granite countertops and professional sink installation, ensuring your project is completed with the highest quality standards. Contact us today to schedule your consultation and let us transform your kitchen with precision, style, and expert craftsmanship.
FAQs
Can I install an undermount sink on granite by myself?
Yes, it is possible to install an undermount sink on granite as a DIY project, but it requires precision, the right tools, and strong adhesives. Mistakes like poor alignment or weak sealing can lead to leaks and costly repairs. For a flawless and long-lasting result, many homeowners prefer hiring professionals like SF Marble and Granite Inc., who specialize in granite installation.
What sealant should I use when installing an undermount sink on granite?
When learning how to install an undermount sink on granite, the most important materials are a strong epoxy adhesive for bonding and a quality silicone sealant for creating a watertight seal. These two work together to hold the sink firmly and prevent water from seeping into the granite.
How long does it take for the adhesive to cure after sink installation?
After you apply epoxy and silicone, the curing time usually takes between 12 to 24 hours, depending on the product and temperature conditions. It’s essential not to connect plumbing or use the sink until the adhesive is fully cured, ensuring maximum strength and durability.