Dull, slippery floors cause worry. You want a home that feels safe, smooth, and simple to clean without spending thousands of dollars on a full replacement. It’s stressful to watch your beautiful stone develop cracks, open pits, and slippery patches that make walking feel unsafe. We agree that your home floors should support your daily life, not add to your physical or financial burdens.
Fortunately, you can restore your existing stone to a safe, beautiful, and low-maintenance state with the right steps. This Complete Guide to Travertine Restoration for Your Floors shows you how to fill voids, remove dangerous trip hazards, and choose slip-resistant finishes. We’ll show you how to protect your investment and make your living space safer for everyone under your roof.
What Is Travertine? Understanding Your Floor’s Origins
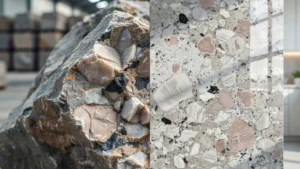
Travertine is a natural sedimentary stone formed by geothermal hot springs. Unlike igneous rocks like granite, this stone is a type of terrestrial limestone deposited by rapidly precipitating water. The distinctive characteristic of this material is its cellular structure, which features natural pockets, holes, and voids. These voids are called vesicles, and they occur because gas bubbles get trapped during the stone’s formation over thousands of years.
Because it is composed primarily of calcium carbonate, it’s highly sensitive to acids. Understanding this chemical makeup explains why everyday household spills can cause immediate damage. The stone comes in two primary cuts: cross-cut, which reveals a circular, flowery pattern, and vein-cut, which shows linear, banded layers.
Travertine vs Marble
When comparing travertine vs marble, the primary difference lies in how they form and their physical texture. While both are calcium-rich stones, marble is metamorphic, meaning it went through intense heat and pressure deep underground. This makes marble denser and less porous than its spring-formed sibling.
Travertine has a warmer, earthier appearance and contains natural pits that marble lacks. It is naturally slip-resistant in its raw state, making it popular for residential spaces where stability is a priority. However, because of those natural holes, it requires more hands-on care over time to keep dirt and debris from filling the open voids.
Travertine Finishes Explained
The surface finish of your floor changes how it looks, how slippery it gets, and how much physical effort it takes to clean. There are four primary finishes used in homes.
Honed Finish
This is a smooth, matte finish that offers excellent slip resistance. The stone is ground flat without a high-shine polish, making it the safest option for homes where stability and fall prevention are critical. It hides scratches well and doesn’t show dust or pet hair easily.
Polished Finish
This finish is highly reflective and smooth, created by grinding the stone with ultra-fine diamond abrasives. While beautiful, a polished floor becomes incredibly slippery when wet. It also shows scratches, etch marks, and dust much faster than matte surfaces.
Tumbled Finish
This style has a highly textured, aged look with rounded edges. The tiles are literally tumbled in a drum with water, sand, and mild acids to mimic ancient stone. It provides maximum traction, but the uneven surface can be a minor trip hazard for those who struggle with balance.
Brushed Finish
Brushed stone is treated with wire brushes to create a soft, textured surface that feels warm underfoot. It offers good slip resistance, though the textured recesses can collect dirt over time, requiring regular vacuuming with a soft brush attachment.
Common Signs Your Travertine Needs Restoration
Over years of daily life, traffic, and accidental spills, your stone floors will show distinct signs of wear. Spotting these signs early prevents minor issues from turning into expensive structural problems.
- Porous Pits Opening Up: The factory-applied grout or resin that fills the natural vesicles will slowly wear away, leaving open holes that trap dirt.
- Chemical Etching: Acidic liquids dissolve the calcium carbonate, leaving behind dull, rough, white spots that feel different from the surrounding stone.
- Lippage (Uneven Tile Edges): When tiles settle unevenly, their edges stick up. This creates dangerous trip hazards that can cause stumbles or falls.
- Loss of Shine and Gray Traffic Lanes: Fine sand and grit acting like sandpaper underfoot will grind away the finish, leaving dark, dull pathways in high-use areas.
DIY Travertine Maintenance
Keeping your stone floor clean doesn’t require back-breaking labor or harsh chemicals. In fact, gentle, consistent habits are the key to making your floors last for generations.
The Daily Cleaning Routine
Use a dry dust mop with a soft microfiber pad every day to sweep up loose dirt, hair, and sand. Avoid vacuum cleaners with rotating brush bars, as the hard plastic wheels and stiff bristles can scratch the soft stone.
Weekly Damp Mopping
For weekly cleaning, use a microfiber damp mop with a specialized best cleaner for travertine floors. This must be a pH-neutral formula designed specifically for natural stone. Avoid dry-mopping with heavy water volumes; keep the mop damp, not soaking wet, to prevent water from seeping into the grout lines or open pores.
Critical Safety Warning: Never use vinegar, lemon juice, bleach, or ammonia. Acidic or highly alkaline cleaners eat away at the calcium, causing permanent surface damage.
How to Restore Travertine Floors Step-by-Step
When your floor has lost its flat texture or has filled with deep dirt, a systematic restoration process is required. Here is how professional stone restorers bring worn stone floors back to a safe, level, and beautiful state.
Step 1: Deep Clean and Extraction
The process begins with a deep travertine floor cleaning. Restorers apply a pH-neutral stone cleaner and use a heavy-duty cylindrical brush machine to lift embedded dirt from the pores and grout lines. A high-powered wet vacuum then extracts the dirty slurry immediately so the dirty water isn’t reabsorbed by the porous stone.
Step 2: Grinding and Lippage Removal
If the floor is uneven, technicians use weighted floor machines with low-grit metal-bond diamond abrasives. This process, called grinding, shaves down high tile edges to make the floor completely flat. Removing this lippage eliminates tripping hazards, making the surface much safer for anyone walking with a cane, walker, or unsteady gait.
Step 3: Honing the Surface
Next comes honing vs polishing travertine. Honing uses medium-grit diamond pads (usually 120 to 400 grit) to remove scratches, light stains, and etch marks. Honing leaves a smooth, satin-like matte surface that maximizes slip resistance, which is highly recommended for residential safety.
Step 4: Travertine Hole Filling
With the surface clean and flat, it’s time for travertine hole filling. Technicians mix a color-matched polyester or epoxy resin and press it deep into every open vesicle and crack. Once the resin cures and hardens, it is ground flat to match the surrounding stone, creating a seamless, easy-to-clean floor.
Step 5: Polishing (Optional)
If you prefer a semi-gloss or high-gloss look, the restorer will use increasingly fine resin-bond diamond pads (from 800 up to 3000 grit). This step of how to polish travertine uses water and mechanical friction to create a natural shine without wax coatings.
Step 6: Penetrating Sealer Application
The final step is protecting the stone. An impregnating, water-based sealer is applied to the floor. Unlike topical sealers that sit on top and create a slippery plastic film, penetrating sealers sink deep into the pores, keeping oils and liquids from staining the stone while allowing it to breathe.
DIY vs. Professional Restoration: Which Do You Need?
You need professional restoration if your floors have deep scratches, uneven tile edges called lippage, or widespread open holes. DIY methods work well for basic daily washing and minor stain treatments, but restoring structural safety and slip resistance requires heavy rotary diamond grinding machinery that professionals use.
Let’s compare what you can handle yourself versus what requires a professional team:
| Restoration Task | DIY Safe? | Professional Required? | Why? |
| Daily Dusting & Mopping | Yes | No | Simple maintenance with a microfiber mop and pH-neutral soap is easy and safe. |
| Minor Stain Removal | Yes | No | Small stains can be treated with a simple baking soda poultice. |
| Hole Filling (1-2 small holes) | Yes | No | Small DIY resin kits work well for isolated, minor pits. |
| Lippage Grinding | No | Yes | Requires heavy rotary diamond grinding machines that can easily gouge stone if used incorrectly. |
| Full Honing & Polishing | No | Yes | Achieving an even matte or polished finish across large areas requires professional multi-stage diamond pads. |
| Deep Scratch Repair | No | Yes | Deep physical damage requires professional travertine etching repair to blend the spot seamlessly. |
How to Prevent Future Damage
Once your floors are restored, keeping them safe and flat is straightforward. Simple changes to your home environment can cut down on wear and tear, saving you from needing another major restoration for years.
- Place Entry Mats: Put large, non-slip walk-off mats at every entrance. This catches dirt, sand, and small pebbles before they can act like sandpaper on your soft stone floors.
- Use Furniture Protectors: Glue thick felt pads to the bottom of all chair, table, and sofa legs. Replace these pads every six months to prevent embedded grit from scratching the floor.
- Wipe Spills Instantly: If you drop coffee, juice, or wine, blot it immediately with a paper towel. Do not wipe in circles, as this spreads the liquid and increases the size of any potential etch mark.
- Use Area Rugs in High-Traffic Zones: Place rugs in main walking pathways to protect the stone from wear, ensuring the rugs have non-slip rubber backings that won’t trap moisture.
At SF Marble and Granite Inc., we don’t just install brand-new marble floors we also help homeowners maintain and restore the elegance of natural stone surfaces like travertine. If your travertine flooring has lost its shine, shows signs of wear, or suffers from scratches and cracks, our team offers expert guidance and hands-on service to bring it back to life.
Our marble floor installation in Lowell service often includes tailored solutions for existing stone surfaces, including travertine polishing, sealing, and refinishing. Whether it’s part of a new installation or a complete floor restoration project, we bring more than a decade of experience in working with all types of natural stones. We use industry-leading tools and sealants to restore the luster of your travertine tiles while also protecting them from future damage.
Choosing us means you’ll get the same quality and precision whether we’re installing a brand-new marble floor or reviving an old travertine one. We understand that every stone tells a story and we’re here to preserve it.
Conclusion
Travertine restoration is a transformative process that unveils the inherent beauty of the stone. By following the steps outlined in this guide, you can enjoy stunning, revitalized floors that enhance the aesthetic and value of your space. Embrace the elegance of your restored travertine floors and relish in their timeless charm.
As you set out on your quest for travertine restoration, take advantage of SF Marble and Granite Inc.’s wealth of expertise. Our team is devoted to reviving the ageless splendor of your floors. Explore the details of our all-inclusive restoration services and unveil the remarkable metamorphosis that awaits your living space. Contact us today.
FAQs
How often should I consider restoring my travertine floors?
The frequency of restoration depends on factors like foot traffic and maintenance. Generally, considering restoration every 3 to 5 years is a good guideline.
Can I restore my travertine floors without professional help?
While some minor issues can be addressed through DIY methods, professional restoration ensures a thorough and lasting outcome.
What factors contribute to the cost of travertine restoration?
The extent of damage, the size of the area, and the complexity of the restoration process influence the overall cost.
Are there any eco-friendly restoration options for travertine floors?
Yes, there are environmentally friendly sealers and restoration products available that prioritize sustainability.
Is it possible to prevent scratches on travertine floors?
Taking preventive measures like using furniture pads and avoiding abrasive materials can significantly reduce the risk of scratches.