S F Marble & Granite

Marble and Granite

sealing-marble-floors

Sealing Marble Floors: Why It Matters and How to Do It Right

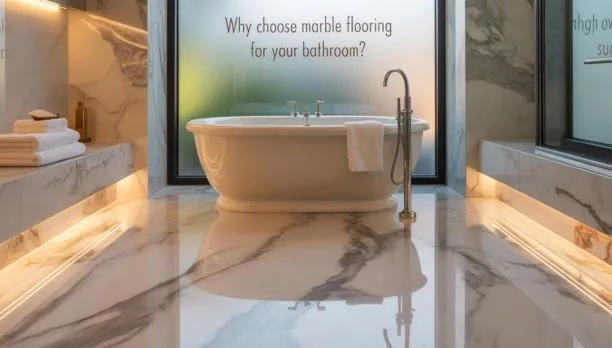
Sealing marble floors means applying a special protective layer to your marble tiles, helping them stay beautiful and last longer. Because marble is a natural stone that can easily soak up liquids, sealing is one of the most important things you can do to protect your investment and keep your floors looking stunning for years to come.. Why Sealing Marble Floors Is Essential Marble floors are famous for their timeless beauty and luxurious feel, but they’re also naturally porous. This means they have tiny holes that let water, oil, and other liquids seep in, which can cause stains, dull spots, and even permanent damage if left unprotected. At SF Marble and Granite, we emphasize the importance of sealing marble floors to create a barrier that keeps out moisture and stains, making cleaning easier and helping your floors stay shiny and new. Key Benefits of Sealing Marble Floors Prevents stains from food, drinks, and everyday spills Protects against etching caused by acidic substances like juice or vinegar Keeps marble looking polished and beautiful for longer Reduces long-term maintenance costs by preventing damage Do Marble Tiles Need Sealing? Yes, marble tiles do need sealing. Whether your marble is on the floor, in the bathroom, or even as a kitchen backsplash, sealing is highly recommended. Without a proper seal, marble tiles can quickly lose their shine and become stained or etched by everyday use. Can You Seal Marble? Absolutely! Anyone can seal marble with the right tools and a little patience. Sealing is a simple process that you can do yourself at home, or you can hire a professional if you prefer. The important thing is to use a high-quality marble sealer designed for natural stone. How to Seal Marble Floors: Step-by-Step Guide Sealing marble floors is easier than you might think. Here’s a simple guide to help you get started: Materials You’ll Need High-quality marble sealer (penetrating/impregnating type is best) Mild, pH-neutral detergent Clean, soft cloths or a foam brush Water and a mop or sponge Gloves (optional) Painter’s tape (optional for protecting nearby surfaces) Step 1: Clean the Surface Start by cleaning your marble tiles with a mild detergent and water. Use a mop or sponge to remove any dust, dirt, or sticky spots. Rinse with clean water and let the floor dry completely. This may take a few hours. Step 2: Prepare the Area If you want to protect walls or fixtures nearby, use painter’s tape to cover them. This keeps the sealer from getting on surfaces you don’t want to treat, especially when working with marble slabs near me, to ensure a clean and precise finish. Step 3: Apply the Sealer Pour a small amount of marble sealer onto a clean cloth or use a foam brush. Work in small sections, spreading the sealer evenly over the marble tiles and grout lines. Follow the instructions on your sealer for how much to use and how long to let it sit—usually about 15-20 minutes. Step 4: Wipe Off Excess After the recommended time, use a clean cloth to wipe away any extra sealer that hasn’t soaked in. This prevents sticky spots or streaks. Step 5: Let It Dry and Cure Let the sealer dry completely, usually overnight. Avoid walking on the floor or getting it wet for at least 24 hours. For the best protection, wait 2-3 days before heavy use or cleaning. Step 6: Repeat as Needed Most marble floors need resealing every 6-12 months, depending on how much traffic they get and where they’re located (bathrooms and kitchens may need more frequent sealing). Marble Bathroom Floor Ideas Marble bathroom floors are a classic choice for a reason: they look elegant, feel cool underfoot, and come in many colors and patterns. Here are some stylish ideas: Pale marble tiles in unique shapes (like hexagons or herringbone) add a modern twist to classic white marble. Basketweave mosaics bring texture and interest to your bathroom floor. Bold veining (like Arabesque or Marquina marble) makes a dramatic statement and adds personality to your space. Mix and match: Use different marble tile sizes or finishes for the floor and walls to create a custom look. Remember, because bathrooms are high-moisture areas, sealing marble bathroom floors is especially important to prevent water stains and keep them looking great. Transform Your Space with Professional Marble Floor Installation Dreaming of a home that feels both timeless and luxurious? Our expert marble floor installation service brings that vision to life seamlessly and stress-free. We handle every detail, from precise measurements and surface preparation to careful tile placement and finishing touches, ensuring your marble floors are perfectly level, durable, and stunning. Whether you’re updating a bathroom, kitchen, or entryway, trust our skilled team to deliver flawless results that stand the test of time. Ready to elevate your space? Discover the difference with our marble floor installation and enjoy elegance underfoot every day. Final Thought Sealing marble floors is a must if you want to protect your beautiful stone from stains, moisture, and everyday wear. The process is simple, affordable, and can be done by anyone with a little care. Whether you’re installing new marble tiles or refreshing your bathroom with new marble floor ideas, sealing is the secret to keeping your investment looking its best for years to come. FAQs How often should I seal my marble floors? Most experts recommend sealing marble floors every 6-12 months, but high-traffic or high-moisture areas may need sealing more often. Can you seal marble yourself, or do you need a professional? You can seal marble yourself by following the right steps and using a quality sealer. Professionals are a good choice for large or tricky areas. Do marble tiles need sealing in every room? Yes, especially in kitchens, bathrooms, and entryways where spills and moisture are common.

Sealing Marble Floors: Why It Matters and How to Do It Right Read More »

black-marble-floor

Black Marble Floor | The Ultimate Guide to Luxury and Elegance

A black marble floor is a premium flooring option made from natural metamorphic rock, featuring deep, rich black tones with distinctive veining patterns in white, gold, or gray. This luxurious flooring material has become increasingly popular in modern homes due to its timeless elegance, sophisticated appearance, and ability to create a dramatic visual impact in any space. From sleek modern kitchens to elegant bathrooms and grand entryways, black marble flooring transforms ordinary rooms into extraordinary spaces that exude luxury and refinement. What Makes Black Marble Special? Black marble is formed through a natural geological process in which limestone undergoes intense heat and pressure over millions of years. This transformation creates a dense, durable stone with unique characteristics that make it perfect for flooring applications. Natural Formation and Characteristics Black marble gets its distinctive dark color from high amounts of carbonate sediments mixed with organic materials that formed under low-oxygen conditions. Many varieties of black marble contain fascinating fossils that tell the story of ancient sea life, making each piece truly unique. The most striking feature of black marble is its beautiful veining patterns. These natural lines, usually in lighter colors like white, gold, or silver, create stunning contrasts against the dark background. When searching for quality marble slabs near me, look for those with unique veins that formed randomly during the stone’s creation, ensuring that no two pieces are exactly alike. Types of Black Marble for Flooring Popular Black Marble Varieties Marquina Black Marble is perhaps the most famous type worldwide, known for its intense black background and characteristic white veins. This Spanish marble offers excellent uniformity and high production volume, making it widely available for flooring projects. Indian Black Marble provides another excellent option with its fine-grained texture and high-gloss finish. Also known as Absolute Black or Nero Black Marble, this variety features subtle white and golden veins that add elegance without overwhelming the design. Noir Saint Laurent from France showcases rich golden veins against a deep black background, creating a luxurious appearance perfect for high-end applications. Finishing Options Polished black marble offers the most popular finish for flooring, providing a mirror-like surface that reflects light beautifully. This finish enhances the natural veining and creates that coveted black shiny flooring appearance that many homeowners desire. Honed finishes provide a matte appearance that’s less slippery and shows fewer water spots, making them practical for high-traffic areas. Bush-hammered or aged finishes work well for outdoor applications where slip resistance is important. Benefits of Black Marble Floor Aesthetic Appeal and Versatility Black marble flooring creates an instant focal point in any room. The deep, rich color provides excellent contrast with lighter walls and furnishings, making spaces appear larger and more dramatic. Whether your style is modern minimalist or traditional luxury, black marble adapts beautifully to different design themes. The natural veining patterns add visual interest and texture that synthetic materials cannot replicate. Each installation becomes a unique work of art that enhances your home’s overall value and appeal. Durability and Longevity When properly installed and maintained, black marble tile flooring can last for a decade. The dense composition of marble makes it highly resistant to cracking, chipping, and normal wear and tear. Unlike softer flooring materials, marble becomes harder and more durable over time. Marble’s natural resistance to moisture makes it an excellent choice for areas prone to spills and humidity. This characteristic makes it particularly suitable for kitchens and bathrooms where water exposure is common. Health and Cleanliness Benefits Unlike carpeting, marble floors don’t harbor allergens, dust mites, or pet dander. Any particles that do accumulate on the surface are easily visible and can be quickly removed with regular cleaning. This makes marble flooring an excellent choice for people with allergies or respiratory sensitivities. Design Ideas and Applications Bathroom Black Marble Floor A bathroom black marble floor creates a spa-like atmosphere that transforms your daily routine into a luxurious experience. The natural water resistance of marble makes it perfect for wet areas, while its elegant appearance elevates the entire bathroom design. Black marble works exceptionally well with white fixtures and gold accents, creating a classic color scheme that never goes out of style. The reflective surface of polished marble can make smaller bathrooms appear larger and brighter. Living Room and Common Areas In living spaces, black marble flooring provides a sophisticated foundation for furniture and decor. The dramatic contrast works beautifully with light-colored sofas, wooden furniture, and colorful artwork. Installing radiant heating beneath marble floors ensures year-round comfort, especially important in colder climates. Kitchen Applications Black marble kitchen floors offer both beauty and practicality. The hard surface resists scratches from dropped utensils and can handle heavy foot traffic around cooking areas. However, it’s important to clean spills promptly to prevent staining, especially from acidic substances. Entryways and Foyers Grand entryways featuring black marble flooring create an impressive first impression for guests. The durability of marble makes it perfect for high-traffic areas, while its elegant appearance sets the tone for the entire home. Installation Considerations Professional Installation Requirements Installing black marble flooring requires experienced professionals who understand natural stone. Proper installation involves careful subfloor preparation, precise cutting, and expert handling to avoid damage. The weight of marble also requires adequate structural support. Tile Sizes and Patterns Black marble tiles come in various sizes, from traditional 12×12 inches to large format 24×48-inch pieces. Larger tiles create a more seamless appearance with fewer grout lines, while smaller tiles offer more design flexibility for patterns like herringbone or checkerboard. Setting Materials and Adhesives Use only setting materials specifically designed for natural stone installation. White, non-staining adhesives prevent discoloration that can show through lighter veining. Proper adhesive selection ensures long-term stability and prevents future problems. Maintenance and Care Guide Daily Cleaning Routine Maintaining black marble floors requires gentle, consistent care. Use a dust mop or soft-bristled vacuum daily to remove surface debris that could scratch the stone. Avoid vacuums with rotating brushes that might damage the marble surface. For regular cleaning, use pH-neutral cleaners specifically

Black Marble Floor | The Ultimate Guide to Luxury and Elegance Read More »

marble-floors-cost

Marble Floors Cost: The Complete Guide to Beautiful Stone Flooring

Marble floors cost between $10 to $40 per square foot installed, with most homeowners spending $1,900 to $5,600 for a typical 250-square-foot room. This luxurious flooring option transforms any space into an elegant masterpiece, but understanding the costs helps you make smart decisions for your home. Whether you’re dreaming of pristine white Carrara marble in your living room or considering dramatic Calacatta for your entryway, this guide breaks down everything you need to know about marble flooring expenses in simple terms that anyone can understand. What Affects Marble Floors’ Cost? Several important factors determine how much you’ll pay for marble flooring. Think of these like ingredients in a recipe; each one changes the final price. Types of Marble Different marble types come with different price tags: Carrara Marble: The most affordable option at $5-$15 per square foot, featuring white backgrounds with soft gray veins  Calacatta Marble: Premium choice costing $15-$40 per square foot, known for bold gold and white veining  Emperador Marble: Brown marble with gold or black veins, priced at $10-$25 per square foot  Statuario Marble: Luxurious white marble with blue or pink veins, ranging $15-$40 per square foot  Marble Quality Grades Marble comes in four quality grades that affect pricing: Grade A: Fewest flaws, subtle colors, $19-$60 per square foot  Grade B: Minor imperfections, good quality, $7-$25 per square foot  Grade C: Noticeable flaws, commercial grade, $5-$15 per square foot  Grade D: Most flaws but interesting patterns, $3-$7 per square foot  Tiles vs. Slabs Your choice between tiles and slabs significantly impacts costs: Marble Tiles: $5-$10 per square foot for materials, easier installation  Marble Slabs: $10-$20 per square foot for materials, more complex installation  Marble Flooring Cost Breakdown by Type Marble Flooring Cost Per Square Foot Breakdown Understanding the marble flooring cost per square foot helps you budget properly. Here’s how costs typically break down: Material Costs Only Basic marble materials start around $5 per square foot, while premium options can reach $40+ per square foot. Italian marble, considered the finest quality, ranges from $15-$75 per square foot, depending on the type and rarity. Installation Costs Professional installation adds $3-$7 per square foot to your project. This covers labor, tools, and expertise needed for proper installation. Complex patterns or difficult layouts may increase these costs. Total Installed Costs When you combine materials and installation, expect to pay: Basic projects: $10-$20 per square foot  Standard projects: $20-$30 per square foot  Premium projects: $40-$60 per square foot  Room Size Cost Examples Here are real-world examples of total project costs: Room Size Basic Marble Standard Marble Premium Marble 50 sq ft $500-$1,000 $1,000-$1,500 $2,000-$3,000 100 sq ft $1,000-$2,000 $2,000-$3,000 $4,000-$6,000 200 sq ft $2,000-$4,000 $4,000-$6,000 $8,000-$12,000 300 sq ft $3,000-$6,000 $6,000-$9,000 $12,000-$18,000 500 sq ft $5,000-$10,000 $10,000-$15,000 $20,000-$30,000 Marble Floor Installation Process Marble floor installation requires professional expertise for the best results. The process involves several careful steps that ensure your floors look beautiful and last for decades. Step-by-Step Installation Professional installers follow these key steps: Surface Preparation: Cleaning and preparing the subfloor foundation  Layout Planning: Measuring and marking installation patterns  Adhesive Application: Spreading specialized marble adhesive  Tile Placement: Carefully positioning each marble piece  Leveling: Ensuring uniform height across all tiles Grouting: Filling spaces between tiles with matching grout  Sealing: Protecting the marble with appropriate sealers  Final Polishing: Creating the desired finish and shine  Why Professional Installation Matters Marble is heavy and requires special handling techniques. Professional installers have the right tools, experience, and knowledge to prevent cracking, ensure proper adhesion, and create stunning results. Beautiful Marble Floor Designs Marble floor designs offer endless possibilities to create stunning spaces. From classic elegance to modern drama, marble adapts to any style preference. Popular Design Patterns Classic design options include: Classic White: Bright, airy feel, perfect for any room  Geometric Patterns: Eye-catching designs using different marble shapes  Dark Marble: Dramatic black or gray for sophisticated spaces  Mixed Textures: Combining polished and textured marble surfaces  Room-Specific Applications Different areas benefit from specific marble choices: Living Rooms: Light marbles create welcoming, spacious feelings  Entryways: Durable, impressive marble makes great first impressions  Kitchens: Heat-resistant marble works well with cooking areas  Bathrooms: Sealed marble provides luxury and water resistance Using a Marble Flooring Cost Calculator A marble flooring cost calculator helps estimate your project expenses accurately. These tools consider multiple factors to give realistic budget estimates. How Calculators Work Most calculators use this simple formula :Total Cost = (Floor Area × Cost Per Square Foot) + Installation Costs For example, a 500 square foot room with $20 per square foot marble plus $1,000 installation would cost $11,000 total. What to Include When using calculators, remember to include: Total floor area in square feet Marble material costs per square foot Installation labor costs Additional supplies like adhesives and sealers Transform Your Home with Expert Marble Floor Installation Ready to bring timeless elegance and lasting value to your home? Our professional marble floor installation service makes it easy to enjoy all the benefits of marble, like durability, easy cleaning, and a stunning, light-reflecting finish without the stress of doing it yourself. Our experienced team handles everything from helping you choose the perfect marble to precise installation, ensuring your new floors look flawless and stand the test of time. Let us take care of every detail so you can simply enjoy the beauty and comfort of your new marble floors. Contact us today to start your marble floor installation and see the difference true craftsmanship makes! Final Thought When considering the timeless beauty and durability of natural stone, understanding the marble floors cost is essential to making an informed decision. At [Your Brand Name], we believe that investing in quality marble flooring is not just about aesthetics but also about enhancing your home’s value and comfort for years to come. Whether you’re drawn to sleek modern designs or classic patterns, our expert team is here to guide you through every step, from selecting the right marble to flawless installation. Don’t let uncertainty hold you back from transforming your space

Marble Floors Cost: The Complete Guide to Beautiful Stone Flooring Read More »

how-to-clean-marble-floors

How to Clean Marble Floors | Step-by-Step Guide for a Brilliant Shine

To clean marble floors effectively, start by sweeping away loose dirt with a soft dust mop, then use a pH-neutral cleaner mixed with warm water to mop the surface gently, and finish by rinsing with clean water and drying immediately with a microfiber cloth. This simple yet essential process keeps your marble floors looking beautiful and protects them from damage that can cost thousands in repairs. Marble floors bring timeless elegance to any home, but they need special care to maintain their stunning appearance. Whether you’re a homeowner in Lowell, MA, or anywhere else, understanding proper marble floor maintenance is crucial for protecting your investment. This guide will walk you through everything you need to know about washing marble floors, how to care for marble floors, cleaning marble floors, and how to mop marble floors safely and effectively. Understanding Marble: Why Special Care Matters Marble is a beautiful natural stone that is both lovely and fragile. However, it is delicate and more vulnerable than other types of flooring because it is porous and made of calcium carbonate. This means that marble is susceptible to acidic chemicals in coffee, wine, and even common household cleaners. The reaction to the marble will lead to permanent dull spots that can resemble water marks. Cleaning marble floors is different than cleaning tile or hardwood flooring. Using products improperly can lead to irreversible damage to your marble at great expense to repair. Essential Tools and Supplies for Marble Floor Care Before you start how to clean marble floors, gather these essential items: Cleaning Tools Soft-bristled broom or dust mop Microfiber mop with soft cotton or microfiber heads Microfiber cloths for drying Spray bottle for cleaning solutions Soft-bristled brush for stubborn stains Safe Cleaning Products pH-neutral marble cleaner or mild dish soap Warm distilled water Hydrogen peroxide for stain removal Rubbing alcohol for specific stains What to Avoid Never use these products on marble floors: Vinegar or lemon juice Bleach or ammonia-based cleaners Abrasive scrubbers or steel wool Generic all-purpose cleaners Step-by-Step Guide: How to Clean Marble Floors Step 1: Remove Loose Debris Start by using a dry dust mop or soft-bristled broom to remove all loose dirt and debris. This prevents scratching during the wet cleaning process. If you’re also searching for quartz countertops near me, make sure your vacuum has soft attachments if you choose to vacuum instead. Step 2: Clean Up Spills Immediately Wipe away any spills as soon as they happen using a damp microfiber cloth. Even with protective sealant, acidic spills can cause permanent etching if left on the surface. Step 3: Prepare Your Cleaning Solution Mix a few drops of pH-neutral marble cleaner or mild dish soap with warm water in a bucket. Fill a second bucket with clean water for rinsing. The key is using very little soap; too much can leave a film on your marble. Step 4: Mop the Floor Properly Dip your soft mop in the cleaning solution and wring it well – the floor shouldn’t be sopping wet. Work in small sections, rinsing your mop frequently to avoid spreading dirt. This technique ensures effective washing of marble floors without oversaturating the stone. Step 5: Rinse Thoroughly Use your second bucket of clean water to rinse each section after cleaning. This removes any soap residue that could dull your marble’s shine. Step 6: Dry and Buff Use a microfiber cloth to dry the floor immediately, making sure to use big circles to keep the luster luster. Marble has iron oxide which may rust if wet too long, so beware.  How to Care for Marble Floors: Long-Term Maintenance Sealing Your Marble Floors Professional sealing protects marble surfaces from stains and moisture damage, recommended every 6 to 12 months depending on foot traffic. To check if a sealing is needed again on your marble, place some drops of water on the surface and if the water soaks in within 10 minutes, it is time to perform sealing again!  Polishing Schedule Regular marble polishing helps preserve its natural gleam and remove any minor scratches, providing optimal appearance over time. In homes with light foot traffic, polish every 2-3 months for best results; high traffic areas may need monthly polishing sessions. Professional polishing every 1-2 years provides optimal appearance. Preventive Measures Place rugs in high-traffic areas and at entrances Use coasters under drinks and cutting boards when preparing food Clean spills immediately, especially acidic substances Avoid dragging furniture across marble floors Removing Stains from Marble Floors Common Stain Types and Solutions Water Stains and Soap ScumMix one cup of hot water with half a teaspoon of dish soap in a spray bottle. Apply to the stained area, let sit for five minutes, then clean with a microfiber cloth. Organic Stains (Coffee, Wine, Food)Create a paste using baking soda and water. Apply the stain, cover with plastic wrap, and let sit overnight. Rinse thoroughly and dry the area. Oil-Based StainsFor grease or oil stains, use a few drops of mineral spirits on a soft cloth. Work gently and rinse immediately with clean water. Ink StainsSaturate a paper towel with rubbing alcohol and place it over the ink stain. Leave for several minutes, then gently rub and rinse with clean water. DIY Natural Marble Cleaning Solutions If you prefer natural cleaning methods, here’s a safe recipe for how to mop marble floors using household ingredients: Homemade Marble Cleaner 1/4 cup high-proof vodka or rubbing alcohol 1 1/2 cups water 1/2 teaspoon liquid castile soap 10 drops lemon essential oil (optional) Mix all ingredients in a spray bottle. This solution is pH-neutral and safe for regular use on marble surfaces. Common Mistakes to Avoid Using the Wrong Cleaning Products Many homeowners unknowingly cause damage to their marble by using household cleaners like vinegar. Acidic cleaners dissolve its surface, leaving permanent etch marks behind. Ignoring Spills Leaving spills on marble, especially acidic liquids, allows them to penetrate the stone and create deep stains. Always clean spills immediately. Over-Wetting the Floor Using too much

How to Clean Marble Floors | Step-by-Step Guide for a Brilliant Shine Read More »

how-to-install-marble-floor-tile-in-a-bathroom

How to Install Marble Floor Tile in a Bathroom: A Complete Guide

Installing marble floor tile in a bathroom involves preparing the subfloor, planning your layout, applying mortar, setting the tiles, grouting, and sealing the surface. This process transforms your bathroom into an elegant space while adding value to your home12. At SF Marble & Granite Inc., we’ve helped countless homeowners in Lowell, MA, achieve stunning bathroom renovations with our expert marble floor installation services. Why Choose Marble Flooring for Your Bathroom? Marble flooring brings timeless elegance and luxury to any bathroom space. The natural veining and unique patterns make each installation one-of-a-kind, instantly elevating your bathroom’s appearance. A bathroom with marble tiles not only looks beautiful but also increases your property value. Benefits of marble bathroom flooring include: Natural cooling properties (perfect for bare feet on hot days) Unique patterns and veining that create visual interest Durability when properly maintained Compatibility with underfloor heating systems Increased home value While marble requires some special care, the stunning results make it worth the effort. Let’s explore how to properly install marble floor tile in your bathroom. Materials and Tools You’ll Need Before starting your marble floor installation project, gather all necessary supplies: Essential Materials: Marble floor tiles Thin-set mortar (specifically for marble) Grout (unsanded for marble) Tile spacers Marble sealer Cement backer board (if needed) Required Tools: Measuring tape Chalk line Notched trowel Rubber mallet Wet saw or tile cutter Level Grout float Sponges Buckets Safety gear (gloves, goggles, knee pads) Having everything ready before you begin will make the installation process much smoother. For professional results, consider renting a quality wet saw, as this will give you the cleanest cuts on your valuable marble tiles. Step-by-Step Installation Process 1. Prepare the Bathroom Subfloor The foundation of a successful marble floor installation starts with proper subfloor preparation: Remove any existing flooring completely Clean the subfloor thoroughly, removing all dust and debris Check for levelness using a long level Fill any low spots with leveling compound Install cement backer board if needed for stability Ensure the surface is completely dry before proceeding Remember, any imperfections in your subfloor will eventually show through your marble tiles, so take your time with this crucial step when selecting high-quality marble slabs near me. 2. Plan Your Marble Floor Pattern Before applying any mortar, plan your marble floor pattern carefully: Measure your bathroom dimensions accurately Find the center point of the room by snapping chalk lines Dry-lay tiles from the center outward to check your pattern Consider different layout options like straight, diagonal, or herringbone Account for cuts needed around fixtures and edges Use tile spacers to visualize grout lines Popular marble floor patterns include: Classic grid (straight layout) Diagonal (45-degree angle) Herringbone Basketweave Versailles pattern Taking time to plan your layout helps avoid awkward cuts and creates a more balanced, professional look. 3. Mix and Apply Thin-Set Mortar With your subfloor prepared and pattern planned, it’s time to begin installing marble floor tile12: Mix thin-set mortar according to the manufacturer’s instructions Work in small sections (about 2-3 tiles at a time) Apply mortar using the flat side of the trowel first Create ridges with the notched side of the trowel Keep the trowel at a 45-degree angle for proper coverage Ensure consistent mortar thickness For marble tiles, it’s crucial to use the right type of mortar. Standard thin-set works for most installations, but check your tile manufacturer’s recommendations. 4. Set the Marble Tiles Now comes the exciting part: setting your beautiful marble tiles. Start at the center point where your chalk lines intersect Place the first tile firmly into the mortar Twist slightly to ensure good adhesion Tap gently with a rubber mallet to set the tile level Place tile spacers at each corner Continue setting tiles, working outward from the center Check frequently with a level to ensure evenness Cut edge tiles as needed using a wet saw When installing marble floor tile in a bathroom, work methodically and avoid stepping on freshly laid tiles. Plan your installation path so you don’t trap yourself in a corner. 5. Allow Proper Drying Time Patience is essential when installing marble bathroom flooring: Allow the mortar to cure for 24-48 hours Avoid walking on the new tiles during this time Keep the bathroom door closed to prevent drafts Maintain a consistent room temperature for optimal curing This waiting period is crucial for a successful installation, as it allows the mortar to properly bond with your marble tiles. 6. Apply Grout After the mortar has cured, it’s time to grout your marble bathroom floor: Remove tile spacers Mix grout according to package instructions Use unsanded grout for marble to prevent scratching Apply grout with a rubber float at a 45-degree angle Work the grout into all joints completely Remove excess grout from tile surfaces Allow grout to set for 15-20 minutes Clean tile surfaces with a damp sponge Rinse sponge frequently and wring well Proper grouting creates clean, defined lines between your marble tiles and completes the professional look of your bathroom floor. 7. Seal Your Marble Floor The final and crucial step in installing marble floor tile is sealing: Ensure the floor is completely clean and dry Apply marble sealer according to product instructions Use a high-quality penetrating sealer designed for marble Apply in small sections with a clean cloth or applicator Allow proper drying time between coats Apply 2-3 coats for maximum protection Sealing is essential for marble bathroom floors as it protects the porous stone from stains, moisture, and damage. Plan to reseal your marble floor annually to maintain its beauty and durability. Marble Bathroom Floor Ideas Looking for inspiration for your marble bathroom floor? Consider these popular design options: Classic White Marble White Carrara or Calacatta marble with subtle gray veining creates a timeless, elegant bathroom that brightens the space. Contrasting Colors Combine two different marble colors in the same pattern for visual interest. Try pairing light and dark marbles for a dramatic effect. Geometric Patterns Hexagonal, octagonal, or basketweave patterns add texture and visual

How to Install Marble Floor Tile in a Bathroom: A Complete Guide Read More »

marble-medallion-installation

Marble Medallion Installation: The Complete Guide for Beautiful Floor Centerpieces

Marble medallion installation is the process of placing decorative stone centerpieces into floors, walls, or backsplashes to create stunning focal points that enhance any space. These beautiful works of art combine different colors and types of marble to form intricate patterns that can transform an ordinary room into an elegant showcase. At SF Marble & Granite Inc., we’ve perfected this craft over 10+ years, helping Lowell homeowners create breathtaking entryways, kitchens, and living spaces with expertly installed marble medallions. This comprehensive guide will walk you through everything you need to know about marble medallion installation, from understanding the basics to maintaining your investment for years to come. What Are Marble Medallions? Marble medallions are decorative inlays made from natural stone that serve as artistic centerpieces in flooring and wall applications. These handcrafted pieces combine different marble types and colors to create intricate patterns ranging from geometric designs to floral motifs. The most common designs include classic starburst medallions with radiating lines, geometric patterns with balanced shapes, and floral medallions inspired by nature. Each medallion is typically made using advanced waterjet cutting technology that eliminates visible seams between marble pieces, creating a seamless and polished final product. The standard thickness for most medallions is 3/8 inch, consisting of a 3/16 inch marble top layer bonded to an aluminum backing of the same thickness. Types of Marble Medallions for Different Spaces Medallion Floor Tile Options Medallion floor tile installations work beautifully in various room sizes and layouts. Round medallions provide a smooth and sleek looks that complement traditional décor, while square medallions offer an easy way to enhance interior design during remodeling. For larger spaces, oval medallions add elegance by breaking apart hard lines with their soft edges. Entryway Tile Medallions Entryway tile medallions create impressive first impressions for guests entering your home. These focal points work particularly well in foyers where they can be surrounded by complementary marble or stone tiles. The installation process for entryways requires careful attention to ensure the medallion is perfectly centered and level with surrounding flooring materials. Tile Medallions for Floors Tile medallions for floors can be installed in dining rooms, living areas, and even outdoor patios. The versatility of these decorative elements allows homeowners to add visual interest anywhere a stunning centerpiece is desired. When properly installed, floor medallions become conversation pieces that showcase craftsmanship and attention to detail. Kitchen Backsplash Medallions Kitchen backsplash medallions serve as artistic focal points behind stoves or sinks. These installations require precise measurements and careful preparation of wall surfaces to ensure proper adhesion. The combination of medallion designs with surrounding tile creates rich, layered looks that enhance kitchen aesthetics. Essential Tools and Materials for Installation Required Tools Professional marble medallion installation requires specific tools to ensure precision and quality results. The essential tools include: A chalk line, or marker, and a ruler for accurate measurements Wet saw or side grinder with a diamond blade for cutting 1/4 to 3/8 inch square notched trowel for adhesive application A router with appropriate bits for creating precise openings Sponge and dry cloth for cleanup Adhesives and Materials Choosing the right adhesive is crucial for long-lasting installations. Marble Set or Thinset Adhesive provides strong bonding for most applications. For specialized needs, epoxy-based adhesives offer gap-filling properties and high strength. Professional-grade polyester-based adhesives provide weather resistance and anti-mildew properties for outdoor applications. Step-by-Step Installation Process Surface Preparation Proper surface preparation ensures successful marble medallion installation. When sourcing marble slabs near me, remember the subfloor or wall must be structurally sound, rigid, smooth, flat, and free of curing compounds or oily films. Any existing moisture barriers should be removed, and protruding fasteners must be set below the surface. For installations over existing floors, the area should be thoroughly cleaned and checked for evenness. High spots should be scraped down, and the surface must be completely dry before proceeding. Layout and Measurements Accurate layout prevents costly mistakes during installation. Start by measuring and marking the center of the installation area both ways. Use chalk lines to create intersecting lines through the center, dividing the area into four quadrants. Dry lay the medallion and surrounding tiles to ensure proper fit. Mark the surrounding tiles with numbers for easy identification, and mark cut lines where tiles will need trimming. This step allows for adjustments before permanent installation begins. Cutting and Fitting For installations in existing floors, create templates using the supplied plywood pieces. Assemble the template by connecting interlocking keys in each segment. The inner circle should match the outside diameter of the medallion exactly. Use a router with appropriate bits to cut the opening, working in 3/16 inch passes to prevent overheating. Route clockwise around the inside of the template until you reach the subfloor level. Vacuum thoroughly between passes to maintain clean working conditions. Medallion Installation Apply adhesive evenly within the prepared opening using the appropriate trowel. For larger medallions that may have warped during transport, use relief cuts on the back side spaced 2-3 inches apart at 5/16 inch depth. Place the medallion carefully, ensuring proper alignment with layout lines. Use sandbags or similar distributed weights to press the medallion firmly into place. Allow adhesive to cure according to the manufacturer’s instructions, typically 24 hours minimum. Finishing Work Clean excess adhesive immediately using damp sponges. Install surrounding cut tiles, taking care to maintain level surfaces. Once everything is set, proceed with grouting using appropriate materials for marble applications. Apply penetrating sealer specifically designed for marble to protect the installation. This final step enhances durability and helps prevent staining. Benefits of Professional Installation Professional installation ensures medallions are properly leveled, centered, and sealed for maximum longevity. Experienced installers understand the nuances of working with natural stone and can avoid common mistakes that lead to cracking or uneven surfaces. At SF Marble & Granite Inc., our 10+ years of experience in Lowell means we understand local building codes and environmental factors that affect installations. Professional installation also includes proper surface preparation and post-installation care instructions that

Marble Medallion Installation: The Complete Guide for Beautiful Floor Centerpieces Read More »

how-to-install-a-marble-floor​

How to Install a Marble Floor: A Complete Guide for Beautiful Results

Installing a marble floor is a step-by-step process that involves preparing the surface, selecting the appropriate materials, laying the tiles correctly, and finishing with grouting and sealing. While it may seem challenging, anyone can achieve stunning results with proper planning, the right tools, and careful attention to detail. This comprehensive guide will walk you through every aspect of marble floor installation, from initial preparation to final maintenance, ensuring your project transforms your space into an elegant showcase. Marble flooring adds timeless beauty and luxury to any home, making it a popular choice for homeowners who want to create lasting impressions. Whether you’re renovating a bathroom, kitchen, or living area, understanding the proper tile installation process will help you avoid costly mistakes and achieve professional-looking results. Let’s explore how you can complete this rewarding home improvement project. Understanding Marble Floor Installation Basics What Makes Marble Special for Flooring Marble is a natural stone that offers unique beauty with its distinctive veining patterns and elegant appearance. Unlike other flooring materials, marble requires specific installation techniques because of its porous nature and sensitivity to certain chemicals. The stone’s natural characteristics make each piece unique, which is why proper planning and careful handling, whether for floors or a vertical shiplap feature wall, are essential for successful installation. Essential Tools and Materials You’ll Need Before starting your marble floor installation project, gather these important tools and materials: Basic Tools: Measuring tape and chalk line Notched trowel (3/16-inch recommended) Rubber mallet Tile spacers (1/8-inch) Wet saw with diamond blade Level and straight edge Sponges and clean cloths Materials Required: Marble tiles or slabs High-quality thin-set mortar suitable for natural stone Penetrating sealer for marble pH-neutral grout (preferably Mapei Flexcolor CQ) Cleaning supplies designed for natural stone Step-by-Step Marble Floor Installation Process Step 1: Surface Preparation and Planning The foundation of a successful installation of marble floor tile begins with proper surface preparation. Start by ensuring your subfloor is completely level, clean, and dry. Any bumps or dips in the surface will cause problems later, so use a leveling compound to smooth out imperfections. For concrete subfloors, make sure they have cured for at least 30 days to prevent moisture issues. Next, create a detailed layout plan by measuring your room carefully and calculating the total square footage. Add 5-10% extra tiles to account for cutting waste and future repairs. This planning stage is crucial for determining your marble floor pattern and ensuring you have enough materials to complete the project. Step 2: Finding the Center Point and Layout Lines Mark the center of your room by measuring the midpoint of opposite walls and drawing chalk lines to create a grid48. These reference lines will guide your tile placement and ensure your marble floor pattern looks balanced and professional. Starting from the center prevents you from ending up with awkwardly cut tiles along the most visible walls. Dry-lay several tiles along your reference lines to test your layout before applying any adhesive. This preview step allows you to make adjustments and ensures your pattern will work well in the space. Step 3: Applying Thin-Set Mortar Choose a high-quality thin-set mortar specifically designed for natural stone installation. Regular ceramic tile adhesives may not provide adequate support for marble’s weight and can cause discoloration. Mix your mortar according to the manufacturer’s instructions, preparing only what you can use within the working time. Apply the thin-set to small sections (about 2×2 feet) using your notched trowel. Create even ridges in the adhesive by holding the trowel at a 45-degree angle4. This technique ensures proper coverage and prevents air pockets that could cause tiles to crack later. Step 4: Setting the Marble Tiles Begin placing your marble tiles at the intersection of your chalk lines, working outward in small sections. Press each tile firmly into the mortar with a slight twisting motion to ensure good contact. Use only gentle pressure from your palms – avoid using rubber mallets as they can create small cracks that will grow over time. Insert tile spacers between each piece to maintain consistent gaps for grouting. Check that each tile is level with its neighbors using a straight edge, and make adjustments while the mortar is still workable. Remove any excess adhesive from the tile surface immediately, as it becomes very difficult to clean once it hardens. Step 5: Cutting Tiles for Edges and Obstacles When you reach walls, doorways, or other obstacles, you’ll need to cut tiles to fit. Use a wet saw with a diamond blade designed for natural stone to make clean, precise cuts. Measure each cut carefully and mark your cutting lines clearly before making any cuts. Always wear safety equipment, including eye protection and gloves, when cutting marble tiles. The wet saw helps prevent dust and reduces the risk of chipping, but proper technique is still essential for good results. Creating Beautiful Marble Floor Patterns Popular Pattern Options for Marble Floors The marble floor pattern you choose significantly impacts the overall look of your space. Some popular options include: Straight Lay Pattern: The simplest approach, where tiles are laid in straight rows, is perfect for beginners. This classic pattern works well in any room and makes spaces appear larger. Diagonal Pattern: Tiles are set at a 45-degree angle to the walls, creating visual interest and making rooms appear wider. This pattern requires more cutting but produces stunning results. Herringbone Layout: Rectangular tiles are arranged in a zigzag pattern that adds sophistication and movement to your floor. This pattern works especially well with longer marble tiles in a herringbone layout. Mosaic Patterns: Small marble pieces create intricate designs and artistic touches. These patterns require more time but offer unlimited creative possibilities. Tips for Pattern Success When planning your marble floor pattern, consider the size of your room and the tile dimensions. Larger patterns work better in spacious areas, while smaller patterns suit compact spaces. Remember that more complex patterns require additional cutting and planning time, so factor this into your project

How to Install a Marble Floor: A Complete Guide for Beautiful Results Read More »

shiplap backsplash in kitchen

How to Install Vertical Shiplap Backsplash: A Complete Guide

Installing a vertical shiplap backsplash in kitchen can transform your kitchen, adding texture, charm, and a modern farmhouse feel. This guide will walk you through every step, from planning and prep to finishing touches, to help you achieve a clean, professional-looking shiplap kitchen backsplash that suits your style. A vertical shiplap backsplash is not only visually appealing but also highly versatile. Whether your kitchen is small or spacious, the upward lines of vertical boards can create the illusion of taller ceilings and a more open space. It adds depth to your walls and pairs beautifully with both modern and rustic kitchen designs. Why Choose a Shiplap Backsplash? A backsplash shiplap is a stylish and practical choice for any kitchen, offering a clean, modern, and slightly rustic look. Its vertical lines create visual height, making smaller kitchens feel more open and spacious. Shiplap is also cost-effective, easy to install, and customizable through paint or finish. Whether you’re redesigning a full kitchen or doing a simple refresh, shiplap adds charm, warmth, and texture without breaking your budget. It brings warmth and character to a kitchen with its natural board lines and wood texture. Vertical orientation (as opposed to horizontal) can make a space feel taller, giving the illusion of higher ceilings. It is relatively simple to install and can be a budget-friendly way to upgrade your kitchen. Many DIYers use MDF or primed wood to cut costs. Once installed, it is easy to paint or caulk, giving a clean finish that works well behind cabinetry, sinks, or stoves. Can You Put Shiplap in a Kitchen? Absolutely. Shiplap in a kitchen is not only decorative but also practical when installed correctly. Many homeowners choose a shiplap backsplash because it delivers a clean, timeless look that blends well with modern, farmhouse, coastal, and traditional kitchen styles. When you prepare and seal the boards properly, shiplap becomes a durable surface that can handle daily cooking activities, occasional splashes, and regular cleaning. Shiplap is usually made from wood, MDF, or PVC, and all of these materials can work in a kitchen environment as long as they are protected with a quality primer, paint, and sealant. Once sealed, the surface becomes smooth and wipe-friendly, allowing you to clean grease or food stains with gentle household cleaners. Another reason shiplap works well in kitchens is its flexibility. You can install it behind sinks, around cabinets, next to stoves, or even across an entire accent wall. It also pairs nicely with open shelving and stone countertops, creating a balanced mix of texture and warmth. Homeowners who want a custom look without the high cost of tile often turn to shiplap. It provides the same level of visual interest but is easier to install and modify. If you ever want to repaint or refresh your kitchen, shiplap adjusts beautifully with new colors or finishes. In short, with the right materials and protective coating, a shiplap backsplash becomes a long-lasting, attractive, and budget-friendly option for any kitchen design.     Picking Out Vertical Shiplap for Your Kitchen Backsplash Choosing the right materials is essential for getting a clean, long-lasting, and visually appealing finish. Before you start, consider how each material will look, how it handles moisture, and how easy it is to install. The type of shiplap you choose can affect durability, cost, and the overall style of your kitchen. With the right selection, your vertical shiplap backsplash will look polished and stay beautiful for years. Material type Real wood: gives an authentic feel, but may expand or contract. Allow boards to acclimate to the room for a few days. MDF shiplap: smooth, primed, and more affordable. Often used in DIY kitchen backsplash projects. Pre-painted or primed boards: save time on finishing, especially in a backsplash area.  Board size and style Nickel-gap shiplap gives a clean, narrow reveal between boards. Tongue-and-groove vs. butt joint: tongue-and-groove provides tighter joints, while simpler styles may be cheaper.  Wall support For vertical installation, furring strips (such as 1 × 3 lumber) are often required, spaced regularly for a solid nailing surface. Ensure your wall (drywall or plaster) is sound and stable before beginning. Tools and Supplies You Will Need Before you begin installing a kitchen shiplap backsplash, it is important to gather every tool and material you will need. Having everything ready not only speeds up the process but also ensures your installation looks clean and professional. Start with a reliable stud finder, since locating studs is essential for securing your vertical boards. A long level, ideally four feet or more, helps keep each piece perfectly straight from top to bottom, which is especially important with vertical shiplap because even a small tilt becomes visible once several boards are installed. A measuring tape is another must-have since accurate measurements prevent gaps, misalignment, or wasted material. For cutting the shiplap boards, you may use a miter saw, circular saw, or table saw. Each one works well as long as you make clean, straight cuts. Most homeowners prefer a miter saw for speed and accuracy. To attach the boards, a brad nailer or finish nail gun with fifteen or sixteen-gauge trim nails creates a secure hold without large nail holes. Many installers also combine nails with construction adhesive for added strength, especially in areas where the wall may not have enough studs. For keeping the gaps perfectly even, simple items such as nickels or thin spacers work surprisingly well. Once the boards are up, wood filler or spackle is used to cover nail holes and achieve a smooth finish. After that, you will need paintable caulk and a caulk gun to seal edges, corners, and seams where the shiplap meets cabinets, countertops, or adjacent walls. If your boards are unfinished or only primed, you will need good-quality paint and possibly a primer. Sandpaper or a sanding block helps smooth rough cuts or edges before painting. Lastly, do not forget basic safety gear. Gloves protect your hands while handling wood, eye protection shields you from sawdust, and

How to Install Vertical Shiplap Backsplash: A Complete Guide Read More »

What-color-backsplash-is-timeless?

What Color Backsplash Is Timeless? A Guide to Enduring Kitchen Style

Home Choosing the right backsplash color is one of the most important decisions you’ll make for your kitchen. A timeless backsplash not only protects your walls but also elevates your kitchen’s design for decades. For homeowners in Lowell, MA, and surrounding areas, white, soft gray, beige, and muted earth tones are the most timeless backsplash colors. These shades blend seamlessly with any cabinet style, countertop material, or hardware finish, ensuring your kitchen always remains up-to-date. Let’s explore why these colors work and how to incorporate them into your space. Classic White Backsplashes: The Ultimate Timeless Choice White backsplashes have dominated kitchens for centuries, and for good reason. They reflect light, making small kitchens feel larger, and pair effortlessly with marble countertops, stainless steel appliances, or warm wood cabinets. Why White Works Versatility: White complements both modern and traditional designs. For example, a glossy white subway tile creates a clean, contemporary look, while hand-painted white Moroccan tiles add vintage charm. Resale Value: Homes with white kitchens sell faster in Lowell’s competitive market, as buyers see them as a blank canvas. Easy Maintenance: White quartz or ceramic tiles hide water spots more effectively than dark colors, making them a practical choice for busy families. At SF Marble & Granite, we often install white marble backsplashes paired with gray granite countertops, a combination that’s popular in Lowell’s historic homes and new builds alike. Neutral Tones: Subtle Sophistication That Lasts If pure white feels too stark, consider these neutral alternatives: 1. Soft Gray Backsplashes Gray bridges the gap between warm and cool palettes. A light gray mosaic tile adds texture without overwhelming the space, while charcoal gray slate creates dramatic contrast in white kitchens. 2. Warm Beige and Cream These earthy tones work beautifully with natural wood elements. A beige travertine backsplash pairs exceptionally well with oak cabinets, a common feature in Lowell’s Colonial-style homes. 3. Greige (Gray + Beige) This hybrid color has surged in popularity because it adapts to changing decor. Try beige porcelain tiles with a matte finish for a modern farmhouse aesthetic. Natural Stone Backsplashes: Timeless Texture Natural stone backsplashes offer unique veining and texture that manufactured materials can’t replicate, providing a distinct character much like the warm, natural appeal of a butcher block countertop. For a stunning backsplash in Lowell MA, natural stone is an excellent choice that combines beauty and durability. Just as butcher block brings rustic charm and functionality to kitchen surfaces, natural stone backsplashes add timeless beauty and depth, creating a perfect balance between elegance and organic texture. Marble Backsplashes While requiring annual sealing, marble’s classic beauty makes it a favorite. Carrara marble with soft gray veins is particularly timeless and pairs well with our granite countertops. Granite Backsplashes Matching your granite countertop to a granite backsplash creates a cohesive look. We recommend Absolute Black granite for a sleek, modern kitchen or Giallo Ornamental for warm traditional spaces. Slate Backsplashes Durable and heat-resistant, slate’s natural cleft surface adds depth. Green-gray slate works well in rustic Lowell kitchens with exposed beams. Subway Tiles: A Shape That Stands the Test of Time The classic 3″x6″ subway tile remains popular because of its clean lines and adaptability: White Glossy Subway Tile: Installed in a herringbone pattern, this adds visual interest to simple kitchens. Colored Subway Tiles: Soft sage green or pale blue tiles maintain a timeless feel when paired with white grout. Beveled Edge Subway Tiles: The subtle dimension elevates basic designs without dating them. For a local touch, consider Boston Brick subway tiles—a slightly larger format (4″x8″) that’s trending in Massachusetts homes. Timeless Backsplash Materials Beyond Tile 1. Stainless Steel Ideal for modern kitchens, stainless steel is durable and matches appliances. We recommend a brushed finish to hide fingerprints. 2. Glass Panels Tinted gray or bronze glass creates a seamless, easy-to-clean surface. Frosted glass is a smart choice for backsplashes behind open shelving. 3. Natural Wood While unconventional, vertical oak planks sealed with food-grade epoxy add warmth to white kitchens. This works particularly well in Lowell’s farmhouse-style homes. Trends to Avoid for a Timeless Look While these styles are currently popular, they risk dating your kitchen: Overly Bold Colors: Neon green or bright orange tiles may feel outdated quickly. Excessively Large Patterns: Busy geometric prints can overwhelm small kitchens. Fad Textures: Heavily 3D tiles or ultra-glossy finishes lack staying power. Instead, opt for subtle textures like honed granite or leathered quartz—materials we stock extensively at our Lowell showroom. Maintaining Your Timeless Backsplash Proper care ensures your backsplash stays beautiful: Daily Cleaning: Use pH-neutral cleaner on natural stone to avoid etching. Grout Protection: Apply a penetrating sealer annually, especially behind stoves. Damage Repair: Chipped tiles? Our team can replace individual units without redoing the entire backsplash Transform Your Kitchen with Professional Backsplash Installation in Lowell, MA Ready to bring your timeless backsplash vision to life? At SF Marble & Granite Inc., our expert team specializes in precise and beautiful backsplash installation for kitchens across Lowell and the surrounding areas. Whether you’ve chosen classic white subway tile, elegant marble, or a neutral stone that never goes out of style, we handle every detail from careful measurement to flawless finishing. Let us help you create a kitchen that’s both stylish and practical, with a backsplash that stands the test of time. Contact us today to schedule your backsplash installation and see the difference professional craftsmanship makes! Get a Free Quote Conclusion A timeless backsplash color acts as the foundation for a kitchen that evolves with your style. By choosing neutral tones, quality natural stone, or classic subway tiles, you create a space that feels fresh year after year. At SF Marble & Granite Inc., we’ve helped hundreds of Lowell homeowners select and install backsplashes that balance beauty and practicality. Whether you prefer the crispness of white marble or the warmth of beige travertine, our team ensures precise fabrication and installation, because true timelessness comes from expert craftsmanship. FAQs Will a white backsplash look dirty quickly? Not if you choose the right

What Color Backsplash Is Timeless? A Guide to Enduring Kitchen Style Read More »

backsplash-with-butcher-block

Integrating Butcher Block Countertops with Backsplash Designs: A Comprehensive Guide

Home Butcher block countertops paired with strategic backsplash designs create warm, functional kitchens that balance rustic charm with modern practicality. This combination has become increasingly popular in Lowell homes, offering durability for meal preparation while serving as a focal point of design. For over a decade, SF Marble & Granite Inc. has specialized in crafting seamless integrations between natural stone surfaces and complementary backsplash materials, helping homeowners achieve kitchens that blend aesthetic appeal with everyday functionality. The Functional Synergy of Butcher Block and Backsplash Heat Resistance and Surface Protection Butcher block’s natural wood surface requires protection from moisture and heat damage in areas near cooking. A properly installed backsplash acts as a protective barrier, particularly behind stovetops where: Splattering oils can degrade untreated wood over time Steam exposure might warp countertop edges Direct heat from pans risks surface scorching Tile or stone backsplashes extending 4-6 inches above the counter provide essential protection while maintaining visual continuity. Our Lowell workshop recommends using heat-resistant materials like ceramic subway tiles or quartz panels in these high-risk zones. Hygienic Food Preparation Surfaces The USDA recommends non-porous surfaces within 18 inches of food prep areas. While properly sealed butcher block meets food safety standards, adding an easy-clean backsplash  creates additional protection: Glass tile backsplashes resist bacterial growth with simple wipe-downs Stainless steel panels offer commercial-grade sanitation Epoxy resin coatings create seamless, germ-resistant surfaces Our fabricators combine food-safe sealants with antimicrobial grout lines and can also incorporate shiplap elements to create hygienic kitchen spaces that meet Massachusetts health codes. Material Compatibility Considerations Thermal Expansion Management Wood countertops expand/contract with seasonal humidity changes. Professional installation accounts for: Material Pairing Expansion Gap Recommended Grout Type Ceramic Tile 1/8″ Sanded Natural Stone 1/4″ Unsanded Metal Panels 3/16″ N/A (Silicone caulk) Our Lowell team uses compression clips and flexible sealants to prevent cracking while maintaining a clean aesthetic, making us the top choice for those searching for butcher block countertops near me Visual Harmony Techniques Create cohesive designs through:Color Bridging Match the grout color to the wood grain tones Use veined stone that echoes butcher block patterns Texture Layering Pair leathered granite backsplashes with wire-brushed oak Combine glossy ceramic tiles with oil-finished maple Profile Alignment Match countertop edge detailing to backsplash trim Continue material patterns vertically from the surface to the wall Installation Best Practices Substrate Preparation Apply a waterproof membrane over the wall studs Install cement backer board with corrosion-resistant screws Seal edges with alkaline-resistant mesh tape We recommend leaving expansion channels behind vertical surfaces to accommodate wood movement, notes John Smith, lead installer at SF Marble & Granite. Sealing and Maintenance Our process includes: Food-grade mineral oil pretreatment Three coats of marine-grade polyurethane Annual resealing inspections Maintenance checklist: Wipe spills immediately with pH-neutral cleaner Re-oil surfaces quarterly using our specialty conditioner Inspect sealant joints biannually Cost-Effective Design Solutions Material Cost/Sq.Ft Durability Rating Ceramic Subway Tile $2.50-$5 8/10 Peel-and-Stick Vinyl $1-$3 6/10 Painted Hardboard $0.75-$2 5/10 Budget-Friendly Pairings DIY enthusiasts, Home Depot carries our recommended Butcher Block Oil and sealing kits. Luxury Upgrades Back-painted glass with custom etchings Integrated LED lighting channels Magnetic spice racks embedded in stainless panels Professional Installation of Backsplash with Butcher Block Kitchens in Lowell, MA Ready to elevate your kitchen with a stunning backsplash that perfectly complements your butcher block countertops? At SF Marble & Granite Inc., our expert team specializes in Backsplash Installation for all styles, from classic subway tiles to modern stone designs. We handle every detail, ensuring a seamless fit that protects your walls and enhances your kitchen’s beauty. Whether you’re renovating or starting fresh, trust our experienced installers in Lowell, MA, to deliver craftsmanship you can see and durability you can count on. Let us help you create a kitchen you’ll love for years to come. Contact us today for your free consultation! Conclusion Butcher block and backsplash combinations offer endless possibilities for personalized kitchen design. At SF Marble & Granite Inc., we combine decade-long expertise with premium materials to create spaces that age gracefully. Visit our Lowell fabrication center to explore samples and discuss your project with our certified design team. FAQs Can I install a backsplash directly on a butcher block? While possible, we recommend wall-mounted installations to allow for wood movement. Direct adhesion risks cracking during seasonal expansion. How often should I reseal my countertop? High-use areas need resealing every 6-12 months. Our maintenance program includes annual inspections and touch-ups. What’s the best grout for kitchen backsplashes? Epoxy grout provides superior stain resistance, though regular cement grout works well when properly sealed. Can you match existing cabinet colors? Yes! Bring paint samples to our Lowell showroom for custom color-matching services.

Integrating Butcher Block Countertops with Backsplash Designs: A Comprehensive Guide Read More »

Scroll to Top