
Dull, scratched, chalky-looking floors are frustrating, especially when the tile underneath is genuinely beautiful. Travertine loses its shine faster than most homeowners expect, usually within a year or two of daily foot traffic. That fading finish isn’t a sign the stone is ruined. It’s a sign the surface needs attention.
Here’s the quick answer: a worn travertine floor gets its shine back through cleaning, honing, and polishing with the right pads and sealant, done in the correct order. This guide walks through each step, the tools that actually matter, and the mistakes that shorten a floor’s life. Unlocking the beauty of travertine tile isn’t a one-time event either. It’s a process you repeat every few years to keep the stone looking the way it did on installation day.
Understanding the Importance of Polishing
Polishing matters because travertine is a porous, soft stone that dulls with normal use. Foot traffic, grit, and cleaning chemicals wear down the surface layer over time. Polishing removes that damaged layer and restores the reflective finish the stone had when it was first cut and honed at the factory.
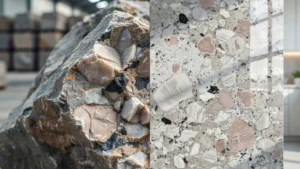
Travertine tile flooring has thousands of tiny natural holes, called pores, formed by mineral deposits and gas bubbles when the stone was created. Those pores fill with dirt and grime over time, which flattens the shine and makes the surface look tired. A proper polish doesn’t just make the floor shinier for a photo. It removes scratches, restores the honed or polished finish, and helps the sealant do its job going forward.
Skipping this step doesn’t just cost you looks. Etch marks from acidic spills, like wine or citrus juice, sit permanently in unpolished stone. Grout lines darken faster. And the natural travertine tile you paid a premium for starts to look like a much cheaper material within a few years.
Materials and Tools You’ll Need for Polishing Travertine Tile
You don’t need a professional workshop to do this job, but you do need the right supplies. Skimping on tools is the fastest way to scratch the stone instead of restoring it.
Here’s what to have on hand before you start:
- Diamond polishing pads (multiple grits, from coarse to fine)
- A variable-speed floor buffer or polisher
- Travertine-safe stone cleaner (pH-neutral, never acidic)
- Soft microfiber cloths
- A wet/dry vacuum
- Stone sealant rated for porous natural stone
- Knee pads and safety goggles
Skip anything labeled as an all-purpose tile cleaner. Most contain acids or ammonia that eat into travertine’s surface. If a product doesn’t specifically say it’s safe for natural stone, leave it on the shelf.
Preparation Steps for Polishing Travertine Tile
Preparation means clearing the floor, deep cleaning it, and letting it dry fully before any polishing begins. Skipping prep traps dirt under the polishing pad, which scratches the stone instead of smoothing it. A clean, dry surface is what lets the polish actually bond and shine correctly.
Start by clearing the room of furniture and rugs. Sweep or vacuum the floor thoroughly, paying close attention to corners and grout lines where grit tends to hide. That grit is abrasive, and it’s the number one cause of fresh scratches during polishing.
Next, mop with a pH-neutral stone cleaner and let the floor dry completely. This usually takes a few hours depending on humidity in your home. Check for cracked tiles or damaged grout now, since polishing won’t fix structural issues. Repair those first.
If you’re working on a floor that was recently laid, confirm the travertine tile installation has fully cured before polishing. Grout and sealant need time to set, often 48 to 72 hours, and polishing too early can pull grout out of the joints.
The Polishing Process
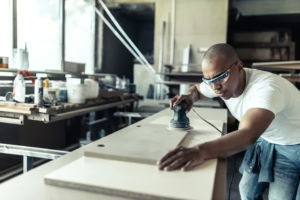
Polishing travertine works in stages, moving from coarse abrasives to fine ones, similar to sanding wood before staining it. Each pad grit removes a slightly finer layer of the stone’s surface, gradually building up shine instead of forcing it all at once.
Most homeowners try to jump straight to a high-grit polishing pad, expecting instant results. That approach usually leaves the floor looking patchy, with some tiles shinier than others. The stone needs to be leveled first, then refined, and only then polished to a full shine.
Working in small sections, roughly four feet by four feet, keeps the process manageable and consistent. Trying to polish an entire room in one pass leads to uneven pressure and missed spots.
Choosing the Right Polishing Pads
The right polishing pads for travertine are diamond-impregnated pads, moving from a low grit (like 50) up to a high grit (3000 or more). Lower grits strip away scratches and old sealant. Higher grits build reflective shine. Skipping grits in between leaves visible swirl marks on the finished floor.
Wet pads work best for travertine because they keep dust down and reduce friction heat, which can crack or discolor the stone. Dry pads exist, but they’re better suited to smaller touch-up jobs rather than full-room polishing.
Buy pads specifically rated for marble and travertine rather than generic concrete polishing pads. The diamond grit size and bond hardness differ, and using the wrong type either does nothing or gouges the surface.
Step-by-Step Polishing Instructions
- Wet the section you’re working on with clean water, keeping the surface consistently damp throughout.
- Attach the lowest grit pad to your buffer and run it over the section in overlapping passes.
- Rinse and inspect the area for remaining scratches or dullness before moving to the next grit.
- Repeat with each grit, working up through the sequence until you reach the highest one.
- Wipe the floor dry with microfiber cloths once the final pass is complete.
- Let the floor rest for a few hours before applying sealant.
- Apply a penetrating sealant in thin, even coats, following the product’s dry time between coats.
- Buff lightly with a soft pad once the sealant cures to bring out the final shine.
Each pass should take roughly the same amount of pressure and speed. Rushing one section while slowing down on another creates an uneven, patchy finish that’s obvious once the whole floor dries.
Maintaining the Shine of Polished Travertine Tile
Keeping polished travertine tile shiny long term comes down to sweeping regularly, using pH-neutral cleaners, and resealing every one to two years. Grit is the enemy of shine, since it acts like sandpaper under foot traffic. Consistent, gentle care protects the polish far longer than any one-time treatment.
Sweep or dry-mop daily in high-traffic areas like kitchens and entryways. Wipe up spills immediately, especially anything acidic like coffee, wine, or fruit juice, since those etch the surface within minutes on unsealed spots.
Reapply sealant on a schedule rather than waiting until water stops beading on the surface. By the time you notice water soaking in instead of beading, the sealant has already worn thin. Travertine tile maintenance works best as routine upkeep, not emergency repair.
Use furniture pads under chair and table legs. Dragging furniture across polished stone is one of the quickest ways to scratch a finish that took hours to restore.
Common Mistakes to Avoid When Caring for Polished Travertine Tile
Even careful homeowners make a few predictable errors with travertine. Knowing them ahead of time saves both money and a lot of frustration.
- Using vinegar or citrus-based cleaners. These are acidic and will etch the stone almost instantly, leaving dull spots that no amount of mopping fixes.
- Skipping the sealant reapplication schedule. Unsealed travertine tile flooring absorbs stains and moisture, which leads to discoloration and, eventually, mold in grout lines.
- Polishing without leveling first. Jumping straight to a fine grit pad without the coarser steps leaves scratches trapped under a glossy surface.
- Ignoring grout condition. Cracked or missing grout lets water seep underneath tiles, which can cause lifting or cracking over time.
- Using steam mops. The heat and moisture can force water into the stone’s pores and weaken the sealant bond.
Avoiding these five issues extends the life of a polish job by years rather than months.
Travertine Tile Flooring vs Other Natural Stone Options
Homeowners comparing travertine to marble or granite often assume the maintenance is identical. It isn’t. Travertine is softer and more porous than granite, which means it scratches more easily but also polishes back to a shine more readily with basic tools.
Marble shares some of travertine’s softness and etching risk, but travertine’s natural pitted texture gives it a more rustic, textured look straight out of the quarry. That texture is part of the appeal for many buyers, though it does mean more surface area for dirt to settle into if the floor isn’t sealed properly.
Granite, by comparison, is far less porous and holds up better to daily wear without sealing as often. If low maintenance is the top priority, granite wins that comparison. If the warm, aged look of natural stone matters more, travertine tile remains a common choice for entryways, bathrooms, and outdoor patios.
When to Call a Professional
Some jobs are worth handing off. Deep etching across an entire floor, structural cracks, or tiles that have shifted usually need a professional grade grinder and years of hands-on experience to fix without causing more damage.
The same logic applies to other stone surfaces in the home. A kitchen island or bathroom vanity often benefits from the same kind of professional attention travertine floors need, particularly during a renovation. If you’re in the area and planning a project, SF Marble and Granite also handles Granite Countertop Installation in Lowell, alongside natural stone floor restoration, for homeowners who want the work done once and done right.
How to Request a Free Consultation:
- Call: Contact us by phone at 978-459-5823 to speak directly with our knowledgeable team and schedule a convenient consultation time.
At SF Marble And Granite Inc, we’re dedicated to helping you achieve your design goals and create stunning spaces with the timeless beauty of travertine tile and other natural stone surfaces. Contact us today for your free consultation, and let’s embark on your next project together.
Conclusion
Travertine tile stands as a testament to the enduring beauty of natural stone. Its rich colors, intricate patterns, and timeless appeal make it a sought-after choice for homeowners and designers alike. By understanding the importance of polishing and following the proper steps, you can elevate the look of your travertine tile to new heights.
Remember, whether you choose wet or dry polishing, selecting the right polishing pads and following a systematic approach are key to achieving that coveted shine. Moreover, regular maintenance, including proper cleaning techniques and stain removal practices, will help you preserve the elegance and longevity of your polished travertine tile.
Avoiding common mistakes in travertine care is equally crucial. By steering clear of harsh chemicals, addressing damages before polishing, and maintaining a consistent sealing regimen, you can safeguard your investment and enjoy the luster of your travertine tile for years to come.
FAQs
How often should travertine tile be polished?
Most residential travertine floors need a full polish every three to five years, depending on foot traffic. High-traffic areas like entryways or kitchens may need attention closer to the three-year mark, while low-traffic rooms can often wait longer.
Can I polish travertine tile myself?
Yes, with the right pads, a buffer, and patience, most homeowners can polish travertine tile themselves. Larger rooms or heavily etched floors are usually better left to a professional with commercial-grade equipment.
What’s the difference between honed and polished travertine?
Honed travertine has a flat, matte finish, while polished travertine has a glossy, reflective surface. Both start from the same stone, and travertine tile installation crews can typically convert one finish to the other with the right grinding process.
Does travertine tile need to be sealed?
Yes, sealing is one of the most important steps in travertine tile maintenance. The stone’s natural pores absorb liquids without a sealant, which leads to staining and, over time, structural weakening around grout lines.
Is travertine tile a good choice for bathrooms?
Travertine works well in bathrooms as long as it’s properly sealed, since sealed stone resists the moisture and humidity common in those spaces. Unsealed travertine in a bathroom absorbs water quickly and is more prone to staining and mildew.