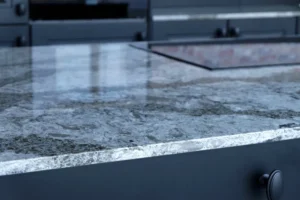
Are you ready to upgrade your kitchen or bathroom with luxurious granite countertops? Look no further! In this comprehensive guide, we’ll walk you through the step-by-step process of installing granite countertops with ease. From planning and preparation to the finishing touches, you’ll learn everything you need to know to tackle this project like a pro.
At SF Marble And Granite Inc., we take pride in delivering top-notch craftsmanship and superior quality products to our clients. With years of experience in the industry, our team of experts is here to ensure your granite countertops installation exceeds your expectations. Let’s dive in and transform your space with the timeless elegance of granite countertops!
How to Install Granite Countertops?

Granite countertop installation is a satisfying project that can improve your kitchen or bathroom’s appearance and usability. For a successful installation, adhere to these detailed instructions:
Prepare the Workspace
- Clear the area where the countertops will be installed, removing any appliances, furniture, or debris.
- Ensure that the cabinets and base are sturdy and level to provide adequate support for the granite.
Gather Materials and Tools
- Gather all necessary materials, including the granite slab, adhesive, shims, and support brackets.
- Ensure you have the appropriate tools on hand, such as a level, tape measure, drill, and caulking gun.
Measure and Cut the Granite
- Measure the dimensions of the countertop space accurately, allowing for any overhang or edge details.
- Use a diamond blade wet saw to cut the granite slab to size, following your measurements precisely.
Install the Granite
- Apply a thin layer of adhesive to the top of the cabinets, then carefully lower the granite slab into place.
- Use shims to adjust the slab as needed to ensure it is level and properly aligned with the cabinets.
- Secure the granite in place using support brackets attached to the underside of the countertop.
Seal and Finish
- Once the granite is securely in place, apply a penetrating sealer to protect the surface from stains and moisture.
- Caulk the seams between the granite and walls or backsplash to create a seamless finish.
With careful planning and attention to detail, you can achieve professional-looking results when installing granite countertops in your home. If you’re unsure about tackling this project yourself, consider hiring a professional installer for peace of mind.
Planning Your Granite Countertop Installation
Before diving into your granite countertop installation project, it’s crucial to have a solid plan in place. Follow these essential steps to ensure a smooth and successful process:
Assess Your Space
Begin by carefully measuring the area where you intend to install your granite countertops. Take note of any obstacles or irregularities that may affect the installation process.
Choose the Right Granite Slab
Selecting the perfect granite slab is key to achieving the desired look for your space. Consider factors such as color, pattern, and durability to find the ideal match for your kitchen or bathroom.
Take Accurate Measurements
Once you’ve chosen your granite slab, double-check your measurements to ensure accuracy. This will help avoid costly mistakes and ensure a seamless installation process.
By taking the time to plan out your granite countertop installation, you’ll set yourself up for success and create a stunning focal point for your home.
Gathering Materials and Tools
Before beginning your granite countertop installation project, it’s essential to gather all the necessary materials and tools. Here’s what you’ll need:
Materials
Granite slab – Ensure it’s the correct size and thickness for your space.
Adhesive – Choose a high-quality adhesive specifically designed for bonding granite.
Shims – These will help you adjust the level and alignment of the granite slab.
Support brackets – These are essential for providing additional support and stability to the countertop.
Penetrating sealer – Protects the granite surface from stains and moisture.
Caulk – Used to seal the seams between the granite and walls or backsplash.
Tools
Tape measure – For accurate measurements of the countertop space.
Level – Ensures the granite slab is installed evenly and level.
Wet saw with a diamond blade – Used to cut the granite slab to size.
Drill – Needed for attaching support brackets and other hardware.
Caulking gun – Dispenses caulk smoothly and evenly for a professional finish.
By gathering all the necessary materials and tools before you begin, you’ll streamline the installation process and ensure you have everything you need to achieve beautiful results.
Preparing Your Kitchen or Bathroom
Proper preparation of your kitchen or bathroom is essential before installing granite countertops. Follow these steps to ensure a smooth and successful installation process:
Clear the Workspace
- Remove any items from the countertops, including appliances, dishes, and decor.
- Clear out the cabinets below the countertops to provide easy access for installation.
Clean the Surfaces
- Thoroughly clean the existing countertops and surrounding areas to remove dirt, grease, and debris.
- Ensure that the walls and backsplash are clean and free of any obstructions.
Check for Stability
- Inspect the cabinets and base to ensure they are sturdy and level.
- Make any necessary repairs or adjustments to provide a solid foundation for the granite countertops.
Create a Support System
- Determine the best method for supporting the granite slab, whether it’s using support brackets or additional reinforcements.
- Install support brackets securely to the underside of the cabinets to provide adequate support for the weight of the granite.
Protect Surrounding Surfaces
- Use drop cloths or cardboard to protect the floors and surrounding areas from dust and debris during the installation process.
- Cover any nearby appliances or fixtures to prevent damage or staining.
By properly preparing your kitchen or bathroom before installing granite countertops, you’ll ensure a seamless and hassle-free process that results in a stunning finished product.
Installing Your Granite Countertops: A Step-by-Step Guide
Are you ready to elevate the look of your kitchen or bathroom with stunning granite countertops? Installing granite countertops can be a rewarding DIY project, but it requires careful planning and execution. In this guide, we’ll walk you through the step-by-step process to ensure a successful installation.
Step 1: Preparing the Workspace
Before you begin, clear out your kitchen or bathroom to provide ample space for the installation. Remove any items from the countertops and cabinets, and protect surrounding surfaces with drop cloths or cardboard to prevent damage. Ensure that the cabinets are sturdy and level to provide a solid foundation for the granite.
Step 2: Positioning the Granite Slab
Carefully lift the granite slab onto the cabinets, ensuring it fits snugly against the walls and edges. Use shims to adjust the level and alignment of the slab as needed. Take your time with this step to ensure the slab is positioned correctly before proceeding.
Step 3: Applying Adhesive
Once the slab is in position, it’s time to apply adhesive to the top of the cabinets. Use a high-quality adhesive designed specifically for granite countertops, and spread it evenly using a trowel or putty knife. Be sure to follow the manufacturer’s instructions for proper application.
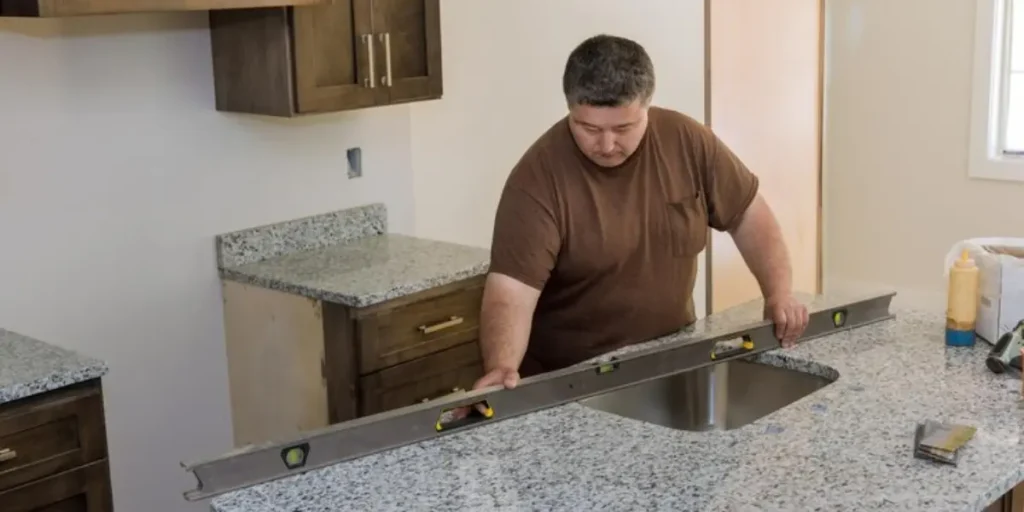
Step 4: Checking for Level and Alignment
Use a level to check that the granite slab is perfectly level from front to back and side to side. Make any necessary adjustments using shims to ensure the slab is level and aligned with the cabinets. This meticulous attention to detail will ensure a flawless finish.
Step 5: Sealing the Seams
Finally, seal the seams between the granite and walls or backsplash with silicone caulk to create a watertight seal. Smooth the caulk with a damp cloth or finger for a clean, finished look. This will not only enhance the appearance of your countertops but also protect them from water damage.
Conclusion
In conclusion, installing granite countertops is a rewarding project that can enhance the beauty and functionality of your kitchen or bathroom. By following the step-by-step guide outlined in this blog post, you can confidently tackle this DIY project and achieve professional-quality results. Remember to take your time, pay attention to detail, and seek guidance from a professional if needed. With proper planning and execution, you’ll be enjoying your stunning granite countertops in no time.
Ready to transform your space with beautiful granite countertops? Contact us today for expert installation services. Email us at sfmarbleangranite@gmail.com or visit our showroom at 755 Dutton St. Lowell, MA 0185MA4. You can also reach us by phone at 978-459-582. Let us help you bring your vision to life!
FAQs
What tools do I need for DIY granite countertop installation?
Some essential tools for DIY granite countertop installation include a tape measure, level, wet saw with a diamond blade, drill, caulking gun, and trowel. It’s also crucial to have safety gear such as gloves and goggles.
How long does it take to install granite countertops?
The duration of granite countertop installation can vary depending on factors such as the size of the space, complexity of the project, and whether it’s being done professionally or DIY. On average, installation can take anywhere from a few hours to a couple of days.
How much does it cost to install granite countertops?
The cost of installing granite countertops can vary depending on factors such as the size of the space, type and quality of granite chosen, additional materials needed, and labor costs. On average, expect to pay between $50 to $200 per square foot for installation.