Tiling with Natural Stone: A Complete Guide to Choosing, Installing, and Maintaining Your Stone Tiles
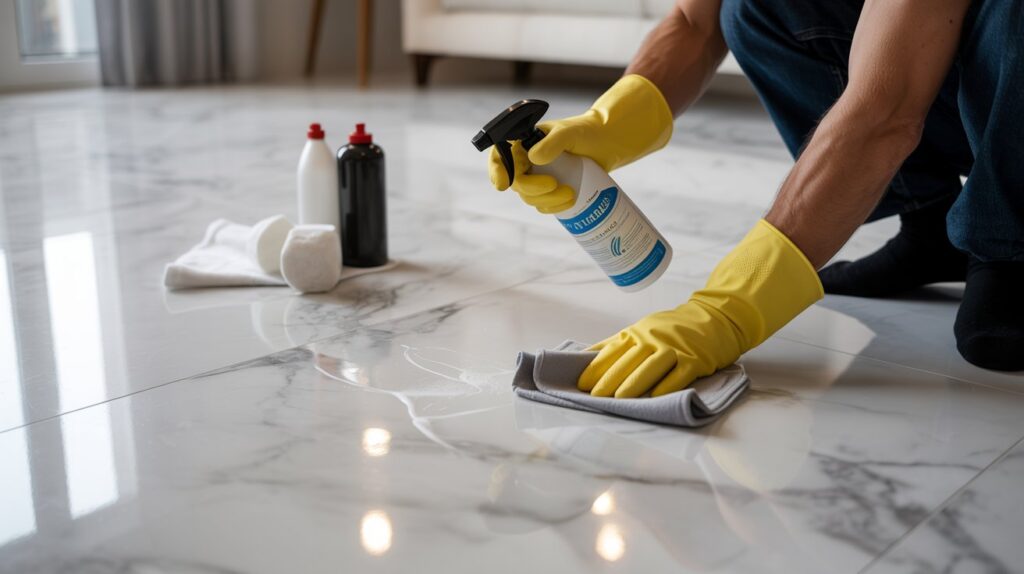
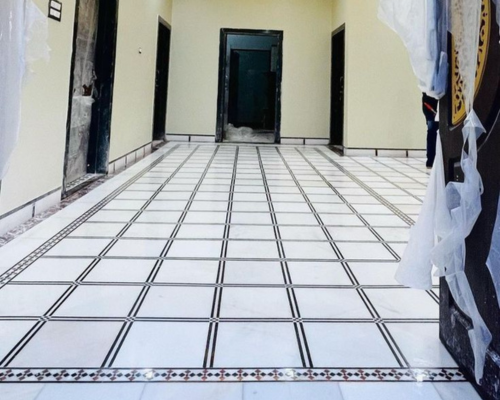
Tiling with natural stone is a rewarding choice that brings luxury, durability, and a unique aesthetic to your space. In this article, you will find detailed guidance on selecting the right stone, preparing for installation, executing the tiling process, avoiding common mistakes, and caring for your finished surface to ensure it lasts for years. What Is Natural Stone Tile? Natural stone tiles are quarried, cut, and finished from stone materials such as marble, granite, limestone, travertine, slate, and sandstone used for floors, walls, countertops, and other surfaces. Unlike man-made materials like porcelain or ceramic, natural stone has unique variations in colour, veining, and texture because it comes from the earth. Because of these inherent materials and characteristics, tiling with natural stone requires special considerations, from structural support to sealing and maintenance. Types of Natural Stone and Their Uses When you are tiling with natural stone, it is crucial to know which type suits your particular area, traffic level, moisture exposure, and design intent. Here are some common stone types and their typical applications: Marble: This stone is prized for its distinctive veining and elegance. It works beautifully in bathrooms, feature walls, and lighter-traffic areas. However, it is softer and more prone to scratching and etching by acidic substances. Granite: Highly durable and less porous than many other stones, granite is an excellent choice for kitchens, hallways, countertops, and other busy spaces. Limestone: Offers a softer, more rustic look. It is porous and may require more maintenance, so best suited for moderate-traffic areas or outdoor covered spaces. Travertine: Recognisable by its natural voids and pitting, travertine gives a warm, textured look. It must often be filled and carefully sealed. Slate: Dense and often more moisture-resistant, slate is suitable for indoor and outdoor use, including patios, but the surface can be uneven and may need more preparation. Sandstone/Quartzite: These are often used outdoors or in areas where rugged performance is needed. They typically require a strong substrate and good sealing. When tiling with natural stone, you should evaluate the stone’s hardness, porosity, thickness, finish, and expected variation from tile to tile. These factors will influence installation ease, maintenance demands, and long-term performance. How to Choose the Right Stone for Your Space Selecting the right material is half the battle when tiling with natural stone. Consider the following criteria: 1. Location and traffic Ask yourself: Is this a floor, wall, countertop or outdoor patio? High-traffic areas such as hallways or commercial zones benefit from tougher stones like granite or slate. Softer stones may work better in bathrooms or feature walls. 2. Moisture exposure and environment Moisture and temperature fluctuations affect natural stone differently than ceramic. In wet zones or outdoors, you want a stone with low absorption and you must ensure good substrate and waterproofing. 3. Finish and aesthetic Polished, honed or tumbled finishes each have distinct appearances and maintenance demands. Polished stone shows scratches and water spots more easily. Honed and tumbled finishes can be more forgiving. 4. Variation and batch consistency Because stone is a natural product, you will see variation in thickness, colour and pattern. Always order extra material (typically 10–15% more) to allow for cuts, waste, and variation. 5. Budget and lifecycle Natural stone often costs more upfront compared with ceramic or porcelain, but with proper installation and care, it can last for decades. 6. Substrate and support Stone tiles are heavier and less tolerant of flexible substrates. Ensure the floor or wall structure is adequately strong and stable. By matching your stone type to the specific demands of your space and usage, you set the stage for a successful tile project. Planning and Preparation Before Installation Before the first tile is laid, thorough planning and preparation will make all the difference when tiling with natural stone. Some of the key steps include: Substrate assessment and preparation Check that floors or walls are level, stable, and correctly cured if new (e.g., new concrete or screed). Replace unsuitable backer systems (e.g., plasterboard for stone), especially when wall-tiling. For floors: ensure dead load and structural stiffness are adequate. Stone tiles often require more support than ceramic tiles. Layout and tile selection Randomly mix tiles from several crates to distribute variation evenly. Arrange the layout for visual balance, considering edges, cuts, focal points, and grout lines. Buy extra tile to account for cuts and future repairs. Choosing adhesives, mortars, and grouts Use adhesives rated for natural stone—often white cement-based (for light stones) and specially formulated to reduce pigmentation or staining. Avoid “dot and dab” methods. A full bed of adhesive behind the tile is crucial to avoid voids, cracking, or unevenness. Select grout compatible with natural stone: colour matched, stain-resistant, with correct joint width allowances for variation. Allowance for movement and thermal expansion Movement joints must be incorporated at edges, changes in substrate, or where heating is present. Sealing and protecting Many natural stone types must be sealed prior to grouting to prevent “picture framin,g” where grout darkens the edges of a tile. Ensure tile backs are clean, dry, and free from dust or contaminants prior to fixing. Proper planning this way increases the chances that your project yields a smooth, long-lasting surface. Step-by-Step Installation for Natural Stone Here is an enhanced installation guide for tiling with natural stone, reflecting the specialised processes required. Prepare the substrate: Confirm the surface is clean, dry, flat, appropriate for stone, and has the correct substrate or underlayment. Dry-lay tiles for mock-up: Without adhesive, place a portion of tiles to check variation, placement, pattern, and edge alignment before committing to glue. Apply adhesive: Use the correct adhesive for stone. Spread a full bed with a notched trowel, then “back-butter” the tile (apply a thin coat to the back as well) to ensure full contact and no voids. Set tiles: Press each tile firmly, check the level frequently, and keep grout joints even. Work out from a fixed datum and maintain consistent spacers. Cut and fit tiles: Use a wet saw with a diamond blade to