S F Marble & Granite

Marble and Granite

Laminate Countertops vs Granite: Best Choice?

Laminate Countertops vs Granite: What’s Better?

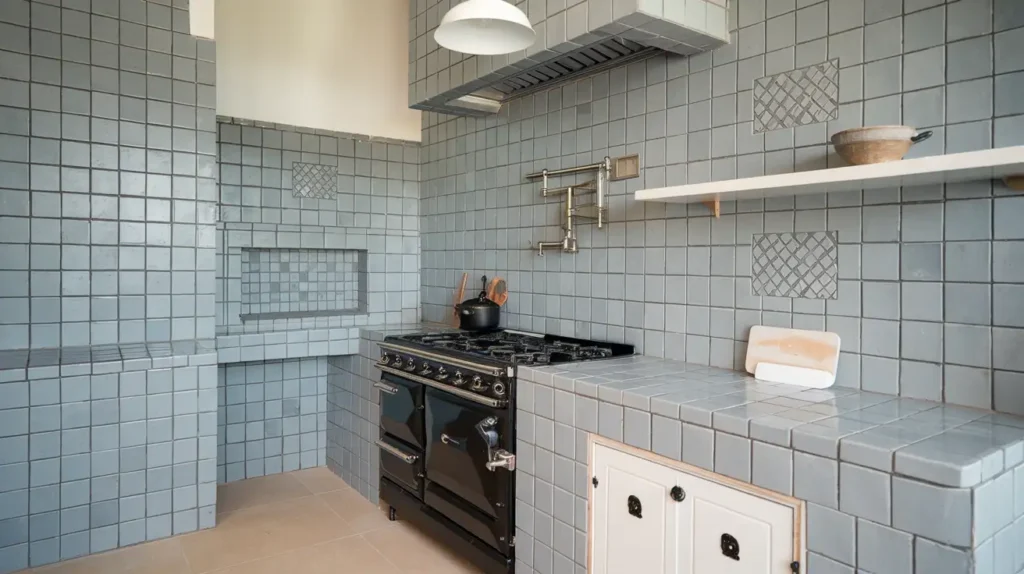
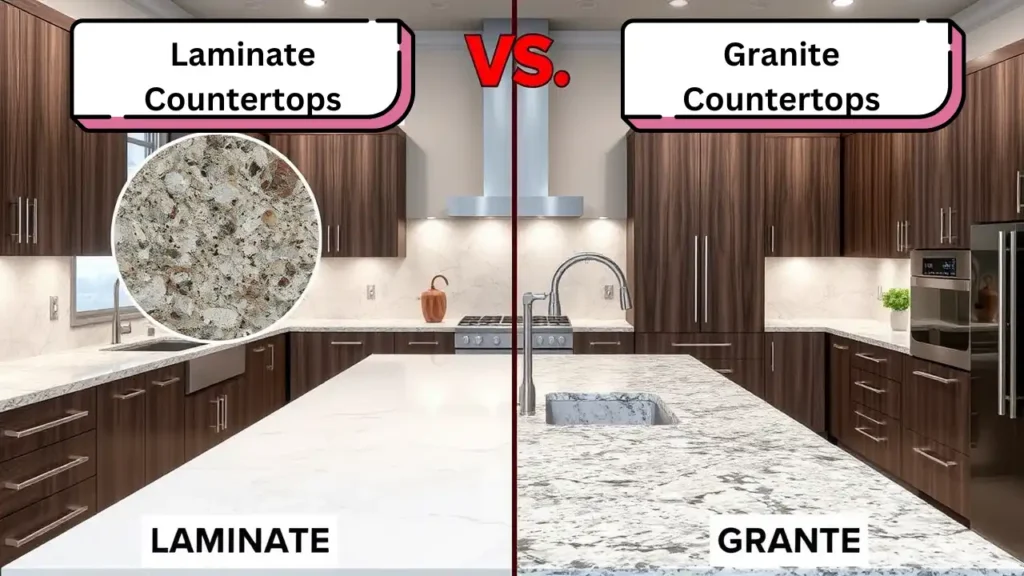
Home / Countertops play a crucial role in both the functionality and aesthetics of a kitchen or bathroom. They serve as a daily workspace for meal prep, cooking, and other household tasks while enhancing the space’s overall design. With so many options available, selecting the right material can be challenging, especially when considering durability, cost, and maintenance. When comparing laminate countertops vs granite, homeowners often debate between affordability and long-term value. Laminate offers a budget-friendly solution with various styles, including designs that mimic natural stone. On the other hand, granite is known for its timeless appeal, durability, and ability to increase home value. But which one is the better choice for your needs? Let’s break down the key differences to help you decide. What is Laminate? Laminate countertops are a popular choice for homeowners looking for an affordable yet stylish surface option. These countertops are made by layering sheets of plastic resin and decorative paper over a core material, usually particleboard or MDF (medium-density fiberboard). The result is a lightweight, durable, and budget-friendly alternative to natural stone. One of the biggest advantages of laminated countertops is their wide range of colors and patterns, including realistic stone-like designs that closely resemble high-end materials like granite and marble. The manufacturing process of laminate counters involves high-pressure bonding, where heat and pressure fuse the layers to create a smooth, durable surface. Thanks to advancements in technology, you can now find laminate countertops that look like granite, offering the aesthetic appeal of natural stone without the hefty price tag.  However, while laminate is resistant to stains and easy to clean, it is not as heat or scratch-resistant as granite. This makes it a great option for homeowners on a budget who want stylish, low-maintenance surfaces, but those seeking long-term durability may still consider laminate or granite countertops, depending on their needs. What is Granite? Granite is a natural stone formed over millions of years through the slow crystallization of magma beneath the Earth’s surface. Composed mainly of quartz, feldspar, and mica, granite is known for its stunning patterns, rich color variations, and exceptional durability. Unlike manufactured materials, every granite slab is unique, offering homeowners a one-of-a-kind countertop that enhances the beauty of any kitchen or bathroom. Its natural strength makes it resistant to heat, scratches, and everyday wear, making it a top choice for those who prioritize longevity and elegance. To transform raw granite into countertops, the stone is quarried from large rock formations, cut into slabs, and then polished to achieve a smooth, glossy finish. Skilled fabricators shape and refine the slabs to fit specific countertop designs, ensuring a seamless installation.  When comparing laminate countertops vs granite, the key differences lie in durability and cost. While granite offers unmatched natural beauty and longevity, it requires sealing to prevent stains and can be more expensive than laminate. However, for homeowners looking for a long-term investment that adds value to their property, granite remains a timeless and luxurious option. Is There Laminate That Looks Like Granite? Yes, modern technology has made it possible to create laminate countertops that look like granite, offering homeowners an affordable alternative to natural stone. With advancements in high-definition printing and textured surfaces, laminate manufacturers can now replicate the intricate veining, depth, and color variations found in real granite. Some premium laminate options even feature a slightly rough texture, mimicking the feel of polished stone for a more realistic appearance. These innovations allow homeowners to enjoy the elegance of granite without the high cost or maintenance requirements. When comparing granite vs laminate, it’s important to weigh the pros and cons of choosing a laminate that mimics stone. On the plus side, laminate is budget-friendly, non-porous, and easy to clean, making it a great option for busy households. However, while it can achieve a similar aesthetic, it lacks the natural durability of granite and may not add the same resale value to a home. Deciding between laminate countertops vs granite comes down to priorities. Those seeking long-lasting performance may prefer granite, while homeowners wanting style on a budget may find laminate a practical and stylish choice. Cost Comparison: How Much More Expensive is Granite Than Laminate? When choosing between laminate or granite countertops, cost is often a deciding factor. Laminate is the more budget-friendly option, typically ranging from $20 to $50 per square foot, including installation. On the other hand, granite countertops cost significantly more, usually between $40 to $200 per square foot, depending on the stone’s rarity, thickness, and origin. Custom edge profiles, sealing, and professional installation further add to the expense of granite, making it a larger upfront investment compared to laminate. Several factors influence the price difference, including durability, maintenance, and installation complexity. Laminate is easy to install and requires minimal upkeep, making it a cost-effective solution for homeowners on a budget. However, it lacks the long-term durability of granite, which can last decades with proper care.  While granite countertops cost more initially, they increase home value, resist heat and scratches, and offer timeless appeal. If you’re planning to stay in your home long-term, granite can be a worthwhile investment, whereas laminate provides an affordable and stylish solution for those looking to save on remodeling costs. Is Granite Better Than Laminate? The choice between laminate countertops vs granite depends on your priorities. If durability is your main concern, granite is the clear winner. It resists heat, scratches, and daily wear, lasting for decades with proper care. In contrast, laminate is more prone to scratches and damage from heat, making it less durable in the long run. However, laminate offers a cost-effective solution with modern designs that can mimic the look of real stone. When it comes to maintenance, laminate requires little upkeep, just regular cleaning with mild soap and water. Granite, on the other hand, needs periodic sealing to prevent stains and maintain its polished appearance. Aesthetically, granite provides a high-end, natural look that adds resale value to a home, while laminate is ideal for budget-conscious homeowners seeking

Laminate Countertops vs Granite: What’s Better? Read More »

How to Install Mosaic Tile Backsplash Like a Pro!

How to Install Mosaic Tile Backsplash Like a Pro!

Top 5 Unique Bar Backsplash Ideas in 2025 Home / A mosaic tile backsplash is a stunning way to elevate the look of your kitchen or bathroom. Made up of small, intricately arranged tiles often in glass, ceramic, or stone it adds a touch of elegance and personality to any space. Not only does it serve as a beautiful focal point, but it also protects your walls from spills, splatters, and moisture. Whether for a modern, rustic, or classic vibe, a mosaic backsplash offers endless design possibilities to match your style. Installing a mosaic tile backsplash might sound intimidating, but it’s a DIY-friendly project that can be tackled with the right tools and patience. In this guide, we’ll walk you through how to install mosaic tile backsplash step by step, making the process simple and stress-free. By the end, you’ll have a gorgeous, professional-looking backsplash that you can proudly say you installed yourself! Tools and Materials Needed for Installing a Mosaic Tile Backsplash Having the right tools and materials is essential for a smooth and professional-looking backsplash installation. Below is a quick reference table outlining everything you need. 🛠 Essential Tools & Materials Category Items Needed Tools Tile cutter, notched trowel, rubber float, level, measuring tape, spacers, utility knife, sponge. Materials Mosaic tile sheets, tile adhesive (thin-set mortar or mastic), grout, grout sealer, and painter’s tape. Safety Gear Safety glasses, gloves, and dust mask (for cutting tiles). With these essentials, you’re ready to move on to surface preparation for a flawless tile installation! Preparation Proper preparation is the key to a flawless mosaic tile backsplash installation. Start by cleaning the wall surface thoroughly to remove grease, dirt, or any old adhesive. A smooth, dry, and debris-free wall ensures the tiles adhere properly and last for years. Next, measure the area to determine how many mosaic tile sheets you’ll need. Planning the layout is crucial to center the design for a balanced look and avoid awkward cuts at the edges. If your wall is uneven or in a wet area (like behind a sink), consider installing a backer board for added stability and moisture protection. Taking the time to prepare correctly will make the installing mosaic tile backsplash process much smoother and ensure a professional-looking result! How to Install Mosaic Tile Backsplash: Step-by-Step Installation Process Now comes the exciting part installing your mosaic tile backsplash! Follow these simple steps to achieve a polished, professional look: Step 1: Apply Adhesive Using a notched trowel, spread tile adhesive evenly over a small section of the wall. Work in manageable areas to prevent the adhesive from drying out before you place the tiles. The notches in the trowel create ridges that help the tiles stick firmly. Step 2: Place the Tiles Gently press the mosaic tile sheets onto the adhesive, starting from one corner. Use tile spacers to maintain even gaps between sheets for consistent grout lines. If the sheets aren’t perfectly aligned, adjust them while the adhesive is still wet. Step 3: Cut Tiles as Needed For edges, corners, or around outlets, use a tile cutter or nippers to trim the tiles to fit. Take your time with this step to ensure clean, precise cuts. Step 4: Let the Adhesive Dry Once all the tiles are in place, allow the adhesive to dry completely. Follow the manufacturer’s instructions for drying time usually 24 hours. Avoid touching or disturbing the tiles during this period. By following these steps, you’ll master the art of how to install mosaic tile backsplash and create a stunning focal point in your space! Grouting Grouting is the final touch that brings your mosaic tile backsplash to life! This step not only secures the tiles but also enhances their beauty by filling in the gaps. Here’s how to do it like a pro: Step 1: Apply Grout Using a rubber float, spread the grout over the tiles at a 45-degree angle, pressing it firmly into the gaps. Work in small sections to ensure even coverage. Make sure all the spaces between the tiles are filled. Step 2: Clean Excess Grout After applying the grout, wait 10-15 minutes for it to set slightly. Then, use a damp sponge to gently wipe away the excess grout from the tile surfaces. Rinse the sponge frequently to avoid smearing grout across the tiles. Step 3: Let the Grout Cure Allow the grout to cure completely, typically for 24 hours. Avoid touching or cleaning the tiles during this time. Once cured, buff the tiles with a soft cloth to remove any haze and reveal their natural shine. By mastering applying mosaic tile backsplash grout, you’ll ensure a polished, professional finish. Whether you’re learning how to lay mosaic tile or perfecting your technique, this step is what ties everything together beautifully! Sealing Once your grout has fully cured, it’s time to seal it a crucial step in putting up mosaic tile backsplash that ensures long-lasting beauty and durability. Sealing protects the grout from stains, moisture, and everyday wear and tear, especially in high-traffic areas like mosaic tiles and kitchen backsplash. Using a grout sealer, apply an even coat over the grout lines with a small brush or applicator. Be careful to avoid getting sealer on the tiles themselves. Allow the sealer to dry as per the manufacturer’s instructions, and consider applying a second coat for added protection. Sealing not only preserves the look of your backsplash but also makes cleaning easier, keeping your mosaic tiles kitchen backsplash looking fresh and vibrant for years to come. Don’t skip this step it’s the final shield that completes your project! Common Mistakes to Avoid Even the most enthusiastic DIYers can run into pitfalls when learning how to install mosaic tile backsplash. Here are some common mistakes to watch out for, so your project turns out flawless: Not Cleaning the Surface ProperlyA dirty or greasy wall can prevent the adhesive from bonding correctly. Always clean the surface thoroughly before starting. Using Too Much or Too Little AdhesiveToo much adhesive

How to Install Mosaic Tile Backsplash Like a Pro! Read More »

Top 5 Unique Bar Backsplash Ideas in 2025

Top 5 Unique Bar Backsplash Ideas in 2025

Home / When designing a stunning bar area, the backsplash is more than just a protective barrier it’s a statement piece that ties the entire space together. A well-chosen bar backsplash not only enhances the aesthetics of your bar but also adds functionality, making it easier to clean and maintain. As we step into 2025, the world of interior design is buzzing with fresh and innovative bar backsplash ideas that promise to transform ordinary bars into extraordinary spaces. This year’s trends are all about creativity, durability, and style, from textured tiles to sleek glass designs. Whether you’re revamping your home bar or designing a commercial space, the right backsplash can elevate the vibe and leave a lasting impression. In this blog, we’ll explore the top 5 unique bar backsplash ideas for 2025, offering inspiration and practical tips to help you create a bar that’s both functional and visually captivating. Let’s dive in! 1. Textured Bar Backsplash Tile What it is: Glass tile backsplashes are the epitome of sleek, modern design, offering a polished and sophisticated look for any bar area. These tiles are available in a variety of finishes, from glossy to frosted, and come in an array of colors and patterns. Their reflective surface not only adds a touch of elegance but also creates a sense of depth, making them a standout choice for unique bar backsplash ideas. Why it’s trending in 2025: In 2025, glass tiles are gaining popularity for their ability to transform a bar into a bright, inviting space. Their light-reflecting properties make smaller bar areas appear more spacious and vibrant, while their versatility allows them to blend seamlessly with any design theme. Whether you’re going for a contemporary, industrial, or even a retro vibe, glass tiles offer endless possibilities. Plus, they’re eco-friendly, often made from recycled materials, which aligns with the growing demand for sustainable design solutions. Design ideas: For a truly unique look, consider using colored or frosted glass tiles as part of your backsplash bar ideas. Colored glass tiles in shades like emerald green, sapphire blue, or even amber can add a pop of personality to your bar, while frosted tiles offer a softer, more subdued aesthetic. You can also mix and match glass tiles with other materials, such as metal or stone, to create a custom design that reflects your style. For a cohesive look, pair glass tiles with LED lighting to enhance their reflective qualities and create a stunning visual effect.   Durability and care: Glass tiles are not only beautiful but also highly durable. They are resistant to stains, moisture, and heat, making them an excellent choice for a bar backsplash. To keep them looking pristine, clean them regularly with a non-abrasive glass cleaner and a soft cloth. Avoid using harsh chemicals or scrubbing pads, as they can scratch the surface. With proper care, a glass tile backsplash will maintain its shine and elegance for years to come. If you’re looking for a modern, low-maintenance, and eye-catching option for your bar, glass tile backsplashes are a top contender. Ready to explore more unique bar backsplash ideas? Contact SF Marble & Granite to bring your vision to life! 2. Glass Tile Backsplash What it is: Glass tile backsplashes are the epitome of sleek, modern design, offering a polished and sophisticated look for any bar area. These tiles are available in a variety of finishes, from glossy to frosted, and come in an array of colors and patterns. Their reflective surface not only adds a touch of elegance but also creates a sense of depth, making them a standout choice for unique bar backsplash ideas. Why it’s trending in 2025: In 2025, glass tiles are gaining popularity for their ability to transform a bar into a bright, inviting space. Their light-reflecting properties make smaller bar areas appear more spacious and vibrant, while their versatility allows them to blend seamlessly with any design theme. Whether you’re going for a contemporary, industrial, or even a retro vibe, glass tiles offer endless possibilities. Plus, they’re eco-friendly, often made from recycled materials, which aligns with the growing demand for sustainable design solutions. Design ideas: For a truly unique look, consider using colored or frosted glass tiles as part of your backsplash bar ideas. Colored glass tiles in shades like emerald green, sapphire blue, or even amber can add a pop of personality to your bar, while frosted tiles offer a softer, more subdued aesthetic. You can also mix and match glass tiles with other materials, such as metal or stone, to create a custom design that reflects your style. For a cohesive look, pair glass tiles with LED lighting to enhance their reflective qualities and create a stunning visual effect.   Durability and care: Glass tiles are not only beautiful but also highly durable. They are resistant to stains, moisture, and heat, making them an excellent choice for a bar backsplash. To keep them looking pristine, clean them regularly with a non-abrasive glass cleaner and a soft cloth. Avoid using harsh chemicals or scrubbing pads, as they can scratch the surface. With proper care, a glass tile backsplash will maintain its shine and elegance for years to come. If you’re looking for a modern, low-maintenance, and eye-catching option for your bar, glass tile backsplashes are a top contender. Ready to explore more unique bar backsplash ideas? Contact SF Marble & Granite to bring your vision to life! 3. Scalloped Tile Backsplash What It Is: Scalloped tiles, also known as fish scale tiles, feature a charming, wavy design that adds softness and movement to a bar backsplash. Their curved edges create a unique, flowing pattern that stands out from traditional square or subway tiles, making them a stylish choice for any bar area. Why It’s Trending in 2025: Blending vintage charm with contemporary appeal, scalloped tiles are gaining popularity for their ability to create an elegant yet playful atmosphere. In 2025, homeowners are embracing these curved designs to add texture and personality to their bar backsplash

Top 5 Unique Bar Backsplash Ideas in 2025 Read More »

Top 6 Modern Kitchen Backsplash Ideas in 2025

Top 6 Modern Kitchen Backsplash Ideas in 2025

Home / A kitchen backsplash is more than just a protective layer. It’s a design statement that can completely transform your space. As we enter 2025, Modern Kitchen Backsplash Ideas evolve with bold patterns, luxurious textures, and sleek finishes. Whether you’re drawn to geometric shapes, metallic accents, or timeless neutrals, the right backsplash can set the tone for your kitchen. This year’s trends embrace minimalism and statement-making designs, offering endless possibilities for every style. From elegant hexagon tiles to eye-catching black and gold combinations, these modern ideas blend function with high-end aesthetics. If you’re planning a kitchen update, explore the top six modern kitchen backsplash ideas defining 2025. 1. Hexagon Kitchen Backsplash: Geometric Charm at Its Best Hexagon tiles are making a bold statement in Modern Kitchen Backsplash Ideas for 2025, blending contemporary aesthetics with timeless appeal. Their six-sided shape adds dynamic energy to any kitchen, making the space feel more stylish and visually interesting. Whether you prefer a subtle, neutral palette or a striking contrast, hexagon backsplashes offer endless design possibilities to suit your style. To achieve the perfect look, consider the material and finish that best complements your kitchen’s theme. Marble hexagon tiles create a luxurious and sophisticated feel, while glass hexagons add a sleek, modern touch with a glossy finish. For a budget-friendly yet trendy option, ceramic hex tiles are a great choice with various colors and textures available. A pro design tip? Use contrasting grout to make the tile shapes pop, or opt for a monochromatic scheme for a seamless, elegant finish. 2. Stacked Tile Kitchen Backsplash: Sleek and Contemporary If you’re looking for a clean, modern aesthetic, a stacked tile kitchen backsplash is the perfect choice. Unlike traditional offset patterns, stacked tiles create a sleek, uniform look that enhances any contemporary kitchen. This design works well with both minimalistic and high-end spaces, making it one of the best kitchen backsplash options for 2025. The simple yet sophisticated arrangement brings a sense of order and refinement, elevating your kitchen’s overall appeal. When deciding between vertical or horizontal stacking, consider your kitchen layout. Vertical stacks make ceilings appear higher, adding an airy feel to smaller kitchens. On the other hand, horizontal stacking provides a wider, more expansive look, perfect for open-concept spaces.  For the best effect, choose the right finish glossy tiles reflect light and add depth, matte tiles offer a modern, understated elegance, and textured tiles introduce character and dimension. To tie everything together, pair your contemporary kitchen backsplash with quartz or marble countertops and sleek cabinetry for a cohesive, stylish kitchen design. 3. French Country Kitchen Backsplash: Timeless Elegance with a Modern Touch A French country kitchen backsplash perfectly balances old-world charm and modern sophistication. This timeless design blends rustic elements with contemporary flair, making it a standout choice in Modern Kitchen Backsplash Ideas for 2025. This style effortlessly enhances your interiors, whether aiming for a warm, inviting space or an elegant farmhouse-inspired kitchen. The key is mixing vintage textures with modern finishes, creating a backsplash that feels classic and fresh. When selecting tiles, opt for subway tiles for a clean, polished look, patterned ceramic tiles for an artistic touch, or travertine tiles for a naturally aged appearance. Soft, neutral color palettes such as cream, beige, and muted pastels help achieve a cozy and refined aesthetic.  If you want a more modern twist, incorporating subtle metallic accents or a glossy finish can elevate the backsplash in your kitchen while maintaining its rustic essence. Whether paired with natural wood cabinets or sleek quartz countertops, this style delivers a truly modern kitchen backsplash with timeless appeal. 4. Eye-Catching Black and Gold: The Ultimate Luxury Statement For those who crave elegance with a bold twist, a black and gold backsplash is the ultimate luxury statement in 2025. This high-contrast design brings drama and sophistication to any kitchen, making it a standout choice in modern backsplash trends. The combination of deep, rich black with the warmth of gold creates an upscale, glamorous feel that instantly elevates your space. Whether you want a sleek contemporary look or a more opulent aesthetic, this trend is redefining modern kitchen backsplash tile designs. To achieve this stunning look, choose the right materials. Marble tiles with gold veining exude timeless beauty, while glass tiles with metallic accents reflect light beautifully, adding depth and dimension. For a bolder effect, metallic-finished tiles bring a striking shine to your backsplash. The key to balancing this bold contrast is to pair it with the right cabinetry and fixtures. Matte black or deep navy cabinets with brushed gold hardware create a cohesive, high-end feel, while lighter wood tones can soften the overall look. By blending bold luxury with smart design choices, you can create a modern kitchen backsplash tile that feels both dramatic and sophisticated. 5. Noteworthy Gray Tiles: The Perfect Neutral with a Modern Twist Gray continues to be a top choice in Modern Kitchen Backsplash Ideas, offering the perfect blend of sophistication and versatility. Its neutral tone complements various kitchen styles, from sleek and contemporary to warm and inviting. Unlike plain white backsplashes, gray tiles add depth and character while maintaining a timeless appeal. Gray backsplashes can effortlessly enhance your kitchen’s aesthetic, whether you prefer a subtle, understated look or a bold statement. Choosing the right shade is key light gray tiles create an airy, open feel, making them ideal for smaller kitchens, while dark gray tiles add a dramatic, moody touch that pairs beautifully with gold or black fixtures.  Texture also plays a vital role; smooth, glossy tiles give a sleek, modern touch, patterned gray tiles introduce visual interest, and stone-effect tiles provide an organic, natural appeal. To complete the look, pair your gray kitchen backsplash ideas with quartz or marble countertops and matte black or brushed nickel hardware for a stylish and cohesive modern kitchen backsplash design. 6. Shimmery Metallic Tiles: A Dazzling and Futuristic Touch Metallic tiles are making a bold statement in modern kitchen backsplash tile trends, bringing a sleek and futuristic

Top 6 Modern Kitchen Backsplash Ideas in 2025 Read More »

bathroom-backsplash-ideas

Top 10 Stunning Bathroom Backsplash Ideas in 2025

Home / A well-designed bathroom backsplash is more than just a decorative feature it’s a functional element that protects your walls from water damage, soap splashes, and daily wear. Whether you prefer a sleek modern look or a bold artistic statement, the right backsplash can transform your bathroom into a stylish and practical space. With countless materials, colors, and patterns available, you can easily find a design that complements your existing décor while adding a touch of personality. From classic tiles to innovative textures, bathroom backsplash ideas offer endless ways to elevate your space. Not only do they enhance visual appeal, but they also make cleaning easier and extend the life of your walls. Whether updating a small powder room or revamping a luxurious master bath, choosing the perfect backsplash can create a cohesive and polished look. Let’s explore some stunning options that blend beauty and functionality effortlessly! 1. Modern Subway Tile Bathroom Backsplash A modern subway tile bathroom backsplash is a timeless favorite that adds a sleek and sophisticated touch to any space. Its clean lines and simple design make it versatile, seamlessly fitting into contemporary and traditional bathrooms. Available in a variety of finishes glossy for a polished look, matte for subtle elegance, and beveled for added depth these backsplashes for the bathroom create a refined and cohesive aesthetic. Beyond its stylish appeal, a subway tile bathroom backsplash is incredibly durable and easy to maintain. Resistant to moisture and stains, it ensures long-lasting protection while keeping your space looking fresh. Whether you opt for classic white tiles or experiment with bold colors and unique patterns, this backsplash choice brings a timeless charm that never goes out of style, especially when paired with modern surfaces like quartz countertops near me for a sleek and cohesive bathroom design. 2. Painted Bathroom Sink Backsplash A painted bathroom sink backsplash is a budget-friendly and creative way to enhance your bathroom without the need for expensive tiles. With waterproof paint, you can easily customize the look to match your style, whether you prefer a sleek, modern finish or a bold, artistic design. This option is perfect for those who want to experiment with unique bathroom backsplash designs while keeping the project cost-effective and DIY-friendly. One of the biggest advantages of a painted bathroom backsplash is its versatility. You can choose solid colors for a minimalist look, add stencils for intricate patterns, or even create a faux tile effect for a high-end appearance. Plus, it’s easy to refresh whenever you want a change, making it a great choice for those who love updating their space. If you’re looking for bathroom backsplash ideas that combine style, affordability, and personalization, a painted backsplash is an excellent option to consider. 3. Bold Bathroom Backsplash Tile Bold bathroom backsplash tiles are an eye-catching way to add personality and character to your space. From vibrant colors, intricate patterns, and tactile surfaces, such as deep blues or rich greens, or artistic mosaics, bold tiles create a striking focal point with personality and charm! To keep the design balanced, pair bold backsplash tiles with neutral fixtures and subtle décor elements. This allows the backsplash to stand out without overwhelming the space. If you’re searching for bathroom backsplash ideas that add drama while maintaining elegance, bold tiles offer a perfect mix of modern flair and timeless appeal. 4. Half Wall Tile Backsplash A half-wall tile backsplash is a perfect blend of style and functionality, offering enhanced wall protection while adding a refined touch to your bathroom. By extending the tiles halfway up the wall, this design creates a visually appealing contrast and makes cleaning effortless. Whether you choose classic subway tiles or bold patterned designs, a half-wall backsplash adds depth and dimension to the space. This backsplash style works well in both modern and vintage-inspired bathrooms, allowing for endless customization. It pairs beautifully with painted upper walls, wallpaper, or even decorative molding to achieve a balanced and elegant look. If you want a backsplash that delivers both practicality and sophistication, a half-wall tile design is a fantastic option. 5. Geometric Bathroom Backsplash Geometric bathroom backsplashes add an elegant and modern touch to any space, instantly turning a bland bathroom into an eye-catching design masterpiece. From hexagonal tiles with honeycomb designs for an impressive honeycomb effect to herringbone patterns or bold chevron patterns for bold statements, geometric designs bring movement and personality into any wall space, making even small bathrooms seem larger and more stylish! Available in materials like ceramic, porcelain, and marble, geometric backsplashes offer durability along with their stunning aesthetics. Lighter tones can brighten up a space, while darker or patterned designs add drama and sophistication. If you’re looking for a way to elevate your bathroom’s style while maintaining a contemporary edge, a geometric backsplash is a perfect choice. 6. Mirrored Backsplash A mirrored backsplash is a stunning choice that instantly enhances brightness and creates the illusion of a larger space. Perfect for small bathrooms, it reflects light beautifully, making the area feel more open and airy. This design adds a touch of luxury and pairs well with modern or classic aesthetics, complementing everything from sleek vanities to intricate décor elements. Mirrored vanity backsplashes offer both elegance and ease of care; there are no grout lines to scrub! A mirrored surface adds depth and sophistication while simultaneously leaving your space looking polished and refined. 7. Wood Paneling for a Natural Look A wood paneling backsplash brings warmth and natural charm to any bathroom, creating a cozy yet stylish ambiance. Whether used in a farmhouse-style setting or a spa-inspired retreat, wood paneling pairs beautifully with modern fixtures, stone countertops, and minimalist décor. With the right sealant, it becomes moisture-resistant, making it a durable and practical choice for wet areas. As a backsplash for vanity, wood paneling adds texture and character while blending seamlessly with various design styles. It complements both light and dark color palettes, making it a versatile option for different aesthetics. If you’re looking for a bathroom vanity backsplash

Top 10 Stunning Bathroom Backsplash Ideas in 2025 Read More »

How to Install Peel and Stick Backsplash

How to Install Peel and Stick Backsplash

Home / Looking to upgrade your kitchen or bathroom without the hassle of traditional tiling? Peel-and-stick backsplashes are the perfect solution for budget-conscious homeowners, renters, and DIY enthusiasts. These adhesive tiles offer a quick and mess-free way to refresh your space, requiring no grout, mortar, or professional installation. With endless designs, you can achieve a high-end look in just a few hours without breaking the bank. In this guide, we’ll walk you through installing peel-and-stick backsplash like a pro, covering expert tips, troubleshooting hacks, and design inspiration. Whether you’re updating a small kitchen nook or a full backsplash wall, this step-by-step guide will help you get stunning results with minimal effort. Plus, compared to traditional tiles, these easy-to-apply options save you both time and money, making them an excellent choice for a stylish, stress-free home upgrade. What Is a Peel and Stick Backsplash? A peel-and-stick backsplash is a modern, hassle-free alternative to traditional tile installations. Made from adhesive-backed vinyl, glass, or peel-and-stick stone sheets, these tiles mimic the look of real ceramic or natural stone. They are designed for easy application simply peel off the backing and stick them onto a clean, smooth surface. With no need for grout, mortar, or special tools, they are an ideal choice for DIY enthusiasts looking to refresh their space quickly and affordably. Pros of Peel and Stick Backsplash Easy Installation – No grout, no mess, and no professional help required. Budget-Friendly – A cost-effective way to achieve a high-end look. Removable & Renter-Friendly – Can be taken down without damaging the walls. Moisture-Resistant Options – Many are designed to withstand humidity in kitchens and bathrooms. Wide Design Variety – Available in styles like subway tiles, mosaic patterns, and even peel-and-stick wall tile with a natural stone finish. Cons to Consider Limited Heat Resistance – Most can only withstand up to 150°F, making them unsuitable for areas directly behind gas stoves. Adhesion Issues – Low-quality tiles may peel at the edges over time, especially in high-moisture areas. Surface Restrictions – Work best on smooth, clean walls; rough or textured surfaces may affect adhesion. Ideal Use Cases Renters – An easy way to personalize a space without permanent changes. Quick Kitchen & Bathroom Upgrades – A simple solution for modernizing backsplashes. Temporary Makeovers – Great for those who love to change décor frequently. If you’re wondering how to install peel and stick backsplash efficiently, choosing the right type of tile and ensuring proper surface preparation is key. In the next section, we’ll go over the essential tools, materials, and prep work needed to achieve flawless results. Pre-Installation: Tools, Materials, and Prep Work Before you begin how to install peel and stick tile backsplash, having the right tools and preparing your surface properly will ensure a smooth and long-lasting application. Below is a detailed checklist to guide you through the process. Essential Tools and Materials   Category Tools/Materials Purpose Essential Tools Utility knife For cutting peel and stick tile to fit edges and outlets.   Level Ensures tiles are straight and properly aligned.   Measuring tape Helps in accurate measurements before application.   Degreaser Removes grease and dirt for better adhesion.   Microfiber cloth Wipes the surface clean without leaving residue. Optional Tools Painter’s tape Marks guidelines without damaging the wall.   Plastic smoother Helps press down tiles for a secure bond.   Silicone caulk Seals edges to prevent moisture from seeping behind tiles. Choosing the Right Peel and Stick Backsplash Tiles   Material Pros Cons Best For Vinyl Budget-friendly, lightweight, and easy to install. Less durable, and may peel over time. Temporary upgrades, renters. Glass Heat-resistant, waterproof, modern look. More expensive, and requires careful handling. Kitchens, near sinks. Stone Durable, high-end aesthetic. Heavier, needs extra adhesion support. Long-term installations, statement walls. Surface Preparation for Best Adhesion   Step Action Why It’s Important Clean Use a pH-neutral soap and degreaser to remove grease, dust, and dirt. Ensures the adhesive sticks properly. Sand Lightly sand rough or textured surfaces. Creates a smooth surface for better adhesion. Fill Gaps Use caulk to seal cracks and holes. Prevents air pockets and peeling over time. Wait If the wall was recently painted, wait at least 3 weeks before applying tiles. Fresh paint can affect adhesion. A well-prepared surface is key to a flawless backsplash. With your tools ready and walls prepped, you’re now set for the next step: applying the tiles. Stay tuned for a step-by-step guide on installation! How to Install Peel and Stick Backsplash | Step-by-Step Installation Guide Installing a peel-and-stick kitchen backsplash is a quick and rewarding project, but proper technique ensures a flawless finish. Follow these steps to transform your space effortlessly. 1. Plan the Layout for a Perfect Fit Before starting, take precise measurements of your backsplash area. This helps you determine how many peel-and-stick wall tiles you need and prevents awkward cuts at the edges. Steps to Plan the Layout: Measure the wall space and note any outlets, switches, or corners. Use a level to mark horizontal and vertical reference lines. Dry-fit the tiles (without removing the backing) to visualize the layout. Pro Tip: Start from the bottom corner and work your way up to ensure alignment. Avoid beginning in the middle, as uneven cuts at the edges can ruin the overall look. 2. Cutting Peel and Stick Tile Like a Pro Not all backsplash tiles are cut the same way. Depending on the material, use the right tools for a clean finish. Cutting Guide by Material: Vinyl tiles: Use sharp scissors for quick and easy cutting. Glass or rigid tiles: A utility knife works best for precision. Around outlets & corners: Create a kraft paper template first to ensure accurate cuts. Hack: Trace the outlet shape onto a piece of kraft paper and use it as a stencil for a perfect fit. Always turn off the power before cutting around the outlets! 3. How to Install Peel and Stick Backsplash with a Secure Hold This step is where the magic happens! Follow

How to Install Peel and Stick Backsplash Read More »

How to Grout Backsplash Like a Pro

How to Grout Backsplash | Step-by-Step Guide

Home / Grouting a backsplash is a crucial step that enhances both the look and functionality of your kitchen or bathroom. It not only fills the gaps between tiles, creating a polished and seamless finish but also acts as a barrier against moisture and stains. Without proper grouting, water can seep behind the tiles, leading to mold growth and damage over time. Knowing how to grout backsplash correctly ensures long-lasting protection while elevating the overall design of your space. A well-grouted backsplash offers durability and easy maintenance, making cleaning effortless with just a damp cloth. It prevents dirt buildup in the joints, keeping your backsplash looking fresh for years. Additionally, choosing the right grout color can enhance tile patterns, adding depth and style to your kitchen or bathroom. Whether you’re a DIY enthusiast or hiring a professional, mastering the grouting process ensures a flawless and long-lasting backsplash. Essential and Optional Tools & Materials for Grouting a Backsplash Category Item Purpose Essential Tools Grout Float Spreads grout evenly into tile joints   Sponge Wipes off excess grout and smooths joints   Bucket Holds water for cleaning grout residue   Trowel or Putty Knife Helps in mixing and applying grout   Mixing Paddle Attaches to a drill for even grout mixing Essential Materials Grout (Sanded/Unsanded) Fills tile joints and secures tiles   Grout Sealer Protects grout from moisture and stains   Clean Water Required for grout mixing and cleanup Optional Items Painter’s Tape Keeps edges clean and prevents grout overflow   Caulk & Caulking Gun Seals gaps between backsplash and countertops   Microfiber Cloth Gives a final polish for a spotless finish Step-by-Step Guide to Grouting a Backsplash Step 1: Prepare the Surface Before starting the grouting process, ensure the backsplash tiles are clean and completely dry. Any dust, grease, or debris can prevent the grout from properly adhering to the tile joints. Use a damp cloth or sponge to wipe down the surface, removing any residues left from installation. Next, inspect the tiles for any cracks or loose pieces. If you notice damaged tiles, replace or secure them before proceeding. A properly prepped surface ensures the grout bonds well and creates a smooth, even finish. Taking the time to prepare will help avoid issues later in the process. Step 2: Choose the Right Grout Selecting the correct grout for backsplash tiles is essential for durability and appearance. There are two main types of grout: Sanded grout – Ideal for tile joints larger than 1/8 inch, providing extra strength and resistance to cracking. Unsanded grout – Best for joints smaller than 1/8 inch, offering a smooth and even application on delicate surfaces like glass or polished tiles. For high-moisture areas, such as kitchens and bathrooms, epoxy grout is an excellent choice. It resists stains, moisture, and mildew better than traditional cement-based grout, making it ideal for grouting tile in areas exposed to water and spills. Step 3: Mix the Grout Properly mixing grout is key to achieving a smooth application. Follow these steps: Pour the dry grout mix into a clean bucket. Gradually add water, stirring continuously with a mixing paddle or trowel. Mix until you get a thick, peanut butter-like consistency. Avoid making it too runny or dry. Let the grout sit for 5–10 minutes (also known as slaking), then stir again before applying. Always follow the manufacturer’s instructions for the correct water-to-grout ratio. Overmixing can introduce air bubbles, weakening the final result. Step 4: Apply the Grout Now comes the main part of how to grout backsplash tiles. Using a grout float, scoop a small amount of grout and press it into the tile joints at a 45-degree angle. Work diagonally across the tiles to ensure the grout fills the gaps. Work in small sections, typically 2–3 square feet at a time, to prevent the grout from drying too quickly before cleaning. Continue this process until all joints are filled evenly. Step 5: Clean Excess Grout After applying grout, allow it to sit for 10–15 minutes, then clean off excess using a damp sponge. Gently wipe the tile surface in a circular motion while avoiding pulling grout from the joints. Rinse the sponge frequently in clean water to prevent the spreading of residue. If a haze forms after drying, buff the tiles with a microfiber cloth to restore their shine. Step 6: Let the Grout Cure Grout requires 24–72 hours to fully cure, depending on the type and humidity levels. Avoid exposing the backsplash to moisture during this period to ensure it sets properly. Patience is key rushing this step may result in weak, crumbly grout that won’t last. Step 7: Seal the Grout Sealing is a crucial step in grouting backsplash tiles, as it protects against stains, moisture, and discoloration. Choose a penetrating grout sealer and apply it using a small brush or applicator bottle. Allow the sealer to absorb, then wipe off any excess. Some sealers require multiple coats for added protection. Reapply every 6–12 months to maintain durability and appearance. By following these steps, you’ll achieve a clean, polished look while ensuring long-lasting performance. A properly grouted backsplash enhances the beauty of your kitchen or bathroom while offering essential protection against moisture and stains. Common Mistakes to Avoid When Grouting a Backsplash 1. Applying Too Much Grout or Letting It Dry Before Cleaning One of the biggest mistakes when grouting tile is applying excess grout and leaving it too long before wiping. This leads to a stubborn haze on the tiles, making cleanup difficult. Always work in small sections and wipe off excess grout with a damp sponge within 10–15 minutes for a smooth, professional finish. 2. Using the Wrong Type of Grout Not all grout is the same! Choosing the wrong one for your grout backsplash can cause cracks or poor adhesion. Sanded grout is best for wider joints, while unsanded grout works for narrow gaps. If your backsplash is in a high-moisture area, epoxy grout is a durable, stain-resistant choice. 3. Skipping the Sealing

How to Grout Backsplash | Step-by-Step Guide Read More »

Backsplash Ideas For Fantasy Brown Granite Countertops

Top 10 Backsplash Ideas For Fantasy Brown Granite Countertops

Home Fantasy Brown Granite is a stunning natural stone known for its unique veining and earthy tones, blending soft beige, warm browns, and subtle gray undertones. This versatile countertop material adds a touch of elegance to any kitchen, making it a favorite among Lowell homeowners. However, pairing it with the right backsplash is essential to truly elevate its beauty. A well-chosen backsplash enhances the visual appeal and ties the entire kitchen design together, creating a cohesive and polished look. When exploring backsplash ideas for Fantasy Brown Granite countertops, it’s important to consider both aesthetics and functionality. A backsplash protects your walls from spills and splatters while serving as a design focal point. At SF Marble & Granite, we recommend selecting materials that complement the granite’s natural patterns and offer durability, especially in Lowell sunny climate. With our expertise in stone installations, we’ll help you create a kitchen that’s as practical as it is beautiful. Top 10 Trending Backsplash Ideas for Fantasy Brown Granite Countertops 1. Classic White Subway Tiles | Timeless and Elegant White subway tiles remain a go-to choice when selecting a backsplash for Fantasy Brown Granite countertops. Their crisp, clean look provides a timeless aesthetic that enhances the warm veining of the stone. The contrast between the creamy browns and whites of the granite and the bright, neutral tone of subway tiles creates a visually appealing balance. For homeowners seeking a budget-friendly yet stylish option, subway tiles are available in glossy, matte, and textured finishes. Choosing a warm white or off-white shade can make the transition between the Fantasy Brown Granite and the backsplash feel seamless. If you want to add more depth, consider using a contrasting grout color like charcoal or taupe. 2. Natural Stone Mosaics | A Touch of Organic Beauty If you love the raw beauty of natural elements, a stone mosaic backsplash is a perfect complement to Fantasy Brown Granite countertops. Options like marble, slate, and travertine introduce organic textures that blend effortlessly with the swirling veins of the granite. Travertine, in particular, pairs well with Fantasy Brown, as it shares similar beige and taupe undertones, creating a warm and cohesive look. A tumbled finish adds rustic charm, while polished marble mosaics bring a sophisticated touch to the space. 3. Herringbone & Chevron Patterns | A Modern Twist For those looking to add dynamic movement to their kitchen, herringbone and chevron-patterned backsplashes offer a contemporary edge. These patterns, crafted from neutral gray or taupe tiles, enhance the soft veining of Fantasy Brown without overpowering the space. Whether you opt for glossy ceramic tiles or matte-finished porcelain, the pattern itself brings depth and visual interest. If you want a subtle statement, stick with soft whites and beiges. For a more defined contrast, darker grout can highlight the intricate layout of the tiles. 4. Bold Glass Tiles | A Subtle Touch of Glamour Glass tiles bring a modern and elegant shine to any kitchen, and when paired with Fantasy Brown Granite, they can create a stunning visual effect. Smoked, frosted, or tinted glass tiles in shades like aquamarine, soft blush, or champagne add just the right amount of sophistication. The reflective quality of glass tiles enhances natural light, making the kitchen feel brighter and more spacious. If you want to achieve a seamless transition, opt for a neutral-tinted glass that harmonizes with the natural hues of your granite countertops. 5. Dark Contrast Backsplashes | Make the Veins Pop For a bold and dramatic effect, pairing Fantasy Brown Granite with a dark backsplash is a stylish choice. Navy blue, deep charcoal, or espresso-colored tiles create a striking contrast that makes the stone’s flowing patterns stand out even more. Matte black subway tiles, glossy navy mosaics, or textured dark slate backsplashes can all enhance the depth of the granite. This combination is particularly stunning in modern and industrial-style kitchens, where bold contrasts add a high-end designer look. 6. Rustic Brick or Cement Tiles | Farmhouse Charm If you love the warm, inviting feel of farmhouse or industrial kitchens, a rustic brick or cement tile backsplash is an excellent match for Fantasy Brown Granite. The natural imperfections and textures of these materials add character while maintaining a cozy and welcoming vibe. Brick backsplashes, whether exposed or whitewashed, create a beautiful contrast with the granite’s flowing patterns. Cement tiles with iron-spot textures provide a handcrafted feel, perfect for adding personality to your kitchen space. 7. Arabesque & Geometric Shapes | Intricate and Eye-Catching For homeowners who appreciate artistic details, an arabesque or geometric-patterned backsplash can elevate the design of their kitchen. The soft curves and unique shapes of arabesque tiles blend beautifully with the natural waves in Fantasy Brown Granite, creating a cohesive, elegant feel. Alternatively, hexagonal or diamond-shaped tiles in soft taupes and beiges add a modern touch while maintaining a neutral color palette. These patterns work exceptionally well in transitional kitchens where a mix of classic and contemporary elements is desired. 8. Granite Continuation | A Seamless Look One of the most luxurious backsplash ideas is to extend the Fantasy Brown Granite itself onto the wall. This “full-height” granite backsplash offers a seamless look that enhances the beauty of the natural stone without any interruptions. By using the same material on both the countertops and backsplash, the movement and veining in the granite become the focal point of the kitchen. This option is ideal for minimalist and high-end kitchen designs that emphasize natural beauty over complex patterns. 9. Metallic Accents | Modern Opulence For those who love a touch of glamour, metallic-accented backsplashes can add just the right amount of shine to a kitchen. Bronze, gold, or silver-flecked tiles provide a luxurious contrast against Fantasy Brown Granite, elevating the entire space. Consider metallic glass mosaics or tiles with a subtle shimmer to create a sophisticated effect. This backsplash choice works particularly well in contemporary and transitional kitchens where rich details enhance the overall aesthetic. 10. Eco-Friendly Recycled Glass | Sustainable and Stylish Sustainability is a growing trend

Top 10 Backsplash Ideas For Fantasy Brown Granite Countertops Read More »

How to Install Tile Backsplash: Advanced Techniques for 2025

How to Install Tile Backsplash: Advanced Techniques for 2025

Home A stunning kitchen doesn’t just happen it’s designed with thoughtful details, and a tile backsplash can instantly elevate the space. Whether you’re updating your kitchen for style or protection, learning how to install tile backsplash yourself can save money while giving your home a high-end look. With the right tools and a bit of patience, this project can be completed in just a weekend. The best part? You don’t need to be a professional to get flawless results. By following a step-by-step approach, you can achieve a polished, magazine-worthy backsplash that enhances your kitchen’s aesthetic. From selecting the right tiles to proper installation techniques, this guide will walk you through everything you need to know to complete the job like a pro. Why Install a Tile Backsplash? A tile backsplash is more than just a stylish upgrade it’s a smart investment. It adds instant value to your home, offering a quick return by making your kitchen or bathroom look modern and well-maintained. Whether you plan to sell or stay, a well-executed backsplash installation enhances both function and appeal. Beyond aesthetics, a backsplash protects your walls from stains, moisture, and everyday splatters. Plus, with endless design options, you can customize your space to match your style. If you’re wondering how to install tile backsplash, the process is simpler than you think. With the right tools and technique, applying backsplash tile can be a rewarding DIY project that transforms your space in just a weekend. Tools & Materials Checklist for Kitchen Backsplash Installation Having the right tools and materials makes tiling walls in the kitchen easier and ensures a professional-looking finish. Below is a helpful table outlining the essentials and upgrades for a smooth kitchen backsplash installation. Tools for Backsplash Installation Category Essential Tools Pro Upgrades Application Notched trowel (for even adhesive spread) Laser level (for precision alignment) Cutting Tile cutter (manual) Wet saw (for faster, cleaner cuts) Spacing & Grouting Tile spacers (for uniform gaps), grout float (for smooth grout application) Tile leveling system (for flawless alignment) Materials for Installing a Tile Backsplash Material Options Best For Tile Types Ceramic, subway, glass, mosaic Different styles & durability needs Adhesive vs. Mortar Adhesive (easier for DIYers), mortar (stronger hold) Fireclay tiles often require mortar Grout Choices Pre-mixed (easy for beginners), sanded (for larger gaps) Smooth, long-lasting finish With the right tools and materials, how to install tile backsplash becomes a simple, rewarding project. Investing in quality supplies ensures a sleek, durable finish that enhances your kitchen’s style and functionality. Pre-Installation Prep: Avoid Costly Mistakes Proper preparation is key to a flawless backsplash. Before you start tiling a kitchen backsplash, follow these essential steps to ensure accuracy and a professional finish. Measure Like a Pro Calculate Tile Quantity – Measure the backsplash area (height × width) and add 10% extra for cuts and breakage. This prevents last-minute shortages. Use a Template for Precision – Apply painter’s tape on the wall to outline the tile layout before installation. This simple trick helps visualize spacing and avoid surprises. Surface Preparation Clean the Walls – Use a degreaser to remove grease and dust, ensuring the adhesive bonds properly. Fix Imperfections – Small holes can be patched with spackle, but larger issues may require a backer board for stability before you install the backsplash. Layout Planning Find the Center Point – Start in the middle for a balanced look or begin at a focal point (like behind the stove). Avoid starting at the edges unless necessary. Avoid Sliver Cuts – Plan tile placement carefully to prevent ending with thin, awkward tile pieces at the edges. Adjusting the starting point can help maintain even cuts for a seamless finish. A well-planned approach makes how to install a backsplash easier, ensuring a polished, long-lasting result. How to Install Tile Backsplash: Step-by-Step Installation Process Follow these clear steps to ensure your kitchen backsplash installation looks professional and lasts for years. Let’s break it down! Step 1: Dry Fit Tiles Before applying anything, test your layout: Plan your pattern — Arrange tiles on the counter to visualize the design. Mark problem areas — Outline where outlets and edges fall. Adjust spacing — Use tile spacers to ensure even gaps and prevent uneven lines later. Step 2: Apply Adhesive/Mortar Time to secure your tiles: Choose your adhesive — Use thin-set mortar for heavier tiles or tile adhesive for easier application. Notch correctly — Hold your notched trowel at a 45-degree angle, spreading the adhesive evenly. Work in small sections to keep it from drying out too fast. Pro tip: Apply adhesive to both the wall and the back of larger tiles for better grip. Step 3: Set Tiles Now, let’s put those tiles in place: Start from the center — Lay the first tile at your focal point, using spacers to keep even gaps. Keep it level — Double-check alignment after every few tiles. Cut around outlets — Use a tile cutter or wet saw, and create a paper template first to ensure accuracy. Step 4: Edge & Corner Solutions Finishing touches matter: Schluter strips — Great for a modern, clean look. These metal strips protect tile edges and add a sleek finish. Bullnose tiles — Ideal for a softer, classic design. These rounded-edge tiles complete the look while preventing sharp edges. Tip: Match your edging to the tile color or choose a metallic finish for added contrast. With these steps, tiling a kitchen backsplash becomes manageable even for beginners. Take your time, check your work, and watch your kitchen transform tile by tile! Grouting & Finishing Touches The final step in how to install tile backsplash is grouting and sealing. This stage ensures durability, a polished look, and long-term protection for your tiles. Grouting Like a Pro Applying grout correctly prevents cracks and staining: Wait for the right time – Allow at least 24 hours for the adhesive to set before grouting. Rushing this step can cause tiles to shift. Use the right technique – Hold a grout float

How to Install Tile Backsplash: Advanced Techniques for 2025 Read More »

How Much to Install a Marble Backsplash in 2025

How Much to Install a Marble Backsplash in 2025

Home Marble backsplashes have become the ultimate statement of luxury in modern kitchens, and their popularity is soaring in 2025. But before you dive into this elegant upgrade, you’re probably wondering, “How much to install a marble backsplash?” The truth is, while marble adds undeniable sophistication, its cost can vary widely anywhere from 1,200 to 6,000 depending on the type of marble, design complexity, and labor involved. Beyond the price tag, marble backsplashes are more than just a pretty addition; they’re an investment. With trends like bold veining and ceiling-height slabs dominating 2025 kitchens, this timeless material can boost your home’s value by 4–7%. But is it worth the splurge? Let’s break down the costs, explore the latest trends, and uncover budget-friendly tips to help you decide. 2025 Marble Backsplash Cost Breakdown When planning your kitchen upgrade, understanding the cost of installing a marble backsplash is crucial. Whether you dream of a sleek marble tile backsplash or a dramatic Calacatta slab, prices can vary significantly based on materials, labor, and design choices. Here’s a detailed breakdown to help you budget wisely. Price Ranges National Average: For a standard 30 sq.ft. backsplash, expect to pay around $1,200. This includes both materials and professional installation. Low-End: If you’re working with a tight budget, polished Carrara marble tiles can cost as little as $600 for the same area. High-End: A Calacatta marble slab can climb up to $6,000 for those seeking luxury, especially for larger kitchens or intricate designs. Key Cost Factors Material Costs: Calacatta Marble: Known for its bold veining, this premium option ranges from 180–200 per sq.ft. Carrara Marble: A more affordable choice at 7–30 per sq.ft., perfect for a classic marble tile backsplash. Crema Luna: A mid-range option with soft veining, priced between 40–60 per sq.ft. Labor Costs: Backsplash installation costs typically range from 40–100 per hour, depending on the complexity of the design. Herringbone or mosaic patterns will push labor costs higher. Finish Options: Honed Finish: Adds 10–20 per sq.ft. but offers a matte, scratch-resistant surface. Leathered Finish: Costs 20–30 per sq.ft. and provides a textured, durable look. Visual Comparison Table Marble Type Cost Per Sq.Ft. Best Use Carrara 7–30 Budget-friendly marble tile backsplash Crema Luna 40–60 Mid-range kitchens, subtle veining Calacatta 180–200 Luxury kitchens, bold statement piece Replacing Backsplash Costs If you’re replacing an existing backsplash, factor in an additional 3–6 per sq.ft. for removal. This cost can vary depending on the material being removed and whether electrical outlets need adjustments. Top 2025 Trends Impacting Marble Backsplash Costs In 2025, marble backsplashes are not just a functional addition to your kitchen—they’re a design statement. However, the latest trends come with their price tags. Whether you’re considering a classic backsplash marble tile or a bold slab design, understanding these trends will help you plan your budget effectively. 1. Slab Backsplashes: The Ultimate Luxury Seamless, ceiling-height marble slabs are dominating kitchen designs in 2025. These oversized pieces create a sleek, uninterrupted look that’s perfect for modern and minimalist kitchens. However, this trend comes at a cost: Labor: Installing slab backsplashes requires precision and expertise, increasing labor costs by 20–30%. Material: Larger slabs mean fewer seams but higher material expenses, especially for premium marbles like Calacatta. Visual Impact: Perfect for homeowners who want a high-end, magazine-worthy kitchen. 2. Mixed Materials: A Trendy Twist Pairing marble with other materials like metal or wood is a hot trend in 2025. This combination adds texture and contrast, making your kitchen stand out. Here’s how it impacts costs: Additional Materials: Incorporating metal accents or wooden trim adds 5–15 per sq.ft. to your project. Installation Complexity: Mixed-material designs require skilled craftsmanship, which can increase tile backsplash installation costs. Design Flexibility: Ideal for those who want a unique, custom look without committing to a full marble backsplash. 3. Bold Veining: The Showstopper Marbles with dramatic veining, such as Calacatta Gold or Statuario, are in high demand this year. These statement-making stones can elevate any kitchen but come with a premium price: Cost Increase: Bold veining adds 50% or more to the price compared to basic Carrara marble. Popularity: These marbles are often imported, driving up costs due to limited supply and high demand. ROI: While expensive, bold veining can significantly boost your home’s aesthetic appeal and resale value. How These Trends Affect Your Budget When planning your price to install a backsplash, it’s essential to consider these trends: Slab Backsplashes: Ideal for luxury kitchens but require a higher budget for materials and labor. Mixed Materials: A cost-effective way to add personality without breaking the bank. Bold Veining: Perfect for creating a focal point but best suited for those with a flexible budget. Marble vs. Alternatives: Costs & Longevity When choosing a backsplash for your kitchen, marble is often the top choice for its timeless elegance. However, it’s not the only option. Understanding how marble stacks up against alternatives like quartz, granite, and porcelain can help you make an informed decision especially when considering backsplash installation cost and long-term durability. 1. Marble Backsplashes for Kitchens Cost: 7–200/sq.ft. (depending on type, e.g., Carrara vs. Calacatta). Pros: Unmatched elegance, unique veining, and a luxurious feel. Cons: Requires regular sealing, prone to staining, and higher maintenance. Best For: Homeowners who prioritize aesthetics and are willing to invest in upkeep. 2. Quartz: The Durable Contender Cost: 15–75/sq.ft. Pros: Non-porous, resistant to stains, and low maintenance. Cons: Vulnerable to heat damage (not ideal near stovetops) and lacks marble’s natural beauty. Best For: Busy kitchens where durability and ease of cleaning are top priorities. 3. Granite: The Classic Choice Cost: 5–14/sq.ft. Pros: Extremely durable, heat-resistant, and available in a variety of colors. Cons: Heavier and less elegant compared to marble. Best For: Those seeking a balance between durability and affordability. 4. Porcelain: The Budget-Friendly Option Cost: 3–6/sq.ft. Pros: Affordable, easy to clean, and available in marble-look designs. Cons: Lacks the depth and authenticity of real marble. Best For: Budget-conscious homeowners who want a marble-like appearance without the high cost. Hidden Costs & Budget-Saving

How Much to Install a Marble Backsplash in 2025 Read More »

Scroll to Top