S F Marble & Granite

Marble and Granite

How to finish tile backsplash edges?

How to Finish Tile Backsplash Edges? Expert Tips for a Polished Kitchen

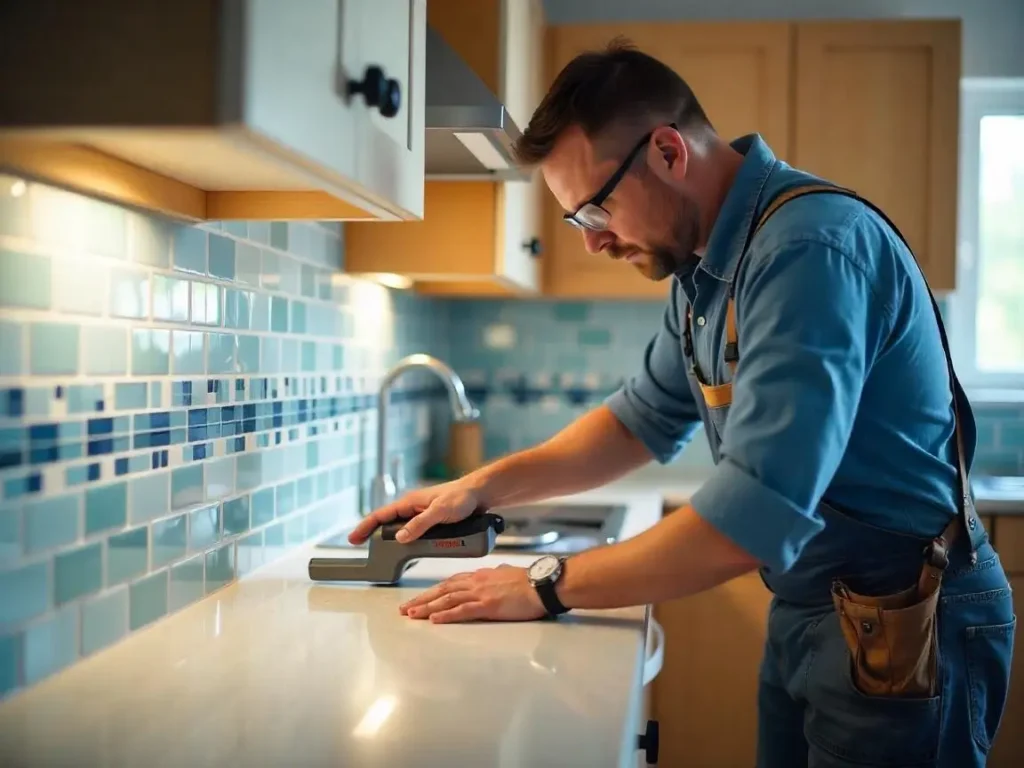
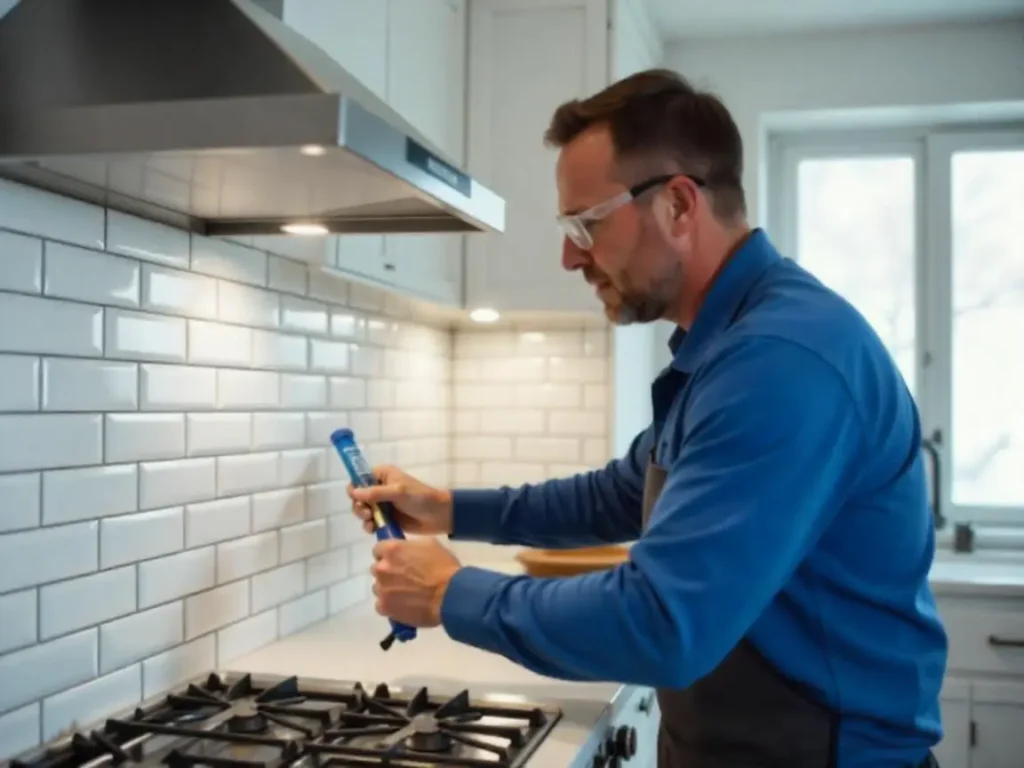
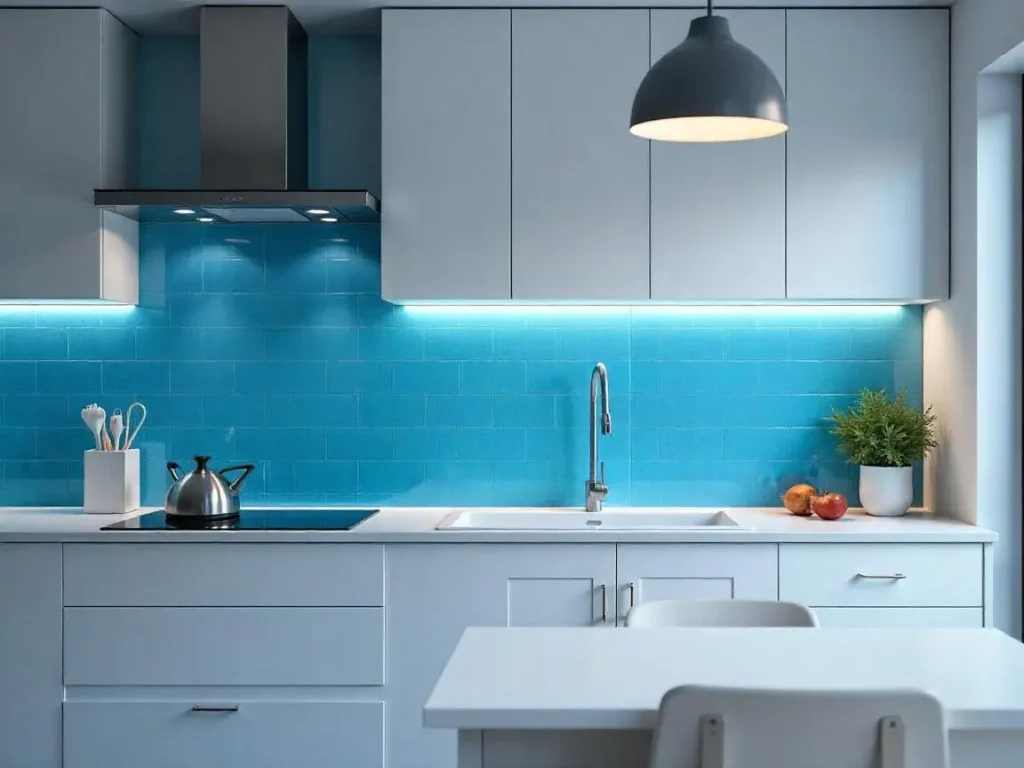
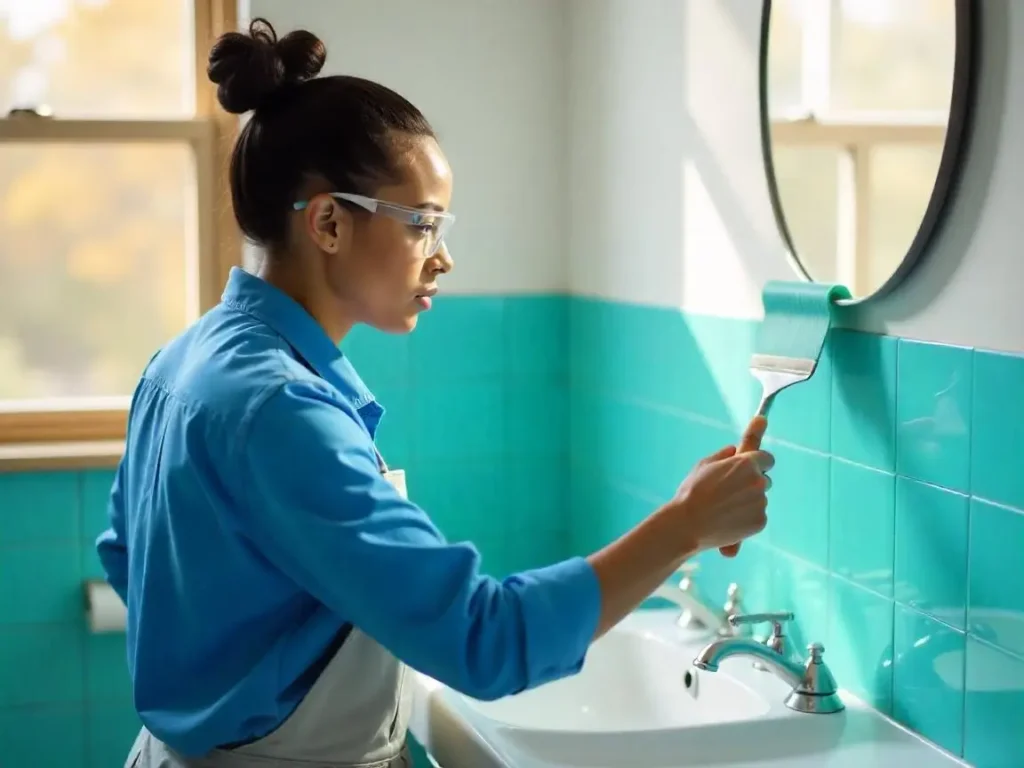
Home The perfect backsplash can transform your kitchen from ordinary to extraordinary, but many homeowners overlook one crucial detail: the edges. How you finish your tile backsplash edges can make or break your kitchen’s overall aesthetic. Whether you opt for sleek metal profiles, classic bullnose tiles, or creative tile backsplash edge treatments, these finishing touches provide both visual appeal and practical protection. The right backsplash trim not only conceals rough tile edges but also creates a polished, professional look that elevates your entire kitchen design. In this comprehensive guide, we’ll explore various backsplash tile edge trim options to help you achieve that perfect finishing touch for your kitchen renovation. Understanding Design Styles and Edge Pairings Selecting the right tile edge backsplash finish depends largely on your kitchen’s overall design aesthetic. Modern kitchens with clean lines often benefit from sleek metal tile backsplash edge treatments, while traditional spaces may call for classic bullnose edges. Rustic kitchens shine with wooden trim accents that add warmth and character. The key is harmony—your backsplash trim should complement existing elements like cabinetry, countertops, and fixtures. For example, a farmhouse kitchen with shaker cabinets pairs beautifully with simple ceramic tile edges, while contemporary spaces with quartz countertops might call for minimalist backsplash tile trim solutions that create clean, uninterrupted lines. Bullnose Edges: The Timeless Tradition Bullnose edges represent one of the most classic approaches to finishing tile backsplash edges. These specially manufactured tiles feature one rounded edge that creates a smooth, finished look perfect for traditional and transitional kitchens. When selecting bullnose tiles for your backsplash tile edge trim, consider matching them precisely to your backsplash tiles for a cohesive appearance. Bullnose edges work particularly well with ceramic and porcelain tiles, offering a clean solution for backsplash trim tile needs. For best results, choose bullnose pieces in the exact same color and material as your main backsplash to ensure seamless integration. Many tile manufacturers produce coordinating bullnose pieces specifically designed to match their tile collections. Design tip: For a more distinctive look, consider contrasting bullnose edges in a complementary color that picks up accent tones from elsewhere in your kitchen. This approach to tile edge backsplash finishing can create subtle visual interest without overwhelming the space. Metal Edges: Sleek and Contemporary Metal profiles offer a modern solution for finishing tile backsplash edges with sleek, clean lines. These backsplash tile trim pieces not only protect tile edges from chips and damage but also create striking visual borders that can define your backsplash area with contemporary flair. When selecting metal tile edge backsplash treatments, consider how they’ll coordinate with your kitchen’s hardware and appliances. Stainless steel profiles complement modern kitchens with similar-finished appliances, while brushed nickel or chrome options offer versatility across design styles. For warmer kitchens, consider copper or bronze metal backsplash trim tile options that add rich, inviting tones. The profile shape matters too—straight metal edges create minimalist, crisp lines, while slightly curved profiles offer a softer transition. These metal edge solutions have become increasingly popular for their durability and ability to create clean, professional-looking transitions between backsplash and counter surfaces or at exposed edges. Pencil Trim: Adding a Touch of Elegance Pencil trim provides a refined option for finishing tile backsplash edges with a touch of sophisticated detail. These slender, cylindrical tiles—typically measuring about half an inch in diameter—create elegant borders around your backsplash tile edge areas. Available in ceramic, porcelain, glass, and natural stone, pencil trim offers versatile backsplash trim tile options for various design aesthetics. In traditional kitchens, ceramic pencil trim in complementary colors can frame subway tile backsplashes beautifully. For more contemporary spaces, glass pencil trim adds a subtle gleam to tile edge backsplash areas while creating visual separation between different materials or colors. Creative combinations can elevate your design further—try pairing pencil trim with decorative tile inserts for custom tile backsplash edge treatments that reflect your personal style. For instance, a marble pencil trim can elegantly frame a mosaic accent strip, adding dimension and interest to your backsplash while providing a finished look at edges and transitions. Glazed-Edge Tiles: Minimalist Chic Glazed-edge tiles offer a modern, streamlined approach to finishing tile backsplash edges without additional trim pieces. These specialty tiles feature glazed edges on one or more sides, eliminating the need for separate backsplash tile edge trim by creating a finished appearance on their own. This minimalist approach works beautifully in contemporary kitchens where clean lines and uninterrupted surfaces are prized. The glazed edges create a cohesive look that flows seamlessly, particularly effective with monochromatic color schemes or when using large-format tiles. When selecting glazed-edge tiles for your backsplash trim tile solution, consider color palettes that complement rather than contrast with your countertops. Soft whites, creams, and light grays offer timeless appeal, while deeper blues, greens, or blacks can create dramatic focal points. For visual interest without additional trim, consider arranging glazed-edge tiles in herringbone, stacked, or other geometric patterns that showcase the clean edges as part of the overall design aesthetic. Caulked Edges: Seamless Integration For a minimalist approach to tile backsplash edge finishing, properly applied caulk creates a clean, seamless transition that’s both practical and visually appealing. This technique works particularly well when your backsplash meets painted walls or when you want to minimize visual transitions in contemporary kitchen designs. The key to successful caulked tile edge backsplash finishing lies in selecting the right caulk color. For a truly seamless look, choose caulk that precisely matches your grout color. Alternatively, match your caulk to the wall color where the backsplash trim tile would typically go for an uninterrupted visual flow. Apply caulk with precision along exposed backsplash tile edges using a caulk gun with a smooth, steady motion. After application, immediately smooth the bead with a damp finger or specialized caulk tool before it sets. This simple backsplash trim approach requires minimal materials while delivering a clean, professional finish that works particularly well in modern kitchen designs where less is more. DIY Bullnose: The Artistic Edge Creating your

How to Finish Tile Backsplash Edges? Expert Tips for a Polished Kitchen Read More »

How to Install Vanity Backsplash?

How to Install a Vanity Backsplash? Protect & Elevate Your Bathroom’s Style

Home A vanity backsplash is more than just a pretty addition; it’s a shield for your walls and a style statement for your bathroom. For Lowell homeowners deeply invested in bathroom remodeling, installing a bathroom vanity backsplash not only guards against water damage but also enhances the overall aesthetic. Whether you’re upgrading your space or building from scratch, a well-chosen backsplash completes the look. Why Install a Vanity Backsplash? Adding a vanity backsplash brings numerous benefits to your bathroom. First and foremost, it offers excellent wall protection, preventing costly water damage to drywall and paint from constant sink splashes. Beyond functionality, a backsplash offers stunning design enhancement, introducing texture and color to complement your granite or marble countertops. For Lowell residents looking to increase their home value, a bathroom upgrade with a stylish backsplash offers a solid ROI in the local housing market. Plus, you’ll enjoy easy maintenance, as backsplashes are far simpler to clean than painted walls. Step-by-Step Guide Ready to get your hands dirty? Here’s a simplified guide on how to install a vanity backsplash. Start by gathering your essential tools and materials. Tools & Materials Needed Design Integration: Matching Backsplashes with Countertops One element that truly sets a bathroom apart is how well the backsplash integrates with the countertop. You see, pairing your backsplash with the right countertop material ensures a cohesive and luxurious look, so let’s explore some winning design pairings. Granite Countertops For those in Lowell who adore the robust elegance of granite countertops, consider pairing them with classic subway tiles or the unique texture of leathered granite slabs. Marble Countertops If luxury is your aim, nothing beats the sophistication of marble countertops. Quartz Countertops Quartz countertops offer a sleek, modern aesthetic, providing a versatile canvas for various backsplash styles. Common Mistakes to Avoid When undertaking a vanity backsplash installation, there are common pitfalls that can undermine the quality and longevity of your project.  Maintenance Tips for Longevity To keep your vanity with tile backsplash looking as good as new, consistent maintenance is key. Here are some simple yet effective practices. Professional vs. DIY Installation Deciding between a DIY approach and hiring a professional can depend on several factors, including your comfort level, the complexity of the project, and local conditions. Here’s what to consider.  Why Choose SF Marble & Granite for Your Backsplash Project? When it comes to transforming your bathroom with a stunning Backsplash Installation in Lowell, SF Marble & Granite is your premier choice. We bring expertise, quality, and a personalized touch to every project. Conclusion Installing a vanity backsplash is a straightforward way to protect your bathroom walls while adding a touch of elegance and increasing your home’s appeal. Whether you choose to tackle it as a DIY project or opt for professional assistance from SF Marble & Granite, the key is careful planning, quality materials, and attention to detail. With the right approach, your bathroom vanity will not only look stunning but also stand the test of time. Contact us today! FAQs  How much does it cost to install a vanity backsplash in Lowell? For a DIY project, expect to spend between $150–$500. Hiring a professional can range from $800–$2,000, varying with the choice of material, with granite installations on the higher end due to their complexity. Can I install a backsplash over existing tiles? Yes, but it’s crucial to ensure the existing surface is clean, level, and securely bonded. Proper preparation is key to prevent adhesion issues. What’s the best backsplash height for a bathroom vanity? A height of 4–6 inches typically works well, providing adequate protection without overwhelming the space. Consider matching the backsplash height to your faucet for visual balance. Do I need a backsplash if my vanity has a built-in countertop? Absolutely. Even with a built-in countertop, a backsplash is essential to protect the wall from water seepage and potential damage over time.

How to Install a Vanity Backsplash? Protect & Elevate Your Bathroom’s Style Read More »

How to Measure for Backsplash?

How to Measure for Backsplash? Expert-Backed Step-by-Step Guide

Home A backsplash is the decorative and protective barrier behind your countertop, crucial for keeping your walls safe from water splashes, grease, and other kitchen mishaps. Not only does it enhance the look of your kitchen or bathroom, but it also preserves the wall’s integrity over time. Accurate measurements save time, money, and prevent wasted materials. In this guide, you’ll learn how to measure for a backsplash, including the right tools, detailed processes, budgeting tips, and troubleshooting advice, ensuring you confidently calculate backsplash square footage for your tile installation. How to Measure for Backsplash? To measure for a backsplash, begin by measuring the height (from countertop to the bottom of the cabinets) and the total width of your chosen area. Multiply these dimensions in inches and then convert the total by dividing by 144. For example, 18 inches by 36 inches equals 648 square inches, which equals 4.5 square feet when divided by 144. This process helps you calculate backsplash square footage and is essential when figuring out square feet for tile. With these basics in place, we now move to tool selection and layout preparation. Tools and Materials You’ll Need Given are the tools and materials required to measure backsplash: Essential Measurement Tools Gather a high-quality measuring tape, pencil, notepad, and a reliable calculator (or a digital backsplash calculator app) to ensure precision. These tools help you accurately measure for a backsplash and lay the foundation for your project. Additional Aids and Safety Gear A level, chalk line, dry-lay templates, and graph paper assist in mapping your area and verifying your calculate backsplash square feet process. Use gloves and protective eyewear, particularly when cutting tile, to keep the project safe and professional. Preparing Your Work Area In order to prepare the work area, follow the given process: Clearing and Cleaning the Surface Before starting, remove any obstacles such as appliances, wall hangings, or furniture near the backsplash zone. Clean the wall thoroughly to eliminate grease, dust, and debris that might affect your measurements and tile adhesion. Documenting the Layout Sketch a scaled diagram or create a digital layout of your backsplash. Mark key elements like outlets or windows. This detailed planning is critical when you measure for a backsplash, ensuring every inch is accounted for. Creating a Dry Lay Arrange your tiles without adhesive a dry lay to visualize your design and confirm your measurements. This step reinforces your approach to calculate backsplash square footage accurately before any permanent work begins. Step-by-Step Backsplash Measurement Process Following are the step-by-step process for backsplash measurement: Sketching and Planning Your Layout Start by drawing a scaled diagram of your backsplash area. Divide the wall into manageable sections if there are interruptions (such as cabinets or windows). This planning ensures precision, especially when figuring out square feet for tile in complex spaces. Measuring Height and Width Vertical Measurement Measure from the countertop to the lower edge of the upper cabinets (or to your desired top edge). A clear vertical measurement is vital when you measure for a backsplash. Horizontal Measurement Measure the full length of the wall, noting any interruptions. This horizontal dimension contributes directly to your calculate backsplash square feet calculation. Handling Irregular Shapes and Obstacles For areas with curves or angles, use a flexible tape measure and break the area into smaller, rectangular segments. Subtract areas that won’t be tiled, like windows or outlet spaces, ensuring you accurately calculate backsplash square footage even in irregular sections. Calculating the Total Area and Material Needs Given are the materials needed for calculating the total area: Converting Measurements Multiply your measured height by the measured width (both in inches) to get the total square inches. Then, divide that number by 144 to convert it to square feet. For example, if 18 inches x 36 inches equals 648 square inches, then 648 divided by 144 gives you 4.5 square feet. This method helps you calculate backsplash square feet efficiently. Determining Tile Quantity Tile-Specific Considerations Based on the tile dimensions, determine how many tiles you’ll need to cover your calculated area. Use your measurements when figuring out square feet for tile to understand if one tile covers the necessary area or if additional cuts are required. Adding Overage It is essential to order an extra 10% to 15% (up to 20% for complex layouts) to cover cutting errors, breakage, and future repairs. This extra helps ensure you always have sufficient material without disruptions in your project. Advanced Tips and Techniques Here are the advanced tips and techniques: Using Technology and Digital Tools Leverage online backsplash calculators and downloadable templates to streamline your process. Many mobile apps allow you to measure for a backsplash digitally, ensuring precision when you calculate backsplash square footage. Visual Planning Aids Utilize infographics, dry-lay photos, and video walkthroughs to guide your measurement process. These visual aids enhance understanding and provide real-life examples, making figuring out square feet for tile simpler and more effective. Troubleshooting Common Measurement Errors Double-check every measurement and use multiple methods if needed to avoid errors. Be mindful of unit conversion mistakes, especially when converting inches to square feet, ensuring your calculate backsplash square feet process is error-free. Budgeting and Cost Estimation Given are the budgeting and cost estimation to measure the backsplash: Estimating Costs Based on Measurements Accurate measurements allow you to control material costs and minimize waste. Use your calculated backsplash square feet to estimate the overall tile cost based on the price per square foot. Material and Waste Cost Considerations Factor in extra tile costs for overage. By anticipating potential mistakes, you ensure your budget covers all required materials. Tips for Saving Money Order slightly more than calculated to take advantage of return policies on unused tiles. Consider repurposing leftovers and, if needed, allocate funds for professional support to keep your project efficient and cost-effective. Elevate Your Kitchen with SF Marble & Granite in Lowell At SF Marble & Granite, we don’t just provide tile we bring your vision to life. When it comes to

How to Measure for Backsplash? Expert-Backed Step-by-Step Guide Read More »

how to install backlit backsplash how to install backlit backsplash.

How to Install Backlit Backsplash? Expert Guide

A backlit backsplash brings a unique glow that transforms kitchens and bathrooms into inviting spaces. Homeowners in Lowell, MA, are increasingly choosing this style to add ambient lighting and a modern twist to traditional designs. With its easy cleaning and customizable colors, the illuminated design enhances both functionality and aesthetic appeal. Whether you opt for a kitchen led backsplash or a classic backlit backsplash, the effect is both dramatic and warm. This trend is popular in mid-century and colonial-style homes, proving that modern lighting can beautifully complement any decor. How to Install Backlit Backsplash? Begin with a clear plan: measure your space and mark areas for the LED strips and tile edge led strip light channel placement. Gather materials such as LEDs, translucent tiles, adhesive, and grout. Clean and prepare the surface carefully before installing the backlit backsplash elements. Secure the LED strips with attention to safety, ensuring wiring is linked to a GFCI outlet. Finally, affix the tiles evenly and finish with grout to allow light to shine through. This step-by-step method guarantees a stunning, even illumination for your new design. Material Showdown: Glass vs. Stone vs. Quartz Backlit Backsplashes Glass Tiles Glass tile backsplash red offers excellent light diffusion, creating a sleek, modern look that emphasizes vibrant hues. However, glass tiles require extra care; using a glass tile backsplash red in high-traffic areas can mean higher maintenance. Natural Stone Opt for granite or marble for durability and unique veining. Many Lowell residents prefer green glass backsplash kitchen tile designs paired with stone, ensuring a timeless yet contemporary finish. Using green glass backsplash kitchen tile accents can balance the rugged beauty of natural stone with the modern feel of backlighting. Engineered Quartz Quartz provides a non-porous, consistent surface. While engineered quartz may limit translucency, it pairs well with a backlit backsplash to create a striking visual contrast that remains low maintenance. Advanced Design Trends: Beyond Basic Lighting Modern design now integrates color-changing LEDs that sync with smart home systems. Innovative options include textured backlit panels and integrated outlets that hide electrical components seamlessly. Homeowners can elevate their space with a light blue glass tile backsplash for a cool, calming effect and a light blue glass tile backsplash that adds sophistication to any kitchen. The future of backlit design is bright, blending technology and style effortlessly, ensuring that every kitchen shines with personalized charm. Safety & Compliance: What Lowell Contractors Want You to Know Ensuring safety is paramount. In Lowell, adherence to Massachusetts’ NEC requirements means connecting LEDs to a GFCI outlet and using waterproof wiring. It’s essential to manage heat effectively, so the backlit backsplash remains cool and safe. Contractors advise checking permit guidelines for major renovations, especially when modifying electrical systems. Proper installation minimizes risks such as overheating of LED strips and ensures compliance with local codes, giving homeowners peace of mind while enjoying their modern backlit backsplash. Cost Analysis: DIY vs. Professional Installation DIY Costs Expect to spend around $1,500–$3,000 on materials, including LEDs, translucent tiles, and installation tools. However, DIY may lead to uneven lighting or electrical issues with your kitchen led backsplash. Professional Costs Professional installation by SF Marble & Granite can range from $3,500–$6,000. This price includes design consultation, expert labor, and warranties, ensuring a flawless backlit backsplash that enhances your home’s value in Lowell’s competitive market. Maintenance & Longevity: Keeping Your Backsplash Pristine Regular upkeep extends the life of your kitchen led backsplash. Use a microfiber cloth and gentle cleaners to avoid damaging the translucent tiles. If you notice flickering or loose fixtures, check the connections along the tile edge led strip light channel. Routine maintenance not only preserves the visual appeal but also prevents common issues. Contact SF Marble & Granite for professional repairs or advice to ensure your backlit backsplash continues to shine beautifully in your Lowell home. Transform Your Kitchen Lighting with Lowell’s Trusted Experts  At SF Marble & Granite, we bring more than just skill we bring local insight. With years of experience in backsplash installation in Lowell, we understand the charm of classic New England homes and the clean lines of modern builds. Whether your kitchen leans traditional or contemporary, we’ll customize every detail to fit your style perfectly. Trust a team that knows your neighborhood as well as we know stone. Conclusion A backlit backsplash isn’t just a trendy design it’s a smart upgrade that brings both function and beauty to your kitchen. From adding soft, ambient lighting to showcasing unique materials like glass, quartz, or stone, this feature truly transforms how your space looks and feels. Whether you love the subtle glow behind a sleek glass tile or the bold statement of color-changing LEDs, the right backsplash can make your kitchen feel brand new. It’s a detail that combines elegance, innovation, and comfort all in one stunning finish. Contact SF Marble & Granite Inc. for a free consultation let’s bring light to your kitchen! FAQs Can I retrofit an existing backsplash with LEDs?Yes, though it may require partial demolition and rewiring for a seamless backlit backsplash integration. How long do LED strips last?With proper heat management, LED strips can run for over 50,000 hours. Do backlit backsplashes work in small kitchens?Absolutely, they enhance space perception, even in compact areas with a kitchen led backsplash. Are natural stone backsplashes prone to cracking?Not when installed correctly with expansion joints and quality adhesives.  

How to Install Backlit Backsplash? Expert Guide Read More »

How to Install Backsplash Tile Sheets?

How to Install Backsplash Tile Sheets? A Step-by-Step Guide

Home A kitchen backsplash is more than just a pretty face – it’s a functional powerhouse that protects your walls from splashes, stains, and everyday wear and tear. Installing backsplash tile sheets is a fantastic DIY project that can transform your kitchen’s look while adding value to your home. Whether you’re a seasoned DIY enthusiast or a first-time renovator, this guide will walk you through the process of creating a stunning focal point in your kitchen using tile sheets. From choosing the right materials to the final touches, we’ll cover everything you need to know to make your kitchen remodel a success. How to Install Backsplash Tile Sheets? Installing backsplash tile sheets involves several key steps: preparing the area, planning your design, applying adhesive, setting the tiles, grouting, and sealing. First, clear the workspace and protect surfaces. Then, clean and prep the wall. Next, apply adhesive and carefully place your tile sheets. Once set, apply grout and clean excess. Finally, seal the grout and tiles for long-lasting protection. Each step is crucial for a professional-looking finish that will make your kitchen ideas & projects come to life. Exploring Backsplash Tile Sheet Options When it comes to backsplash materials, the options are endless. Tile sheets come in various materials, including ceramic, glass, metal, and stone. Each offers unique benefits: Emerging trends include fluted tiles for added dimension and peel-and-stick options for easy installation. Consider your kitchen’s style and your personal preferences when choosing. Remember, your backsplash is a chance to express your creativity and enhance your home decor ideas. Design Considerations Your backsplash should complement your existing cabinetry and countertop. Consider these design tips: Balance aesthetics with functionality – a busy pattern might look great but could be overwhelming in a small space. Take your time with the design phase; it’s the foundation of your project. Budgeting and Cost Estimation Before diving in, it’s essential to budget for your backsplash project. Costs can vary widely depending on materials and scope. Here’s a breakdown: To save money without compromising quality: Remember to factor in a 10% overage for cuts and mistakes. Preparing the Workspace A clean, organized workspace is crucial for a successful installation. Follow these steps: Safety first: Power off any electrical outlets you’ll be working around. Surface Preparation Proper wall preparation is key to a long-lasting backsplash. Here’s what you need to do: Take your time with this step – a smooth, clean surface will make tile installation much easier. Install a Ledger Board A ledger board is crucial for ensuring your tiles are level and properly supported. Here’s how to install one: Remember, the ledger board is temporary and will be removed after the adhesive sets. Plan the Design Planning your layout is crucial for a professional-looking finish. Follow these steps: Take your time with this step – a well-planned layout will make installation much smoother. Cut the Tiles Cutting tiles accurately is essential for a polished look. Here’s how to do it: Remember, measure twice, cut once to avoid wasting tiles. Mix and Apply Adhesive Proper adhesive application is crucial for a secure installation. Follow these steps: Remember, you have limited working time once the adhesive is mixed, so work efficiently. Install the Tile Now for the exciting part – setting your tiles! Here’s how: Take your time and work carefully – this is where your backsplash comes to life! Mix and Apply the Grout Grouting gives your backsplash a finished look. Here’s how to do it right: Be thorough but gentle to avoid scratching your tiles. Clean and Seal Grout and Fill the Expansion Gap The final touches make all the difference. Here’s what to do: These steps protect your backsplash and give it a professional finish. Clean and Reassemble the Area Time to put your kitchen back together: Take care not to damage your new tiles during this process. Tools You’ll Need Here’s a checklist of tools for your backsplash project: Having the right tools on hand will make your project go smoothly. Maintenance and Care To keep your backsplash looking great: With proper care, your backsplash will stay beautiful for years to come. Common Mistakes to Avoid Steer clear of these common pitfalls: Take your time and follow each step carefully for the best results. Expert Backsplash Installation Company in Lowell, MA If you’re looking to elevate your kitchen or bathroom with a stylish and functional backsplash, SF Marble & Granite Inc. is the premier choice for Backsplash installation in Lowell, MA. With over a decade of experience, we specialize in creating custom designs that blend seamlessly with your home’s aesthetic while offering unmatched durability and protection. Whether you prefer classic subway tiles, intricate mosaics, or modern glass tiles, our team ensures precision and quality in every project. Conclusion Installing a backsplash is a rewarding DIY project that can dramatically enhance your kitchen’s appearance and functionality. With careful planning, the right tools, and attention to detail, you can create a beautiful backsplash that will be the envy of your friends and family. Remember to take your time, follow each step carefully, and don’t be afraid to ask for help if you need it. Your new backsplash will not only protect your walls but also serve as a stunning focal point in your kitchen for years to come. Happy tiling! Contact Us Today Transform your space with a stunning backsplash installed by SF Marble & Granite Inc., the trusted name in Lowell. Contact us for a free quote and consultation to start your project! FAQs How Do I Cut Backsplash Tiles Without A Wet Saw?You can use a manual tile cutter for straight cuts or an oscillating tool with a diamond blade for more complex cuts. Always wear safety gear and work slowly for the best results. Can I Install Backsplash Tile Sheets Over Existing Tiles?It’s possible, but not always recommended. Ensure the existing tiles are firmly attached and the surface is clean and flat. Use a special bonding primer before applying new adhesive. How

How to Install Backsplash Tile Sheets? A Step-by-Step Guide Read More »

How do you cut tile backsplash?

How do you cut tile backsplash? A Complete Guide 2025

Home In modern kitchen design, a perfectly cut backsplash elevates home aesthetics by adding style and sophistication. If you’ve ever wondered, “How do you cut tile backsplash?” mastering this DIY skill is a game changer. Learning the art of cutting backsplash tile offers significant cost‑savings and endless customization. Whether you’re cutting tile for backsplash with a manual cutter or experimenting with advanced tools, the satisfaction of achieving professional results on your own is unbeatable. By learning to cut backsplash tile precisely, you not only create a stunning kitchen feature but also embark on a rewarding home improvement journey that transforms your space into a work of art.  What Is the Best Way to Cut Tile Backsplash? To cut tile backsplash effectively, start by carefully measuring and marking your tile. Choose a tool that matches your tile material whether it’s a manual tile cutter, snap cutter, tile nipper, angle grinder, or wet saw. Score the tile along the marked line and apply steady pressure to snap or cut it cleanly. Finally, smooth rough edges with a rubbing stone or sanding sponge. This process for cutting backsplash tile sets a foundation for DIY projects and leads to professional results. Understanding Your Tile Material & Its Impact When planning how do you cut tile backsplash, understanding your tile material is key. Different materials require specific methods when cutting and installing. Tile Types Overview Material-Specific Tips Sustainability & Waste Reduction Plan your cuts carefully to maximize tile usage and reduce waste. Measure twice and mark your layout to minimize off‑cuts. Consider recycling any leftover pieces or donating scraps to local community projects. This eco‑friendly approach not only saves you money but also contributes to a greener project. Pre‑Project Planning & Preparation Successful backsplash installation starts long before you pick up a tool. Project Assessment & Goal Setting Accurate Measurement & Layout Design Workspace Organization & Safety Setup Comprehensive Tool Guide & Maintenance Choosing the right tool is essential when learning how do you cut tile backsplash. Overview of Tile Cutting Tools Tool Selection & Maintenance Step‑by‑Step Cutting Techniques Mastering the cutting process is crucial for a flawless backsplash installation. Manual Cutting Methods Using a Manual Tile Cutter/Snap Cutter: Precision Trimming with Tile Nippers Trimming Curves and Details: Using an Angle Grinder Versatile Cutting for Various Shapes: Wet Saw Operation For Clean, Professional Cuts: Techniques for Pre‑Installed Tile Modifying Existing Backsplash: Advanced Specialty Cuts & Creative Solutions Making Diagonal, Bevel, L‑Shaped, and Plunge Cuts: Finishing Touches & Post‑Cut Care A flawless finish is the final step in laying your backsplash tile. Edge Smoothing & Refinishing Sanding & Smoothing: Preparing Tiles for Installation Cleaning and Surface Preparation: Long‑Term Maintenance & Repair Repair Tips: Safety Guidelines & Best Practices Prioritize safety throughout your backsplash tile project. Comprehensive Safety Checklist Personal Protective Equipment (PPE): Managing Dust, Noise, & Water Dust Control: Noise Reduction: Water Usage: Emergency & First-Aid Tips Accident Preparedness: Cost Analysis & DIY vs. Professional Help Evaluate your project’s budget and decide if DIY is right for you. Budgeting Your Project Cost Estimation: Cost‑Benefit Analysis DIY Advantages: When to Hire a Professional: Return on Investment (ROI) Long‑Term Value: Elevate Your Kitchen with SF Marble & Granite in Lowell At SF Marble & Granite Inc., we’re more than just another Backsplash Installation company in Lowell we’re your local neighbors and experts. We truly understand the unique architectural styles of Lowell homes, whether it’s a charming historic Victorian or a sleek modern condo. Our personalized approach ensures your kitchen gets a backsplash that not only looks stunning but also perfectly complements your space. Trust in our quality craftsmanship and dedicated service to transform your kitchen into a functional work of art. Experience the difference with solutions that are inspired by our local community. Conclusion Learning how do you cut tile backsplash can transform your kitchen by giving you a stunning, custom finish that reflects your unique style. By carefully measuring, selecting the right tools, and mastering techniques from scoring and snapping with a manual tile cutter to using a wet saw for precision cuts you can achieve professional results on your own. Remember to plan your project meticulously, follow safety guidelines, and always smooth edges for a flawless look. We encourage you to experiment with these methods, share your DIY successes, and join our community of home improvement enthusiasts. Contact us now! FAQs How do I cut tile backsplash without chipping?To avoid chipping when cutting backsplash tile, start by scoring accurately along your marked line using a manual tile cutter or snap cutter. Apply gentle, steady pressure to snap the tile cleanly. Always follow up by smoothing rough edges with a rubbing stone or sanding sponge. Consistent scoring and proper tool use make all the difference when it comes to cutting tile for backsplash. What is the best tool for cutting backsplash tile?The ideal tool depends on your tile type and project needs. Manual tile cutters and snap cutters work well for straight cuts on ceramic and porcelain. Wet saws offer clean, precise cuts, especially for larger or thicker tiles, while tile nippers excel at trimming small or curved sections. For versatile cutting, an angle grinder with a diamond blade can handle various materials. Choose the tool that best suits your backsplash design and tile material. How can I fix minor damage if my tile gets chipped?If your tile gets chipped, you can repair it by gently sanding the rough or sharp edges with a fine-grit sanding sponge or rubbing stone. For small gaps or deeper chips, consider using a tile repair kit to fill in and smooth out the damaged area. These simple repair techniques help restore both the appearance and safety of your backsplash. What safety precautions should I take when cutting backsplash tile?Safety is paramount when cutting backsplash tile. Always wear gloves, eye protection, and a respirator to protect against dust and debris. Work in a well‑ventilated, well‑lit area and secure your workspace to prevent slips or accidents. Use dust collection or wet cutting

How do you cut tile backsplash? A Complete Guide 2025 Read More »

How to Lay Backsplash Tile? A Guide with Expert Tips

How to Lay Backsplash Tile? A Guide with Expert Tips

Home Installing a backsplash is a simple way to protect your walls, enhance your kitchen design, and boost your home’s value. This guide on “how to lay backsplash tile” is perfect for DIY enthusiasts, homeowners, and beginners seeking clear, actionable instructions. Learn a complete, step-by-step backsplash tile installation process, including professional tips for laying backsplash tile with precision. We explain planning your layout, selecting quality materials, and troubleshooting common mistakes, as well as maintenance strategies. Whether you need an easy guide to laying backsplash tile for your kitchen or detailed tile installation tips, this guide is your comprehensive, hands-on resource indeed. How to Lay Backsplash Tile? Start by cleaning and priming your wall. Next, measure, mark, and plan your layout to determine your starting point. Apply tile adhesive in small sections, then lay backsplash tile with consistent spacing using spacers. Trim tiles for edges with a tile cutter, apply grout, clean off excess, and seal for lasting durability. Follow detailed steps in Section 3 for planning, Section 6 for installation, and Section 7 for design enhancements. This process minimizes mistakes and ensures a professional, attractive finish. Understanding Backsplash Tile Options and Trends When learning how to lay backsplash tile, it’s essential to know your options. Start with a materials comparison: Ceramic: Affordable and easy to work with, ceramic tiles are great for classic, clean looks. Porcelain: Durable and low-maintenance, perfect for busy kitchens. Glass: Offers a modern, reflective quality that brightens your space. Natural Stone: Options like granite or marble add timeless elegance and unique patterns. Design Styles Popular styles include classic subway, mosaic, patterned, and modern minimalist. Each style influences your layout and overall kitchen aesthetic. Color & Texture Select colors and textures that complement your countertops and cabinetry. Look for harmonious shades that enhance your décor without overwhelming the space. Sustainability in Tile Selection Eco-friendly options are emerging opt for recycled glass or sustainably sourced natural stone. Sustainable practices not only reduce waste but also align with green building trends. Emerging Trends Innovative tile designs, such as textured surfaces and smart tile solutions with integrated LED lighting, are gaining traction. These trends offer fresh ways to personalize your backsplash and make your DIY project stand out. Pre-Installation Planning and Layout A successful DIY backsplash tile installation begins with solid planning. Surface Assessment Inspect your wall for any damage. Clean thoroughly and prime the surface to ensure proper adhesion. Measuring and Marking Measure the area accurately, and use a level to mark guidelines. Determining your starting point often the center or bottom is crucial for symmetry. Project Timeline & Scheduling Estimate the time needed for each phase: preparation, tile laying, grouting, and sealing. Create a realistic schedule that accommodates drying times and breaks. Safety and Accessibility Considerations Wear appropriate personal protective equipment (PPE) such as gloves and safety glasses. Ensure that instructions are clear and accessible for DIY beginners, so even novices can confidently follow the process. Tools, Materials, Budgeting, and Supplier Selection Gathering the right tools and materials is key for how to lay backsplash tile successfully. Tools Required Essential tools include: Tile cutter or wet saw: For precise cuts. Notched trowel: To spread adhesive evenly. Grout float: For smooth grout application. Spacers and level: To maintain consistent tile spacing and alignment. Materials Needed You’ll need high-quality adhesive, grout, primer, sealant, and spacers. These materials ensure your backsplash tile installation is durable and attractive. Budgeting Tips Estimate project costs by listing tools and materials. Look for cost-saving tips, such as renting specialized tools or buying materials in bulk. Supplier and Brand Selection Research local suppliers and reputable brands. Read reviews and compare prices to choose quality products that fit your budget, ensuring your DIY backsplash tile project lasts for years. Step-by-Step Installation Process Follow these clear steps for your tile backsplash installation: Adhesive Application Mix your tile adhesive according to manufacturer instructions. Apply it in small sections with a notched trowel, ensuring even coverage. Tile Placement Start laying your tiles from your determined starting point. Use spacers to maintain consistent gaps for grout and check alignment with a level. Tile Cutting Techniques For edges and obstacles, trim tiles using a tile cutter or wet saw. This step is vital for a clean, professional finish. Grouting Process Once tiles are set, apply grout with a grout float. Work it into the spaces, then remove excess grout with a damp sponge. Sealing and Finishing After the grout dries, seal the tiles and grout to protect against moisture and stains. Advanced Installation Techniques For curved surfaces or mosaic effects, adjust your method experiment with layout variations and extra cutting techniques to handle irregular areas. Design Enhancements and Creative Customizations Make your backsplash stand out with creative customizations: Enhancing Visual Appeal Integrate your backsplash design with your countertops, cabinets, and overall kitchen décor. Consistency in style ties the room together. Decorative Accents Use contrasting grout colors, accent lighting, or patterned tiles to add visual interest. These small details can transform a simple installation into a statement piece. Smart Home Integration Consider incorporating LED strip lighting or smart sensors. These modern touches not only add style but also enhance functionality by illuminating your backsplash. Custom Patterning Explore unique layout options, like creating a focal mosaic or incorporating geometric patterns, to add a personalized touch that reflects your style. Troubleshooting and Common Mistakes Even with careful planning, challenges can arise. Here’s how to tackle them: Identifying Issues Common pitfalls include uneven tile spacing, improper adhesive application, or grout inconsistency. Regularly check your alignment and spacing throughout the process. Troubleshooting Tips If tiles start to shift, gently reposition them before the adhesive sets. For grout issues, adjust the water-to-grout ratio and reapply if necessary. Preventative Quality Checks Implement periodic checks during installation. Measure frequently and use a level to ensure consistency. This proactive approach helps catch errors early, ensuring a smooth, professional finish. Post-Installation Care and Long-Term Maintenance Keep your backsplash looking fresh and lasting over time: Routine Cleaning Clean tiles regularly with a

How to Lay Backsplash Tile? A Guide with Expert Tips Read More »

How to install tile backsplash on drywall?

How to install tile backsplash on drywall? A Complete Guide 2025

Home Learning how to install tile backsplash on drywall not only protects your walls but also boosts your kitchen’s aesthetic appeal. A professionally finished tile backsplash creates a cohesive look, unifying cabinetry, countertops, and décor while adding functional durability. In this guide, you’ll learn step-by-step instructions on how to install tile backsplash, ensuring even gaps, proper adhesion, and a flawless finish. Designed for DIY enthusiasts and budget-conscious homeowners, our guide provides clear, practical tips to help you save on installation costs while achieving a stunning, durable backsplash that enhances your kitchen design. How to Install Tile Backsplash on Drywall? To install a tile backsplash on drywall, start by cleaning and priming the surface. Next, create a precise marking grid and apply adhesive evenly. Set your tiles with spacers to ensure uniform gaps, then cut tiles to fit edges and corners before grouting the joints. Finally, seal the grout for lasting protection. This method also works effectively for tiling kitchen backsplashes. Understanding the Basics Definition & Purpose A tile backsplash is a decorative and protective wall covering installed behind countertops. It shields your walls from water, grease, and splashes while adding a visual accent to your kitchen or bathroom. Tiles available in ceramic, porcelain, glass, or natural stone come in myriad designs, letting you express personal style while enhancing the room’s functionality. Why Drywall? Drywall is a popular, affordable substrate for installing a backsplash. Its smooth, even surface can yield a clean installation if properly prepared. However, compared to cement board, drywall may be more vulnerable to moisture and requires careful cleaning, repair, and priming. Knowing these benefits and challenges helps you choose the right technique to install backsplash on drywall effectively. Industry Insights & Design Trends Current Design Trends Modern tile backsplash designs emphasize bold geometric patterns, mosaic arrangements, and even hand-painted accents. Neutral tones paired with vibrant splashes are popular, while minimalist designs with subtle textures are gaining traction. These trends offer homeowners multiple ways to personalize their spaces. Material & Tile Options Ceramic Tiles: Affordable, versatile, and available in numerous styles. Porcelain Tiles: Denser and highly water-resistant, making them ideal for kitchens and bathrooms. Glass Tiles: Provide a reflective, modern look and help brighten spaces. Natural Stone Tiles: Offer unique, organic textures but require more maintenance. Sustainability & Eco-Friendly Considerations Eco-friendly solutions are increasingly important. Opt for adhesives with low VOCs and consider recycled or sustainably sourced tiles. These choices not only protect your home’s environment but also improve indoor air quality. Case Studies & Success Stories DIY enthusiasts have transformed dated kitchens with a beautifully installed tile backsplash. For instance, one homeowner combined modern ceramic tiles with reclaimed wood accents, creating a unique, budget-friendly update that impressed both family and friends. Real-life examples like this illustrate the power of a well-executed project. Pre-Installation Planning and Preparation Measuring & Layout Design Accurate measurements are critical. Start by measuring the backsplash area and sketching a layout. Create a detailed plan showing tile placement, ensuring you account for necessary cuts and alignment. Use painter’s tape to mark a grid on your drywall, guiding a precise installation. Tools and Materials Checklist Gather all essential items: Tools: Tile cutter, notched trowel, level, spacers, measuring tape, pencil, and safety gear (gloves, safety glasses). Materials: Tiles, adhesive (specifically for tile backsplash on drywall), grout, sealant, and primer if needed. Preparing the Drywall Surface Proper preparation ensures durability. Clean the wall thoroughly, repair any cracks or holes, and sand the surface smooth. Apply a primer to improve adhesive bonding—this step is crucial for a long-lasting installation. Budget Breakdown & Cost Analysis Estimate your total project cost by researching prices for tiles, tools, and materials. Budgeting tips include comparing local hardware store prices and online deals. Factor in potential ROI, as a new backsplash can increase your home’s appeal and value. Project Scheduling & Time Management Develop a realistic timeline that segments your project into phases: preparation, installation, and finishing. Allocate extra time for drying periods and unexpected adjustments to ensure a stress-free process. Environmental Impact Considerations Choose sustainable products wherever possible. Eco-friendly adhesives, recycled tiles, and efficient waste management can minimize your project’s environmental footprint while delivering a high-quality finish. Step-by-Step Installation Process Creating the Marking Grid Using a level and pencil, draw a grid on your prepared drywall. This grid serves as a blueprint, ensuring that every tile is aligned correctly. Mark the center and work outwards to maintain balance and symmetry. Adhesive Application Best Practices Select an adhesive suited for tile backsplash on drywall. Using a notched trowel, apply a consistent layer of adhesive on a small section of the wall at a time. Working in manageable sections prevents the adhesive from drying before you set your tiles. Tile Laying Process Place tiles along the grid lines, using spacers to maintain uniform gaps. Start from a central point or a key focal area, gradually moving outward. Keep checking with a level to ensure tiles are straight and even. Cutting and Fitting Tiles For edges and corners, measure carefully and cut tiles with a tile cutter or wet saw. Aim for precise, clean cuts to ensure a seamless finish, and always test fit a tile before final placement. Advanced Installation Techniques For uneven surfaces or custom layouts, advanced techniques may be required. If tiling backsplash over drywall presents challenges due to imperfections, consider reinforcing areas with backer boards or shims. Experiment with custom patterns to add a personal touch to your design. Finishing the Installation Grout Selection and Application Choose a grout that complements your tiles and meets your durability needs. Once the adhesive has set, remove spacers and apply the grout using a rubber float. Work it thoroughly into the gaps, then smooth and clean the surface with a damp sponge for a professional look. Sealing and Protecting Your Work Sealing is key to longevity. Once the grout is dry, apply a high-quality sealant to protect against moisture, staining, and everyday wear this step is especially crucial in kitchens and bathrooms. Enhancing

How to install tile backsplash on drywall? A Complete Guide 2025 Read More »

How to end backsplash on open wall?

How to end backsplash on open wall? A Complete Guide 2025

Home The kitchen backsplash is more than just a shield against splashes; it’s a design statement that can elevate the entire space. However, how to end backsplash on open wall presents a unique challenge. Unlike backsplashes enclosed by cabinets, open-ended designs require careful planning to ensure a seamless and visually appealing finish. In this guide, we’ll explore creative and practical solutions to tackle this design puzzle. Understanding the Basics What is an Open Wall Backsplash? An open wall backsplash refers to a backsplash that isn’t confined by adjacent walls or cabinets. This layout is common in modern, open-concept kitchens where the backsplash extends along a wall without any clear boundaries. Common Design Challenges with Open Walls Open walls pose several design challenges: Lack of Natural Stopping Points: Without cabinets or walls to define the edge, it’s tricky to determine where the backsplash should end. Exposed Edges: Raw tile edges can look unfinished and may be vulnerable to damage. Visual Imbalance: An improperly terminated backsplash can disrupt the overall harmony of the kitchen design. Importance of Choosing the Right Stopping Point Selecting the right stopping point is crucial for both aesthetics and functionality. A well-placed ending creates a polished look, protects the edges, and ensures the backsplash complements the rest of the kitchen. Design Principles for Ending Backsplashes Balance and Proportion Maintaining visual harmony is essential in any kitchen design. When ending a backsplash on an open wall, consider how it aligns with other elements in the room. A backsplash that is either too long or too short can throw off the balance. Tip: Use the height of upper cabinets or the length of the countertop as a guide to determine the appropriate length for your backsplash. Visual Continuity Ensure smooth transitions between the backsplash, walls, and cabinetry. The goal is to create a cohesive design where the backsplash appears to be a natural extension of the surrounding elements. Tip: Choose colors and patterns that complement the existing décor to create a seamless look. Functional Considerations Protecting exposed edges from damage and dirt is a key functional concern. Open edges are more susceptible to chipping and can accumulate grime over time. Tip: Use edge treatments like bullnose tiles or metal trims to protect and seal the exposed edges. 12 Creative Methods to End a Backsplash Align with Cabinetry Ending the backsplash at the base of upper cabinets or aligning with lower cabinets is a straightforward approach. This method works well when the cabinets provide a natural stopping point. How to: Simply extend the backsplash to the bottom edge of the upper cabinets, ensuring a clean, straight line. Taper Off the Tile Gradually staggering the tiles to create a soft transition offers a more subtle finish. This technique works best with mosaic or small format tiles. How to: Start with a full row of tiles and gradually reduce the height in subsequent rows to create a tapered effect. Frame the Area Using picture rails, chair rails, or trim tiles to define the backsplash area adds a decorative touch. This method is ideal for creating a focal point. How to: Install trim along the top and sides of the backsplash to create a framed effect, adding visual interest. Bullnose Trim Tiles Adding rounded edge tiles for a polished finish provides a clean and professional look. Bullnose tiles are specifically designed to finish off exposed edges. How to: Replace the last row of standard tiles with bullnose tiles to create a smooth, rounded edge. Schluter Strips or Metal Trim Using aluminum, steel, or PVC trims for clean edges offers a sleek, modern aesthetic. Schluter strips provide a clean line and protect the tile edges. How to: Install Schluter strips along the exposed edges of the backsplash, ensuring a snug fit for a seamless finish. Full-Wall Cladding Extending the backsplash to the ceiling for a bold statement can transform the entire kitchen. This method works well with eye-catching tiles or patterns. How to: Continue the backsplash tiles all the way to the ceiling, creating a dramatic, floor-to-ceiling effect. Decorative Borders Creating defined edges with contrasting tiles or patterns adds visual interest. This method is ideal for those looking to make a statement. How to: Use a border of contrasting tiles along the top and sides of the backsplash to create a visually striking edge. Countertop Material Extension Continuing the countertop material up the wall as the backsplash provides a seamless and luxurious look. This method works well with materials like granite, quartz, or marble. How to: Extend the countertop material a few inches or feet up the wall, creating a backsplash that matches the countertop. Add Floating Shelves Using shelves as natural stopping points while adding functionality is a practical and stylish solution. Shelves provide a clear boundary for the backsplash while offering additional storage. How to: Install floating shelves along the open wall and end the backsplash at the bottom edge of the shelves. Wainscoting or Beadboard Integration Combining paneling with tile for a bespoke look adds texture and dimension. This method is ideal for creating a unique, customized backsplash. How to: Install wainscoting or beadboard along the lower portion of the wall and end the backsplash where the paneling begins. Large Mirrors (for Bathrooms) Ending the backsplash below mirrors for a sleek finish is common in bathrooms. This method creates a clean and reflective surface. How to: End the backsplash a few inches below the bottom edge of the mirror for a seamless look. Caulking for Simplicity Sealing edges with caulk for an affordable and easy solution provides a clean finish. This method is best for minor gaps or imperfections. How to: Apply painter’s tape along the edges of the backsplash and apply a bead of caulk, smoothing it out with a finger or tool before removing the tape. Material-Specific Solutions Marble Backsplash Edge Finishing Techniques Marble requires special care to maintain its elegance. Polishing the edges and sealing them properly prevents staining and damage. Tip: Use a wet polisher with diamond

How to end backsplash on open wall? A Complete Guide 2025 Read More »

Can You Paint Tile Backsplash? A Complete Guide to Transforming Your Space

Can You Paint Tile Backsplash? A Complete Guide to Transforming Your Space

Home A tile backsplash is a staple in modern kitchens and bathrooms, offering both functionality and aesthetic appeal. But what happens when your backsplash starts to look outdated or no longer matches your style? Replacing it can be expensive and time-consuming. This leads many homeowners to ask: “Can you paint tile backsplash?” The answer is a resounding yes! Painting a tile backsplash is a cost-effective, creative, and quick way to refresh your space without the hassle of a full renovation. With the rising popularity of DIY home improvement projects, painting backsplash tiles has become a go-to solution for transforming kitchens and bathrooms. In this guide, we’ll explore everything you need to know about painting tile backsplashes, from preparation to design ideas. Why Consider Painting a Tile Backsplash? Given are the reasons to consider while Painting a Tile Backsplash: Cost-Effective Alternative Replacing a tile backsplash can cost hundreds or even thousands of dollars, depending on the material and labor involved. Painting, on the other hand, is an affordable option that requires only basic supplies like primer, paint, and brushes. For those on a budget, learning how to paint tile backsplash offers a wallet-friendly way to achieve stunning results. Versatility in Design One of the biggest advantages of painting backsplash tiles is the ability to customize your design. Whether you prefer bold colors, subtle neutrals, or intricate patterns, tile backsplash paint allows you to unleash your creativity. You can even use stencils to mimic high-end designs like Moroccan tiles or subway tiles. Quick Transformation Unlike a full renovation, which can take weeks, painting your backsplash can be completed in just a few days. With proper preparation and the right materials, you can achieve professional-looking results quickly. This makes painting tile backsplash an ideal weekend project for DIY enthusiasts. Types of Tile Backsplashes Suitable for Painting Following are the types of Tile Backsplashes Suitable for Painting: Ceramic Tiles Ceramic tiles are among the most common types of backsplashes and are highly suitable for painting. Their smooth surface allows paint to adhere well after proper cleaning and priming. If you’re wondering can you paint ceramic backsplash tiles, the answer is absolutely yes! Glass Tiles While it’s possible to paint glass tiles, they present unique challenges due to their glossy surface. Special primers designed for glass are essential for ensuring that the paint adheres properly. If you’re considering painting glass tile, keep in mind that the finish may not be as durable as other materials. Porcelain Tiles Porcelain tiles are another excellent candidate for painting. Their dense surface requires thorough sanding and priming to create a base for the paint. When done correctly, painting porcelain tile backsplashes can yield beautiful results. Can All Backsplash Tiles Be Painted? Not all tiles are ideal for painting. For example, heavily textured or damaged tiles may not provide a smooth surface for paint application. However, with proper preparation and high-quality materials, most types of backsplash tile can be painted successfully. How to Paint Tile Backsplash Painting a tile backsplash involves several steps to ensure long-lasting results. Follow this detailed guide: Step-by-Step Guide Step 1: Preparation Clean the tiles thoroughly using a degreaser to remove grease and grime. Sand the surface lightly with fine-grit sandpaper to create texture for better adhesion. Mask off surrounding areas with painter’s tape to protect walls and countertops. Step 2: Priming Apply a high-quality primer designed specifically for tiles. Allow the primer to dry completely before moving on to painting. Step 3: Painting Use durable, water-resistant paint such as epoxy or latex-based options. Apply multiple thin coats with a foam roller or brush for an even finish. Let each coat dry fully before applying the next layer. Step 4: Sealing Seal the painted surface with a clear polyurethane sealant to protect against moisture and stains. Allow the sealant to cure according to the manufacturer’s instructions. Tips for Success Always test your chosen paint on a small area before committing. Ensure proper ventilation during painting and drying. Allow adequate drying time between coats for optimal durability. Pros and Cons of Painting Tile Backsplash Here are the Pros and Cons of Painting Tile Backsplash: Pros Budget-Friendly: A fraction of the cost compared to replacing tiles. Customizable: Endless design possibilities with backsplash paint. Quick Results: Transform your space in just a few days. Cons Maintenance: Painted backsplashes may require touch-ups over time. Durability: Not as long-lasting as new tiles; sealing is crucial. Limitations: Heavily textured or damaged tiles may not yield ideal results. Creative Ideas for Painted Backsplash Designs Below are the Creative Ideas for Painted Backsplash Designs: Patterns and Stencils Use stencils to create patterns like herringbone, chevron, or Moroccan-inspired designs. These add character and sophistication without breaking the bank. Trending Colors Neutral tones like white, gray, and beige remain popular choices for painted kitchen backsplashes. For bolder looks, consider navy blue or emerald green. Faux Finishes Experiment with faux finishes like marble or metallic effects using specialized paints. These mimic high-end materials at a fraction of the cost. Elevate Your Lowell Kitchen with Professional Backsplash Installation You’ve considered painting your tile backsplash for a quick refresh, and perhaps even explored our guide, Can You Paint Tile Backsplash?. While painting offers a temporary solution, it often falls short of achieving lasting beauty and durability. That’s where SF Marble & Granite Inc. steps in, providing expert backsplash installation in Lowell for a truly transformative upgrade. Here’s why homeowners choose us after considering paint: Expert Guidance: Unsure if painting achieved the look you desired? We assess your results and recommend the best path forward. Unmatched Material Selection: Move beyond limited paint colors to explore luxurious marble, granite, glass, and more! Professional Installation: Ensure flawless, long-lasting results that painting simply can’t provide. Custom Designs: Create intricate mosaics and unique patterns for a truly personalized kitchen. Conclusion Painting your tile backsplash is an affordable and creative way to refresh your kitchen or bathroom without undergoing major renovations. By following our step-by-step guide on how to paint tile backsplash, you can

Can You Paint Tile Backsplash? A Complete Guide to Transforming Your Space Read More »

Scroll to Top