How to Tile a Fireplace: A Comprehensive Guide by SF Marble And Granite Inc
How to Tile a Fireplace Transforming your fireplace with tiles can add a touch of elegance and warmth to your living space. To begin this creative project, gather all necessary materials including tiles, adhesive, spacers, a tile cutter, and a trowel. Start by cleaning the surface of the fireplace to ensure proper adhesion of the tiles. Apply a layer of adhesive using the trowel, making sure to create an even surface. Place the tiles with spacers in between to maintain a uniform gap.
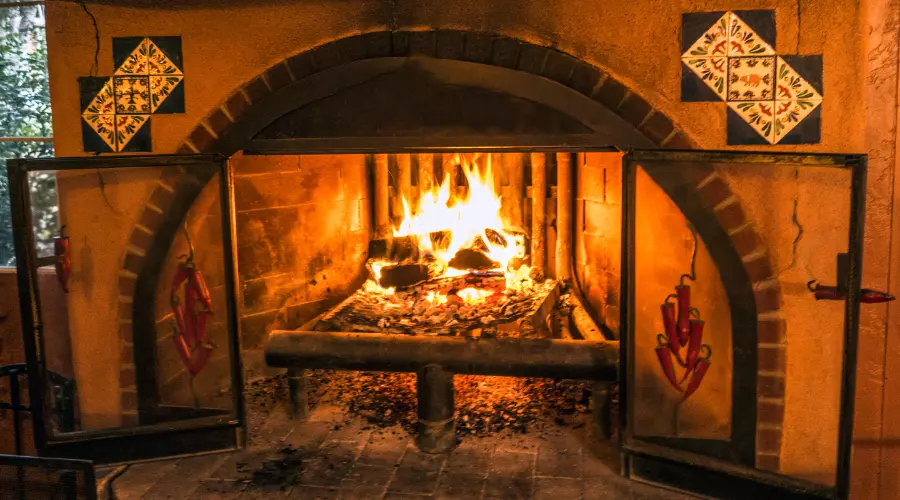
Are you looking to add a touch of elegance and style to your living space? Tiling your fireplace can transform the entire room, giving it a chic and sophisticated look. In this guide, brought to you by SF Marble And Granite Inc, we’ll walk you through the step-by-step process of tiling a fireplace to achieve stunning results. Whether you’re a seasoned DIY enthusiast or a novice looking to explore your creative side, this article will provide you with the knowledge and inspiration you need. Let’s dive in!
Table of Contents
Toggle
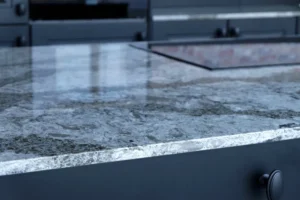
Choosing the Right Tiles
Selecting the perfect tiles sets the tone for your fireplace’s overall aesthetic. Opt for tiles that complement your interior design while also being able to withstand the heat generated by the fireplace. The right tiles not only enhance the visual appeal of your fireplace but also ensure its durability and longevity.
When choosing tiles, consider the following factors:
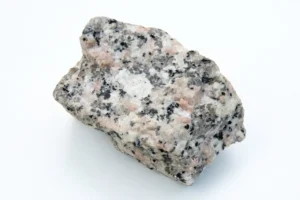
- Material: Opt for heat-resistant materials like ceramic, porcelain, or natural stone. These materials can handle the high temperatures produced by the fireplace without cracking or warping.
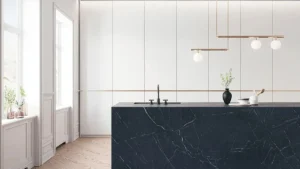
- Style: Choose tiles that align with the style of your room. Whether you prefer a classic look, a modern vibe, or something in between, there are tiles available in various colors, patterns, and textures.
- Size: The size of the tiles can impact the overall appearance of your fireplace. Larger tiles can create a seamless and contemporary look, while smaller tiles can add intricate detail and charm.
- Color: The color of the tiles should complement the room’s color palette. Consider how the tiles will interact with the surrounding walls, furniture, and décor elements.
- Texture: The texture of the tiles can add visual interest to the fireplace. Textured tiles can create depth and dimension, making the fireplace a focal point in the room.
- Maintenance: Pick tiles that are simple to keep clean. Fireplaces can produce soot and ash, so tiles that can be wiped clean effortlessly are ideal.
Before making a final decision, it’s a good idea to request samples and visualize how the tiles will look in your space. Take into account both the aesthetics and the practical aspects to ensure that the tiles you choose not only enhance your fireplace but also contribute to the overall atmosphere of the room.
Alongside our expert fireplace tiling advice, SF Marble And Granite Inc also offers a range of additional services, including marble and floor installation. Elevate your home’s aesthetics with our comprehensive solutions.
Gathering the Necessary Tools
Before you embark on tiling your fireplace, it’s crucial to gather all the essential tools you’ll need. The procedure will go more smoothly and effectively if the proper tools are available. Here’s a list of tools you should gather before you start:
- Tile Cutter: A tile cutter is essential for accurately cutting tiles to fit around the edges of the fireplace and any other obstacles.
- Trowel: A notched trowel is used to apply adhesive evenly to the fireplace surface before placing the tiles.
- Spacers: Spacers maintain consistent gaps between tiles, ensuring a professional and even look.
- Level: A level helps you ensure that your tiles are straight and aligned correctly.
- Safety Gear: Safety should always be a priority. Wear safety goggles, gloves, and a dust mask to protect yourself from tile fragments and dust.
- Measuring Tape: Accurate measurements are essential to ensure that your tiles fit perfectly.
- Grout Float: This tool is used to apply grout to the spaces between tiles.
- Sponge: A damp sponge is necessary for cleaning excess grout from the tiles during the grouting process.
- Bucket and Mixing Paddle: You’ll need these to mix the adhesive and grout to the right consistency.
- Tile Nippers: Tile nippers help you make small, precise cuts on tiles when needed.
- Caulk Gun: A caulk gun is necessary for applying adhesive or caulk around the edges of the tiles.
- Painter’s Tape: Painter’s tape can be used to protect surfaces adjacent to the fireplace from adhesive and grout.
- Cleaning Supplies: Keep a bucket of water and rags on hand for cleaning up as you go.
- Dustpan and Broom: These will help you keep your workspace clean from debris.
- Primer (if needed): Depending on the condition of the fireplace surface, you may need to apply a primer before tiling.
By having all these tools ready, you’ll be well-prepared to tackle the tiling process with confidence and efficiency. Make sure to set up your workspace in a well-ventilated area and follow safety precautions throughout the project. With the right tools and careful planning, you’ll be on your way to creating a beautifully tiled fireplace that enhances the aesthetics of your living space.
Preparing the Fireplace Surface
Before you begin the tiling process, it’s crucial to prepare the surface of your fireplace to ensure that the tiles adhere properly and the end result is both visually appealing and durable .To prepare the fireplace surface, take the following actions:
- Clean the Surface: Start by cleaning the fireplace surface thoroughly. Remove any dust, dirt, or debris using a brush or vacuum cleaner. Clean off any soot, grease, or residue that might hinder the adhesive’s effectiveness.
- Check for Damage: Inspect the fireplace surface for any cracks, chips, or unevenness. If you notice any significant damage, consider repairing it before tiling. Use a suitable filler or patching compound to address minor imperfections.
- Sand the Surface: If the surface is smooth and non-porous, use sandpaper to lightly roughen it. This makes the adhesive’s bonding surface better. Wipe away the dust after sanding.
- Apply Primer (If Needed): Depending on the type of surface and tiles you’re using, applying a primer may be necessary. A primer improves adhesion and helps prevent moisture from seeping into the surface.
- Mask Off Surrounding Areas: Use painter’s tape to mask off areas around the fireplace that you want to protect from adhesive or grout spills. This will make the cleanup process easier and prevent damage to adjacent surfaces.
- Ensure Levelness: Use a level to ensure that the fireplace surface is even and level. If necessary, use shims or leveling compounds to correct any unevenness.
- Protect the Surrounding Area: Lay down drop cloths or plastic sheets to protect the floor and surrounding furniture from dust and debris generated during the tiling process.
By taking the time to properly prepare the fireplace surface, you set the foundation for a successful tiling project. A well-prepared surface ensures that the tiles adhere securely and that the finished result is not only aesthetically pleasing but also long-lasting. Following these steps will help you achieve professional-looking results that you can enjoy for years to come.
Applying the Adhesive
With the fireplace surface properly prepared, it’s time to apply the adhesive that will securely hold the tiles in place. The adhesive creates a strong bond between the tiles and the surface, ensuring their longevity. Follow these steps to apply the adhesive:
Choose the Right Adhesive: Select a high-quality adhesive that is suitable for both your tile material and the type of surface you’re working with. Read the manufacturer’s instructions to ensure you’re using the adhesive correctly.
Mix the Adhesive: If your adhesive requires mixing, follow the manufacturer’s instructions to achieve the correct consistency. Use a mixing paddle and a bucket to combine the adhesive components thoroughly.
Work in Small Sections: It’s best to work in small sections to prevent the adhesive from drying out before you lay the tiles. Apply adhesive to one section of the fireplace at a time.
Use the Notched Trowel: Using a notched trowel, spread a layer of adhesive onto the fireplace surface. Hold the trowel at a 45-degree angle to create even ridges in the adhesive.
Apply Evenly: Make sure the adhesive is spread evenly across the surface. The ridges created by the notched trowel will help ensure that the tiles adhere properly.
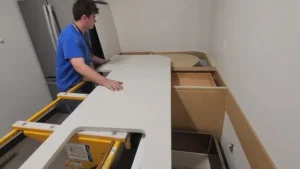
Start Placing Tiles: Begin placing the tiles onto the adhesive, starting from the center and working outward. Press each tile firmly into the adhesive and give it a slight twist to set it in place.
Check Alignment: Use a level and spacers to ensure that the tiles are properly aligned and evenly spaced. Adjust the tiles as needed to achieve the desired look.
Continue in Sections: Repeat the process, working in small sections and applying adhesive as needed. Avoid applying adhesive to areas where you won’t be able to place tiles immediately.
Clean Excess Adhesive: As you work, be sure to clean off any excess adhesive that may squeeze up between the tiles. A damp cloth or sponge can help you keep the workspace neat.
Allow Adhesive to Set: Once all the tiles are in place, allow the adhesive to set according to the manufacturer’s instructions. This usually takes around 24 hours.During this time, refrain from touching or disrupting the tiles.
By applying the adhesive methodically and following these steps, you’ll create a solid foundation for your tiled fireplace. Proper adhesive application ensures that the tiles remain securely attached to the surface, allowing you to move forward with the next steps of the tiling process with confidence.
Placing the Tiles
Now that you have applied the adhesive to the fireplace surface, it’s time to start placing the tiles. This step requires precision and careful attention to detail to ensure that the tiles are aligned correctly and create a visually appealing pattern. Follow these steps to successfully place the tiles:
Start from the Center: Begin placing tiles from the center of the fireplace and work your way outward. This ensures that the tiles are centered and symmetrical, especially if your fireplace has a focal point like a mantel.
Use Spacers: Place tile spacers between the tiles to maintain consistent gaps. The size of the spacers will determine the width of the grout lines.
Press Tiles Firmly: Press each tile firmly into the adhesive, making sure it adheres securely. Apply even pressure to prevent any gaps or unevenness.
Check for Level and Alignment: Use a level to ensure that the tiles are both level and aligned properly. Adjust the tiles as needed to maintain a uniform appearance.
Trim Tiles as Necessary: In areas where tiles need to fit around corners or obstacles, use a tile cutter to trim them to the correct size and shape.
Grouting the Tiles
After the tiles have been securely placed and the adhesive has set, the next step is to apply grout. Grouting not only fills in the gaps between the tiles but also adds stability and a finished look to your tiled fireplace. Follow these steps to effectively grout the tiles:
Choose the Right Grout: Select a grout color that complements your tiles and desired aesthetic. Ensure that the grout you choose is suitable for high-temperature areas like fireplaces.
Mix the Grout: Follow the manufacturer’s instructions to mix the grout to the appropriate consistency. Use a grout float to combine the grout components thoroughly.
Apply the Grout: Hold the grout float at a 45-degree angle and spread the grout diagonally across the tiles, ensuring that the gaps are completely filled. Press the grout into the gaps and work in small sections.
Use a Float and Sponge: Use the grout float to remove excess grout from the tile surface. Hold the float at a 90-degree angle and move it diagonally across the tiles. This helps pack the grout into the gaps.
Wipe off Excess Grout: After a short period, usually about 15-20 minutes, the grout will start to set. Use a damp sponge to gently wipe off excess grout from the tile surface. Rinse the sponge frequently to avoid smearing the grout.
Cleaning and Sealing
Once the grout has cured and the tiles are beautifully in place, the final steps involve cleaning and sealing to ensure that your tiled fireplace looks stunning and remains in excellent condition. Follow these steps to clean and seal your newly tiled fireplace:
Initial Cleaning: Before applying the sealer, give the tiles a thorough cleaning. Use a damp cloth or sponge to wipe away any dust, residue, or grout haze from the tile surface.
Choose the Right Sealer: Select a suitable sealer for your tiles and grout. There are different types of sealers available, including water-based and solvent-based options. Follow the manufacturer’s instructions for application.
Apply the Sealer: Using a clean, dry cloth or a specialized applicator, apply the sealer to the grout lines and the surface of the tiles. Work in small sections and make sure the sealer is evenly applied.
Allow Sealer to Absorb: Let the sealer sit for the recommended amount of time to allow it to be absorbed by the tiles and grout. Normally, this takes 10 to 15 minutes.
Conclusion
Tiling a fireplace is a creative and rewarding project that can transform the entire look and feel of your living space. With the comprehensive guide provided by , you’ve gained the knowledge and SF Marble And Granite Inc confidence to undertake this endeavor and achieve exceptional results.
FAQs
Can I tile over my existing fireplace tiles?
Yes, it’s possible to tile over existing fireplace tiles. However, it’s recommended to remove the old tiles and prepare the surface properly for the best results. Removing old tiles ensures a smoother and more even surface for the new tiles to adhere to.
What type of tiles should I choose for a fireplace?
Opt for heat-resistant materials like ceramic, porcelain, or natural stone. These materials can withstand the high temperatures generated by the fireplace without getting damaged or cracked. Ensure that your chosen tiles align with your design preferences and the overall style of the room.
How long does the adhesive take to dry?
The drying time of the adhesive can vary based on factors such as humidity and temperature. Generally, adhesive takes about 24 hours to dry and set completely. Follow the manufacturer’s instructions for precise drying times.
Can I use any grout for my fireplace tiles?
No, it’s important to choose a grout that is suitable for high-temperature areas like fireplaces. Opt for a heat-resistant grout that can withstand the heat produced by the fireplace without cracking or deteriorating over time.
Why should I seal the tiles and grout?
Sealing the tiles and grout provides a protective barrier against moisture, stains, and dirt. This helps maintain the appearance of the tiles and extends their lifespan. Sealing also makes cleaning and maintenance easier, ensuring your tiled fireplace looks its best for years to come.
Contact Us