You have granite in your kitchen and you want it to stay granite for years, not months. I understand. Granite is a first-rate countertop material, and once you’ve shelled out for a slab, the last thing you want is a wine stain or a ring of oil that won’t go. My pledge is this, by the end of this tutorial, you will know exactly how to do the sealing of granite countertops yourself, without having to hire someone, or guess at the process.
First the quick response because I know you’re busy: Clean your granite, let it dry fully, then apply a penetrating sealer with a soft cloth in thin, even coatings, wiping off the excess before it hardens. Most granite will require this done once a year. I’ll walk you through every step below, plus how to tell whether your seal has already worn off and what truly happens if you skip it.
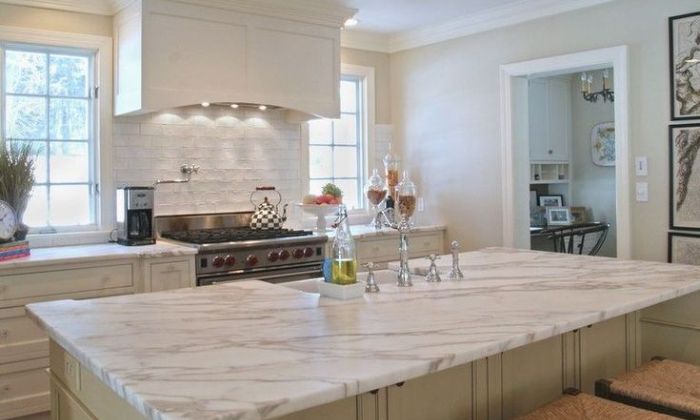
Why Sealing Granite Countertops Is Important
Why is it important to seal granite countertops? Granite is a natural stone and it is porous and will absorb liquids as a sponge absorbs water if left unsealed. Coffee, wine, oil and even soap can penetrate the stone and cause lasting stains. A good sealer will fill those pores, and prevent spills from soaking in.
This is the bit nobody understands. Granite seems like a solid rock, and it is, yet under a microscope it is filled of microscopic spaces between mineral crystals. The gaps create the natural veining and texture of granite. The same structure that gives your slab its character also lets liquid move underneath the surface if it’s not sealed.
Unsealed granite doesn’t just stain. It can cling onto bacteria in those pores, which matters a lot if you’re prepping meals on that surface every day. Sealing is not a vain thing. It’s about keeping a natural stone countertop hygienic and practical, not simply gorgeous.
How Often Should You Seal Granite Countertops?
Most granite countertops need resealing once a year, though this changes based on the color of your stone and how much your kitchen gets used. Lighter granite is generally more porous and may need sealing every six to eight months, while darker, denser granite can sometimes go up to two years between applications.
Think of it like sunscreen. You don’t apply it once and forget about it forever. Your kitchen counter gets touched, wiped, and splashed on constantly, so the protective layer wears down over time. A guest bathroom vanity barely gets used, so its seal lasts a lot longer than a busy family kitchen island.
Climate plays a role too. If you live somewhere humid, moisture works against your sealer faster. If your kitchen sees a lot of direct sun near a window, heat can also speed up wear. Rather than guessing, there’s a simple test I’ll show you in the next section that tells you exactly when it’s time.
How to Know if Your Granite Countertop Needs Sealing
The water test is the easiest technique to determine if you’ve got to seal your granite countertop. Pour a little puddle of water on your countertop the size of a coffee cup and let it sit for fifteen minutes. If water beads up on the surface, you still have your seal. If it soaks in and darkens the stone, it’s time to reseal.
Try this test in several places, not just one. Areas around your sink, stove and coffee maker receive the most wear and often need to be resealed before the rest of the counter. Don’t miss the edges as well. One of the most typically neglected locations is the lip under your sink cutout. This is usually the first place a seal fails.
If you notice black rings that don’t go away after you dry the surface, that’s more than an unsealed place. That could already be a stain setting in, so it pays to catch it early rather than late.
Types of Granite Sealers
There are two main types of sealers, and knowing the difference saves you money and frustration. Topical sealers sit on top of the stone and form a coating, similar to a layer of wax on a car. Penetrating sealers soak into the pores of the stone itself and bond with it from the inside.
Penetrating sealers tend to last longer, usually six months to two years, and they don’t change how the surface looks or feels. Topical sealers can add a slight sheen, but they wear off faster and can peel or haze if applied unevenly. For granite specifically, a penetrating sealer is almost always the better long-term choice, especially for kitchen counters that see daily wear.
You’ll also come across water-based and solvent-based formulas. Water-based sealers are easier to work with and lower odor, which makes them a solid pick for a DIY project in a kitchen you still need to use that day. Solvent-based versions can penetrate slightly deeper but usually need better ventilation while you work.
What You’ll Need to Seal Granite Countertops
Before you start, gather everything so you’re not looking for supplies halfway through. You’ll want a penetrating granite sealer formulated for natural stone, a few clean microfiber cloths, rubber gloves, and a stone-safe cleanser without ammonia or chlorine. Soft-bristle brushes help too, especially for rough or honed granite where filth lurks in little grooves.
Good ventilation is more important than people realise. Even if you’re using a water-based sealer, open a window or put on a fan as you work. If your granite has ornamental elements like resin fill or color enhancement, check the sealer label first, since certain formulas aren’t certified for enhanced stone.
Set out an entire day for this job, not just an hour. Cleaning, drying, sealing, and curing all require time, and hurrying any one of those stages is the main reason DIY sealing jobs fail.
Step-by-Step Guide to Sealing Granite Countertops
This is the core of how to seal granite countertops the right way, so follow each step in order rather than skipping ahead.
Step 1: Clear and clean the surface. Remove everything from your countertop, including small appliances and decorative items. Wipe the entire surface with a stone-safe cleaner and a soft cloth, working section by section so nothing gets missed.
Step 2: Let it dry completely. Granite needs to be fully dry before sealer goes on, or the sealer can’t penetrate properly. Give it at least twelve hours in normal room temperature, longer if your kitchen runs humid.
Step 3: Apply the first coat. Shake the sealer bottle, then wipe it onto the surface with a clean microfiber cloth in a thin, even layer. Cover the whole surface, including the edges and any sink cutout lips, since these areas take the most daily contact.
Step 4: Apply a second coat while the first is still wet. Wait three to five minutes, then add another layer before the first one dries. Darker or more porous stones sometimes need a third pass, so check your product label for specifics.
Step 5: Wipe off the excess. About thirty minutes after your last coat, buff the surface with a dry cloth to remove anything that hasn’t absorbed. If you notice a hazy film, spray a little more sealer on that spot and wipe it immediately.
Step 6: Let it cure. Keep the surface completely dry for twenty-four hours so the sealer bonds fully with the stone. Avoid setting anything wet on it during this window, including a damp dish rag.
Step 7: Run the water test. Once the cure time is up, test a few spots with water the way I described earlier. If the water beads up everywhere you tested, you’re done.
Common Mistakes to Avoid When Sealing Granite
Skipping the drying step is the single biggest mistake I see. If the stone isn’t bone dry, the sealer sits on trapped moisture instead of bonding with the surface, and it won’t hold. Give it the full twelve hours, even if the counter looks dry to the touch.
Another common slip is letting the sealer dry between coats instead of applying the second layer while the first is still wet. This creates uneven absorption, which shows up later as patchy spots that stain faster than the rest of the counter. Set a timer for those three to five minutes so you’re not guessing.
People also forget the edges and under-sink lips, treating sealing like it’s only about the flat top surface. Those spots see constant water exposure and need just as much attention, sometimes an extra coat, as the main surface.
Granite vs Quartzite vs Quartz: Does Sealing Matter for Every Stone?
Not every countertop material needs the same care, and this trips people up during kitchen remodeling. Granite is a natural stone with real porosity, so it needs regular sealing. Quartzite kitchen countertops are also natural stone, often even harder than granite, and typically need sealing too, sometimes more often since quartzite can be more porous depending on the slab.
Quartz, despite the similar name, is an engineered surface made from crushed stone and resin, and it doesn’t need sealing at all because it’s non-porous by design. If you’re comparing natural stone countertops against engineered options for a remodel, hardness and durability aren’t the only factors. Maintenance routine matters just as much, and it’s worth knowing before you commit to a slab.
Granite still wins for a lot of homeowners because it offers a heat resistant, scratch resistant surface with natural veining that no engineered material fully replicates. It just comes with the trade-off of needing that yearly seal to stay a truly durable kitchen surface for the long run.
Final Thoughts
Granite is worth the small amount of upkeep it asks for. A slab that’s properly sealed and cared for can genuinely last a lifetime, and the process itself takes less effort than most people expect once they’ve done it once. If your kitchen is part of a bigger remodel, or you’re weighing a luxury kitchen countertops upgrade, keep sealing in mind as part of the total cost of ownership, not an afterthought.
If you’re local and would rather have it done right the first time, our team handles Granite Countertop Installation in Lowell along with sealing and long-term care for every slab we install. We’re SF Marble and Granite, and we’ve seen firsthand what happens when sealing gets skipped versus done properly. contact us if you’d like a hand with your countertops, whether that’s a new installation or getting an existing slab back in shape.
FAQs
How Often to Seal Granite Countertops
Most granite countertops should be resealed every 1-3 years, depending on their usage and the sealer’s quality.
How Long to Wait After Sealing Granite Countertops
Wait 24 hours after sealing for the sealer to fully cure. This ensures that the sealer bonds with the stone effectively.
What Happens If You Don’t Seal Granite Countertops?
Unsealed granite can absorb liquids, leading to stains, discoloration, and possible damage to the stone over time.
How to Seal Granite Countertops DIY
Sealing granite countertops is a straightforward DIY project. With a quality granite sealer and the steps in this guide, you can easily seal your granite countertops yourself.
Can I Seal My Granite Countertop Myself?
Yes, sealing granite is a manageable DIY project. Follow the steps outlined above to ensure a thorough and effective seal.