Removing a tile backsplash requires careful preparation, the right tools, and methodical execution to avoid damaging your walls. As Lowell’s trusted marble and granite experts with over a decade of experience, SF Marble & Granite Inc. outlines this definitive guide to help homeowners and contractors safely remove old backsplashes while preserving drywall integrity. Whether upgrading to granite countertops or installing modern marble finishes, proper tile removal ensures a flawless foundation for new installations.
Essential Tools for Tile Backsplash Removal

Before tackling your kitchen or bathroom backsplash, gather these critical tools:
Table of Contents
Toggle- Protective gear: Safety goggles, gloves, and dust masks shield against sharp tile shards and silica dust.
- Utility knife: Scores caulk and severs adhesive bonds between tiles and walls.
- Putty knife: Pries tiles away from the wall after loosening the adhesive.
- Hammer and chisel: Breaks stubborn tiles; use a 1-inch chisel for precision.
- Oscillating multi-tool: Cuts through grout lines with diamond-grit blades for cleaner removal.
- Heat gun: Softens adhesive for easier tile separation (avoid open flames).
- Drywall repair kit: For patching minor wall damage post-removal.
Pro Tip: For large backsplashes, rent an electric demolition scraper to save time and reduce physical strain.
Step-by-Step Guide to Removing Kitchen Backsplash Tiles
1. Prepare the Work Area
Clear countertops, cover surfaces with drop cloths, and shut off power to nearby outlets. Use painter’s tape to protect adjacent walls and cabinets.
2. Score the Edges
Run a utility knife along the backsplash’s perimeter to cut through caulk and paint seals. This prevents peeling adjacent surfaces during removal.
3. Loosen Grout Lines
Insert an oscillating tool with a grout-removal blade into joints. Work horizontally to avoid gouging drywall. For manual removal, use a grout rake or screwdriver.
4. Remove Tiles Methodically
Starting at the top corner, slide a putty knife behind a tile. Tap gently with a hammer to separate it from the wall. If the adhesive resists, apply heat for 10–15 seconds to soften it.
5. Scrape Off Residual Adhesive
Once the tiles are removed, use a 4-inch scraper to remove any leftover thinset or mastic. Hold the tool at a 30° angle to avoid digging into drywall.
Best Way to Remove Backsplash Tile Without Damaging Drywall
Strategy 1: The “Slow Peel” Technique
For modern backsplashes with polymer-based adhesives:
- Heat a 12×12-inch section with a hair dryer.
- Slide a flexible pry bar behind tiles.
- Apply steady pressure until tiles release.
Strategy 2: Wet Removal for Cementitious Adhesives
Spritz water on thinset mortar and let it soak for 10 minutes. The moisture reactivates the adhesive, making scraping easier.
Strategy 3: Drywall Preservation Hack
Place a thin metal sheet behind the pry bar to distribute force evenly, preventing cracks.
Addressing Common Backsplash Removal Challenges
Problem: Tiles Breaking into Small Pieces
Solution: Cover the tile with painter’s tape before striking to hold fragments together.
Problem: Adhesive Residue Gouging Drywall
Solution: Sand stubborn spots with 80-grit sandpaper wrapped around a wood block.
Problem: Hidden Plumbing/Wiring
Solution: Use a stud finder with AC detection to map utilities before scraping.
Post-Removal Steps: Prepping for New Backsplash
After successfully removing your old tile backsplash, the next crucial step is preparing your walls for the new installation. Start by carefully inspecting the surface for any damage such as gouges, holes, or uneven spots left behind from the tile removal process. Use a good-quality joint compound to fill in these imperfections, ensuring the wall is smooth and level. Once the compound dries, sand the area gently to create a flat, even surface. This preparation is essential because a smooth wall guarantees that your new backsplash will adhere properly and look flawless.
Next, thoroughly clean the wall to remove any dust, adhesive residue, or debris. Wiping the surface with a solution like Trisodium Phosphate (TSP) helps eliminate stubborn adhesive particles, improving the bond for your new backsplash. After cleaning, apply an oil-based primer to seal the wall. Priming not only protects the drywall but also creates an ideal surface for tile adhesive to grip. Taking these careful post-removal steps ensures your new backsplash installation will be durable, beautiful, and ready to transform your kitchen or bathroom space.
- Inspect Walls: Fill gouges deeper than 1/8-inch with joint compound.
- Smooth Surfaces: Sand repaired areas until flush with the wall.
- Clean Thoroughly: Wipe walls with Trisodium Phosphate (TSP) to remove adhesive dust.
- Prime: Apply oil-based primer to seal the surface for new installations.
Why Professional Backsplash Removal Matters
While DIY removal is possible, SF Marble & Granite Inc. recommends professional services for:
- Heritage Homes: Older plaster walls require specialized techniques to prevent collapse.
- Large-Scale Projects: Whole-kitchen removals demand industrial tools and waste management.
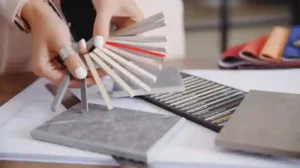
- Upcoming High-Value Installations: Flawless walls are critical for luxury materials like leathered quartz or marble mosaics.
Our Lowell-based team uses truck-mounted HEPA vacuums, like Lowell granite models, to contain dust and infrared
Heaters to soften adhesives efficiently.
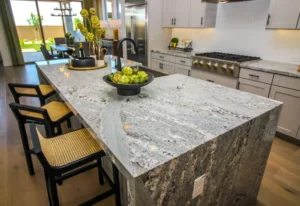
Upgrade Your Kitchen with Professional Backsplash Installation
After removing your old tile backsplash, the next step to transforming your kitchen is a seamless, stylish upgrade. At SF Marble & Granite Inc., we specialize in expert backsplash installation that not only enhances the beauty of your space but also protects your walls for years to come. Our skilled team in Lowell, MA, works with a wide range of materials—from classic marble to modern granite and quartz—ensuring a perfect fit for your design vision. Let us handle every detail, from precise measurements to flawless finishing, so you can enjoy a kitchen that truly feels like home. Contact us today to schedule your backsplash installation and experience the difference that quality craftsmanship makes!
Conclusion
How to remove tile backsplash properly sets the foundation for a stunning kitchen makeover. At SF Marble & Granite Inc., we bring over 10 years of expertise to every project, ensuring your backsplash removal and installation are handled with care and precision. Ready to elevate your space with beautiful, durable stone surfaces? Contact SF Marble & Granite Inc. today for professional service you can trust, and let us help you create the kitchen of your dreams!
FAQs
A 10-foot section typically takes 4–6 hours for DIYers or 2–3 hours with professionals.
Only if removed intact. Most ceramic tiles break, but glass or metal ones often survive careful extraction.
DIY costs $50–$200 for tools/materials vs. $300–$800 for professional services, depending on backsplash size.
Lowell residents can drop off construction debris at the Lowell Transfer Station (1365 Middlesex St) for $75/ton.