Looking to upgrade your kitchen or bathroom without the hassle of traditional tiling? Peel-and-stick backsplashes are the perfect solution for budget-conscious homeowners, renters, and DIY enthusiasts. These adhesive tiles offer a quick and mess-free way to refresh your space, requiring no grout, mortar, or professional installation. With endless designs, you can achieve a high-end look in just a few hours without breaking the bank. In this guide, we’ll walk you through installing peel-and-stick backsplash like a pro, covering expert tips, troubleshooting hacks, and design inspiration. Whether you’re updating a small kitchen nook or a full backsplash wall, this step-by-step guide will help you get stunning results with minimal effort. Plus, compared to traditional tiles, these easy-to-apply options save you both time and money, making them an excellent choice for a stylish, stress-free home upgrade.
What Is a Peel and Stick Backsplash?
A peel-and-stick backsplash is a modern, hassle-free alternative to traditional tile installations. Made from adhesive-backed vinyl, glass, or peel-and-stick stone sheets, these tiles mimic the look of real ceramic or natural stone. They are designed for easy application simply peel off the backing and stick them onto a clean, smooth surface. With no need for grout, mortar, or special tools, they are an ideal choice for DIY enthusiasts looking to refresh their space quickly and affordably.
Table of Contents
TogglePros of Peel and Stick Backsplash
- Easy Installation – No grout, no mess, and no professional help required.
- Budget-Friendly – A cost-effective way to achieve a high-end look.
- Removable & Renter-Friendly – Can be taken down without damaging the walls.
- Moisture-Resistant Options – Many are designed to withstand humidity in kitchens and bathrooms.
- Wide Design Variety – Available in styles like subway tiles, mosaic patterns, and even peel-and-stick wall tile with a natural stone finish.
Cons to Consider
- Limited Heat Resistance – Most can only withstand up to 150°F, making them unsuitable for areas directly behind gas stoves.
- Adhesion Issues – Low-quality tiles may peel at the edges over time, especially in high-moisture areas.
- Surface Restrictions – Work best on smooth, clean walls; rough or textured surfaces may affect adhesion.
Ideal Use Cases
- Renters – An easy way to personalize a space without permanent changes.
- Quick Kitchen & Bathroom Upgrades – A simple solution for modernizing backsplashes.
- Temporary Makeovers – Great for those who love to change décor frequently.
If you’re wondering how to install peel and stick backsplash efficiently, choosing the right type of tile and ensuring proper surface preparation is key. In the next section, we’ll go over the essential tools, materials, and prep work needed to achieve flawless results.
Pre-Installation: Tools, Materials, and Prep Work
Before you begin how to install peel and stick tile backsplash, having the right tools and preparing your surface properly will ensure a smooth and long-lasting application. Below is a detailed checklist to guide you through the process.
Essential Tools and Materials
Category | Tools/Materials | Purpose |
Essential Tools | Utility knife | For cutting peel and stick tile to fit edges and outlets. |
Level | Ensures tiles are straight and properly aligned. | |
Measuring tape | Helps in accurate measurements before application. | |
Degreaser | Removes grease and dirt for better adhesion. | |
Microfiber cloth | Wipes the surface clean without leaving residue. | |
Optional Tools | Painter’s tape | Marks guidelines without damaging the wall. |
Plastic smoother | Helps press down tiles for a secure bond. | |
Silicone caulk | Seals edges to prevent moisture from seeping behind tiles. |
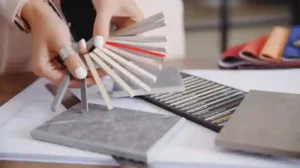
Choosing the Right Peel and Stick Backsplash Tiles
Material | Pros | Cons | Best For |
Vinyl | Budget-friendly, lightweight, and easy to install. | Less durable, and may peel over time. | Temporary upgrades, renters. |
Glass | Heat-resistant, waterproof, modern look. | More expensive, and requires careful handling. | Kitchens, near sinks. |
Stone | Durable, high-end aesthetic. | Heavier, needs extra adhesion support. | Long-term installations, statement walls. |
Surface Preparation for Best Adhesion
Step | Action | Why It’s Important |
Clean | Use a pH-neutral soap and degreaser to remove grease, dust, and dirt. | Ensures the adhesive sticks properly. |
Sand | Lightly sand rough or textured surfaces. | Creates a smooth surface for better adhesion. |
Fill Gaps | Use caulk to seal cracks and holes. | Prevents air pockets and peeling over time. |
Wait | If the wall was recently painted, wait at least 3 weeks before applying tiles. | Fresh paint can affect adhesion. |
A well-prepared surface is key to a flawless backsplash. With your tools ready and walls prepped, you’re now set for the next step: applying the tiles. Stay tuned for a step-by-step guide on installation!
How to Install Peel and Stick Backsplash | Step-by-Step Installation Guide
Installing a peel-and-stick kitchen backsplash is a quick and rewarding project, but proper technique ensures a flawless finish. Follow these steps to transform your space effortlessly.
1. Plan the Layout for a Perfect Fit
Before starting, take precise measurements of your backsplash area. This helps you determine how many peel-and-stick wall tiles you need and prevents awkward cuts at the edges.
Steps to Plan the Layout:
- Measure the wall space and note any outlets, switches, or corners.
- Use a level to mark horizontal and vertical reference lines.
- Dry-fit the tiles (without removing the backing) to visualize the layout.
Pro Tip: Start from the bottom corner and work your way up to ensure alignment. Avoid beginning in the middle, as uneven cuts at the edges can ruin the overall look.
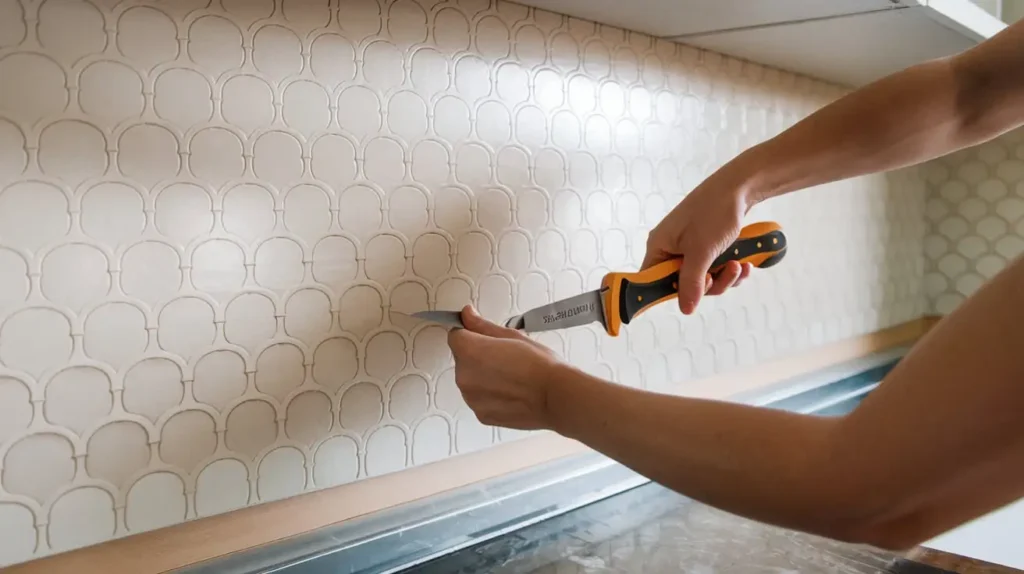
2. Cutting Peel and Stick Tile Like a Pro
Not all backsplash tiles are cut the same way. Depending on the material, use the right tools for a clean finish.
Cutting Guide by Material:
- Vinyl tiles: Use sharp scissors for quick and easy cutting.
- Glass or rigid tiles: A utility knife works best for precision.
- Around outlets & corners: Create a kraft paper template first to ensure accurate cuts.
- Hack: Trace the outlet shape onto a piece of kraft paper and use it as a stencil for a perfect fit. Always turn off the power before cutting around the outlets!
3. How to Install Peel and Stick Backsplash with a Secure Hold
This step is where the magic happens! Follow a peel-apply-press method to ensure a seamless finish.
Application Steps:
- Peel off half the backing (not all at once!) to prevent sticking mishaps.
2. Align the tile with your reference lines and gently press it into place.
3. Smooth with a roller or plastic smoother to remove air bubbles and secure adhesion.
4. Continue overlapping edges to create a seamless look.
⚠ Warning: Low-quality tiles may lose their stickiness if repositioned multiple times. If adjustments are needed, do so quickly before the adhesive weakens.
4. Handle Obstacles with Ease
Navigating around outlets, cabinets, and windows can be tricky, but careful cutting ensures a professional result.
Handling Common Obstacles:
- Outlets & Switches: Measure and cut openings before applying tiles. Turn off the power first to stay safe.
- Windows & Corners: Use a sharp utility knife to trim excess and maintain a clean edge.
- Uneven surfaces: Apply extra pressure with a roller for better adhesion.
5. Finishing Touches for a Polished Look
The final step is all about sealing and refining your work for durability and a high-end finish.
Final Touches:
- Seal edges with silicone caulk to prevent moisture from seeping behind tiles.
- Install trim pieces at the ends for a sleek, finished look.
- Clean the surface with a damp cloth to remove any dust or residue.
Mastering how to install stick-on backsplash is all about proper planning, precision cutting, and careful application. Whether you’re upgrading your kitchen or bathroom, using peel-and-stick backsplash tiles is an easy, affordable way to achieve a stylish, modern look. Now that you’ve completed the installation, enjoy your refreshed space!
Post-Installation Tips for Long-Lasting Results
Let It Set: Give your backsplash 24–48 hours to fully adhere before exposing it to steam, water, or heavy cleaning. This ensures a strong bond and prevents premature lifting.
Easy Maintenance: Keep your backsplash looking fresh by wiping it down with mild soap and water. Avoid harsh chemicals or scrubbing pads that can damage the surface.
Quick Fixes: If corners start to lift over time, secure them with double-sided tape or a dab of hot glue for a seamless repair.
Following these simple steps will keep your space looking flawless long after you’ve mastered how to install peel and stick backsplash!
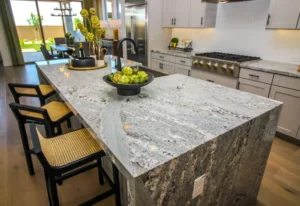
Professional Backsplash Installation in Lowell | SF Marble & Granite
Transform your kitchen or bathroom with expert backsplash installation in Lowell by SF Marble & Granite. Whether you prefer the convenience of peel-and-stick tiles or the elegance of traditional stone backsplashes, our skilled team ensures a flawless finish that enhances your space. We specialize in high-quality materials, precision installation, and seamless designs that elevate both style and functionality.
At SF Marble & Granite, we take pride in delivering professional craftsmanship tailored to your vision. From selecting the perfect tile to expert installation, we handle every detail with care. Whether you’re upgrading your home or completing a new build, trust us to bring your backsplash ideas to life with durability and sophistication. Contact us today for a consultation and let’s create a stunning focal point in your space!
Conclusion
Installing a peel-and-stick backsplash is a quick, affordable, and stylish way to upgrade your space. With the right tools, proper surface preparation, and careful application, you can achieve a professional-looking finish without the hassle of grout or mortar. Plus, maintenance is simple, making it a great long-term solution for kitchens and bathrooms.
Looking for expert backsplash installation in Lowell? SF Marble & Granite offers professional services to ensure a flawless and durable finish. Contact us today for a consultation and let us bring your vision to life!
FAQs
Can you install a peel-and-stick backsplash over existing tiles?
Yes, but the surface must be smooth, clean, and dry for proper adhesion. If the old tiles have deep grout lines or an uneven texture, applying a thin backer board or skim coat can help create a better surface.
How long does a peel-and-stick backsplash last?
With high-quality materials and proper installation, it can last 5–7 years or longer. Longevity depends on factors like humidity, heat exposure, and how well the edges are sealed. Regular maintenance can help extend its lifespan.
Is a peel-and-stick backsplash heat and moisture-resistant?
Most peel-and-stick tiles are moisture-resistant but not fully waterproof. Avoid placing them directly behind a gas stove or in areas with constant steam exposure. If using near sinks or stoves, opt for glass or high-temperature-resistant tiles for better durability.