Top 5 Unique Bar Backsplash Ideas in 2025
A mosaic tile backsplash is a stunning way to elevate the look of your kitchen or bathroom. Made up of small, intricately arranged tiles often in glass, ceramic, or stone it adds a touch of elegance and personality to any space. Not only does it serve as a beautiful focal point, but it also protects your walls from spills, splatters, and moisture. Whether for a modern, rustic, or classic vibe, a mosaic backsplash offers endless design possibilities to match your style. Installing a mosaic tile backsplash might sound intimidating, but it’s a DIY-friendly project that can be tackled with the right tools and patience. In this guide, we’ll walk you through how to install mosaic tile backsplash step by step, making the process simple and stress-free. By the end, you’ll have a gorgeous, professional-looking backsplash that you can proudly say you installed yourself!
Tools and Materials Needed for Installing a Mosaic Tile Backsplash
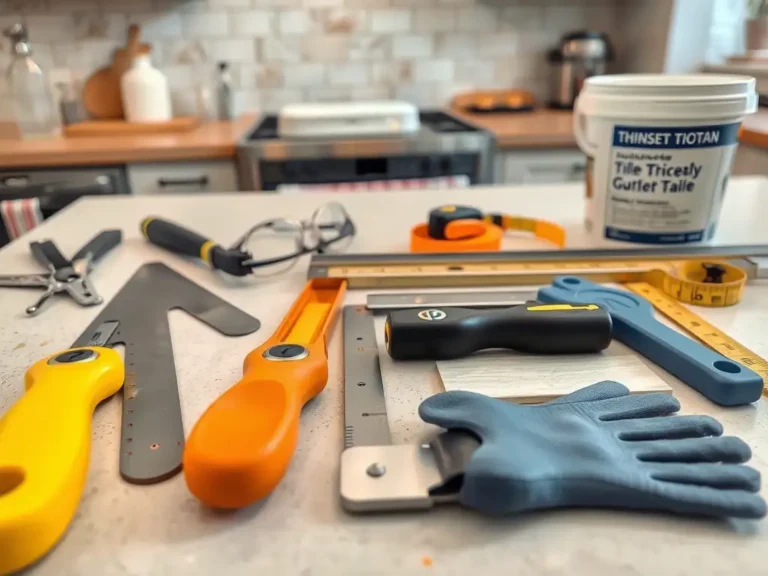
Having the right tools and materials is essential for a smooth and professional-looking backsplash installation. Below is a quick reference table outlining everything you need.
Table of Contents
Toggle🛠 Essential Tools & Materials
Category | Items Needed |
Tools | Tile cutter, notched trowel, rubber float, level, measuring tape, spacers, utility knife, sponge. |
Materials | Mosaic tile sheets, tile adhesive (thin-set mortar or mastic), grout, grout sealer, and painter’s tape. |
Safety Gear | Safety glasses, gloves, and dust mask (for cutting tiles). |
With these essentials, you’re ready to move on to surface preparation for a flawless tile installation!
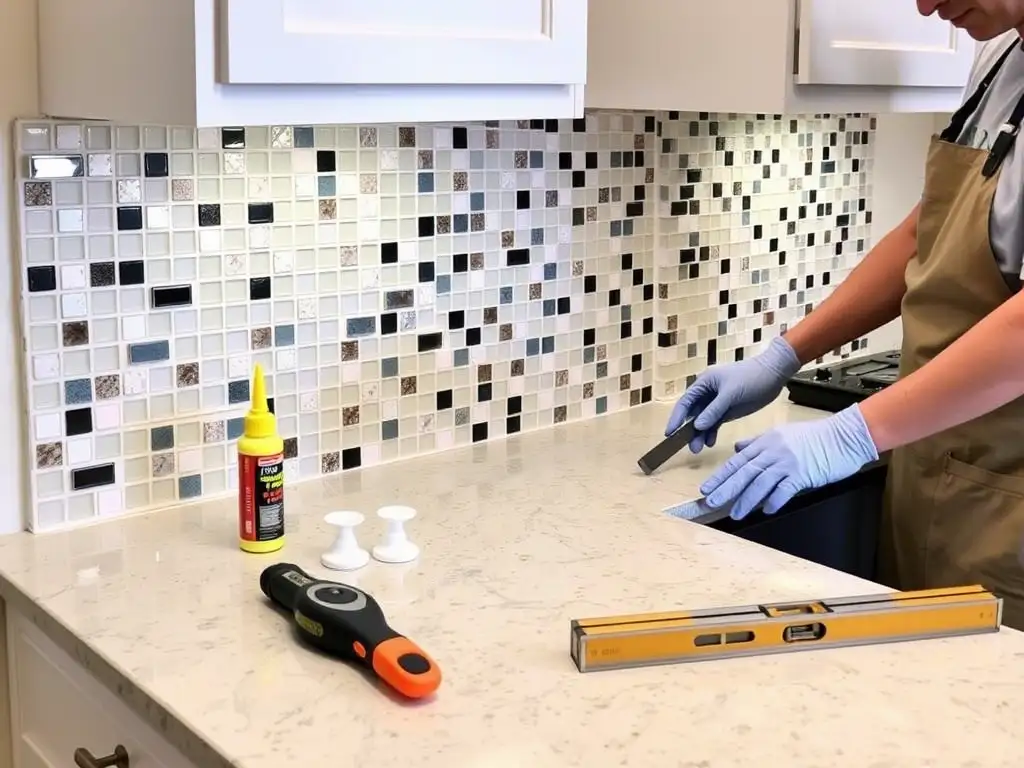
Preparation
Proper preparation is the key to a flawless mosaic tile backsplash installation. Start by cleaning the wall surface thoroughly to remove grease, dirt, or any old adhesive. A smooth, dry, and debris-free wall ensures the tiles adhere properly and last for years.
Next, measure the area to determine how many mosaic tile sheets you’ll need. Planning the layout is crucial to center the design for a balanced look and avoid awkward cuts at the edges. If your wall is uneven or in a wet area (like behind a sink), consider installing a backer board for added stability and moisture protection.
Taking the time to prepare correctly will make the installing mosaic tile backsplash process much smoother and ensure a professional-looking result!
How to Install Mosaic Tile Backsplash: Step-by-Step Installation Process

Now comes the exciting part installing your mosaic tile backsplash! Follow these simple steps to achieve a polished, professional look:
Step 1: Apply Adhesive
Using a notched trowel, spread tile adhesive evenly over a small section of the wall. Work in manageable areas to prevent the adhesive from drying out before you place the tiles. The notches in the trowel create ridges that help the tiles stick firmly.
Step 2: Place the Tiles
Gently press the mosaic tile sheets onto the adhesive, starting from one corner. Use tile spacers to maintain even gaps between sheets for consistent grout lines. If the sheets aren’t perfectly aligned, adjust them while the adhesive is still wet.
Step 3: Cut Tiles as Needed
For edges, corners, or around outlets, use a tile cutter or nippers to trim the tiles to fit. Take your time with this step to ensure clean, precise cuts.
Step 4: Let the Adhesive Dry
Once all the tiles are in place, allow the adhesive to dry completely. Follow the manufacturer’s instructions for drying time usually 24 hours. Avoid touching or disturbing the tiles during this period.
By following these steps, you’ll master the art of how to install mosaic tile backsplash and create a stunning focal point in your space!
Grouting
Grouting is the final touch that brings your mosaic tile backsplash to life! This step not only secures the tiles but also enhances their beauty by filling in the gaps. Here’s how to do it like a pro:
Step 1: Apply Grout
Using a rubber float, spread the grout over the tiles at a 45-degree angle, pressing it firmly into the gaps. Work in small sections to ensure even coverage. Make sure all the spaces between the tiles are filled.
Step 2: Clean Excess Grout
After applying the grout, wait 10-15 minutes for it to set slightly. Then, use a damp sponge to gently wipe away the excess grout from the tile surfaces. Rinse the sponge frequently to avoid smearing grout across the tiles.
Step 3: Let the Grout Cure
Allow the grout to cure completely, typically for 24 hours. Avoid touching or cleaning the tiles during this time. Once cured, buff the tiles with a soft cloth to remove any haze and reveal their natural shine.
By mastering applying mosaic tile backsplash grout, you’ll ensure a polished, professional finish. Whether you’re learning how to lay mosaic tile or perfecting your technique, this step is what ties everything together beautifully!
Sealing
Once your grout has fully cured, it’s time to seal it a crucial step in putting up mosaic tile backsplash that ensures long-lasting beauty and durability. Sealing protects the grout from stains, moisture, and everyday wear and tear, especially in high-traffic areas like mosaic tiles and kitchen backsplash.
Using a grout sealer, apply an even coat over the grout lines with a small brush or applicator. Be careful to avoid getting sealer on the tiles themselves. Allow the sealer to dry as per the manufacturer’s instructions, and consider applying a second coat for added protection.
Sealing not only preserves the look of your backsplash but also makes cleaning easier, keeping your mosaic tiles kitchen backsplash looking fresh and vibrant for years to come. Don’t skip this step it’s the final shield that completes your project!
Common Mistakes to Avoid
Even the most enthusiastic DIYers can run into pitfalls when learning how to install mosaic tile backsplash. Here are some common mistakes to watch out for, so your project turns out flawless:
- Not Cleaning the Surface Properly
A dirty or greasy wall can prevent the adhesive from bonding correctly. Always clean the surface thoroughly before starting. - Using Too Much or Too Little Adhesive
Too much adhesive can cause tiles to slide or create a messy finish, while too little can lead to poor adhesion. Spread it evenly with a notched trowel for the perfect amount. - Skipping the Sealing Step
Sealing the grout is essential, especially in high-moisture areas like kitchens. Skipping this step can lead to stains and mold, shortening the lifespan of your backsplash.
By avoiding these mistakes, you’ll ensure a smooth and successful mosaic tile backsplash installation that looks professional and stands the test of time!
Why Choose SF Marble & Granite for Backsplash Installation in Lowell
When it comes to transforming your kitchen or bathroom with a stunning backsplash, SF Marble & Granite stands out as the top choice in Lowell. Here’s why homeowners and designers trust us for their backsplash installation needs:
- Unmatched Expertise
With years of experience in the industry, our skilled professionals specialize in precision craftsmanship. Whether you’re dreaming of a sleek mosaic tile backsplash or a luxurious stone design, we bring your vision to life with flawless execution. - Premium Materials
We source only the highest-quality materials, from durable mosaic tiles to exquisite granite and marble. Our extensive selection ensures you’ll find the perfect style to match your aesthetic and functional needs. - Customized Solutions
Every space is unique, and we tailor our services to fit your specific requirements. From design consultation to installation, we work closely with you to create a backsplash that complements your home’s decor and enhances its value. - Exceptional Customer Service
At SF Marble & Granite, your satisfaction is our priority. We pride ourselves on clear communication, timely project completion, and a commitment to exceeding your expectations every step of the way. - Local Reputation
As a trusted name in Lowell, we’ve built a reputation for delivering top-notch craftsmanship and reliability. Our portfolio of completed projects speaks for itself, showcasing our dedication to quality and attention to detail.
Whether you’re upgrading your kitchen or bathroom, SF Marble & Granite is your go-to partner for backsplash installation in Lowell. Let us turn your space into a masterpiece you’ll love for years to come!
Conclusion
Installing a mosaic tile backsplash is more than just a home improvement project it’s a chance to add personality, style, and functionality to your kitchen or bathroom. Whether you’re looking to refresh your space or create a stunning focal point, learning how to install mosaic tile backsplash can be a rewarding DIY experience. With its timeless appeal, durability, and easy maintenance, a mosaic backsplash is a smart investment that enhances both the look and value of your home.
As you embark on this DIY journey, remember to take your time, follow the steps carefully, and enjoy the process. The satisfaction of seeing your finished backsplash is worth every effort!
If you’re in Lowell and prefer a flawless, stress-free installation, trust the experts at SF Marble & Granite. Our team specializes in creating stunning backsplashes tailored to your unique style. Contact us today for a consultation and let us bring your vision to life!
FAQs
What is the best adhesive for installing a mosaic tile backsplash?
The best adhesive for mosaic tile backsplash is thin-set mortar or tile mastic, depending on your surface type and tile material.
Do you need spacers for mosaic tile backsplash installation?
Yes, using spacers ensures even grout lines and a professional finish, especially when working with individual mosaic tiles.
How do you cut mosaic tile sheets without breaking them?
Use a tile cutter, wet saw, or nippers for precise cuts. Apply gentle pressure to avoid cracking delicate mosaic tiles.
Can I install a mosaic tile backsplash over the existing tiles?
Yes, but the surface must be clean, roughened, and properly primed to ensure the new tiles adhere well.
How long does it take for the grout to dry after installing a mosaic tile backsplash?
Grout usually takes 24 to 48 hours to dry completely. Avoid water or cleaning until it’s fully cured.