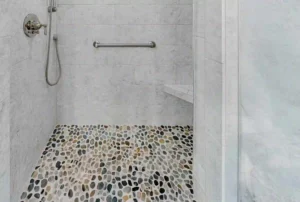
Grouting a backsplash is a crucial step that enhances both the look and functionality of your kitchen or bathroom. It not only fills the gaps between tiles, creating a polished and seamless finish but also acts as a barrier against moisture and stains. Without proper grouting, water can seep behind the tiles, leading to mold growth and damage over time. Knowing how to grout backsplash correctly ensures long-lasting protection while elevating the overall design of your space. A well-grouted backsplash offers durability and easy maintenance, making cleaning effortless with just a damp cloth. It prevents dirt buildup in the joints, keeping your backsplash looking fresh for years. Additionally, choosing the right grout color can enhance tile patterns, adding depth and style to your kitchen or bathroom. Whether you’re a DIY enthusiast or hiring a professional, mastering the grouting process ensures a flawless and long-lasting backsplash.
Essential and Optional Tools & Materials for Grouting a Backsplash
Category Table of Contents Toggle | Item | Purpose |
Essential Tools | Grout Float | Spreads grout evenly into tile joints |
Sponge | Wipes off excess grout and smooths joints | |
Bucket | Holds water for cleaning grout residue | |
Trowel or Putty Knife | Helps in mixing and applying grout | |
Mixing Paddle | Attaches to a drill for even grout mixing | |
Essential Materials | Grout (Sanded/Unsanded) | Fills tile joints and secures tiles |
Grout Sealer | Protects grout from moisture and stains | |
Clean Water | Required for grout mixing and cleanup | |
Optional Items | Painter’s Tape | Keeps edges clean and prevents grout overflow |
Caulk & Caulking Gun | Seals gaps between backsplash and countertops | |
Microfiber Cloth | Gives a final polish for a spotless finish |
Step-by-Step Guide to Grouting a Backsplash

Step 1: Prepare the Surface
Before starting the grouting process, ensure the backsplash tiles are clean and completely dry. Any dust, grease, or debris can prevent the grout from properly adhering to the tile joints. Use a damp cloth or sponge to wipe down the surface, removing any residues left from installation.
Next, inspect the tiles for any cracks or loose pieces. If you notice damaged tiles, replace or secure them before proceeding. A properly prepped surface ensures the grout bonds well and creates a smooth, even finish. Taking the time to prepare will help avoid issues later in the process.
Step 2: Choose the Right Grout
Selecting the correct grout for backsplash tiles is essential for durability and appearance. There are two main types of grout:
- Sanded grout – Ideal for tile joints larger than 1/8 inch, providing extra strength and resistance to cracking.
- Unsanded grout – Best for joints smaller than 1/8 inch, offering a smooth and even application on delicate surfaces like glass or polished tiles.
For high-moisture areas, such as kitchens and bathrooms, epoxy grout is an excellent choice. It resists stains, moisture, and mildew better than traditional cement-based grout, making it ideal for grouting tile in areas exposed to water and spills.
Step 3: Mix the Grout
Properly mixing grout is key to achieving a smooth application. Follow these steps:
- Pour the dry grout mix into a clean bucket.
- Gradually add water, stirring continuously with a mixing paddle or trowel.
- Mix until you get a thick, peanut butter-like consistency. Avoid making it too runny or dry.
- Let the grout sit for 5–10 minutes (also known as slaking), then stir again before applying.
Always follow the manufacturer’s instructions for the correct water-to-grout ratio. Overmixing can introduce air bubbles, weakening the final result.
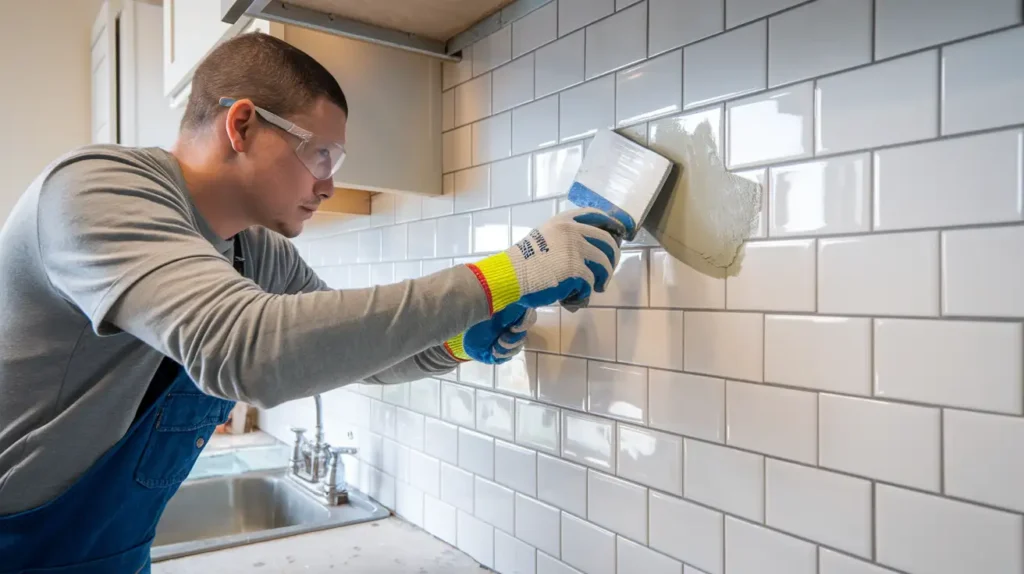
Step 4: Apply the Grout
Now comes the main part of how to grout backsplash tiles. Using a grout float, scoop a small amount of grout and press it into the tile joints at a 45-degree angle. Work diagonally across the tiles to ensure the grout fills the gaps.
Work in small sections, typically 2–3 square feet at a time, to prevent the grout from drying too quickly before cleaning. Continue this process until all joints are filled evenly.
Step 5: Clean Excess Grout
After applying grout, allow it to sit for 10–15 minutes, then clean off excess using a damp sponge. Gently wipe the tile surface in a circular motion while avoiding pulling grout from the joints.
Rinse the sponge frequently in clean water to prevent the spreading of residue. If a haze forms after drying, buff the tiles with a microfiber cloth to restore their shine.
Step 6: Let the Grout Cure
Grout requires 24–72 hours to fully cure, depending on the type and humidity levels. Avoid exposing the backsplash to moisture during this period to ensure it sets properly.
Patience is key rushing this step may result in weak, crumbly grout that won’t last.
Step 7: Seal the Grout
Sealing is a crucial step in grouting backsplash tiles, as it protects against stains, moisture, and discoloration. Choose a penetrating grout sealer and apply it using a small brush or applicator bottle.
Allow the sealer to absorb, then wipe off any excess. Some sealers require multiple coats for added protection. Reapply every 6–12 months to maintain durability and appearance.
By following these steps, you’ll achieve a clean, polished look while ensuring long-lasting performance. A properly grouted backsplash enhances the beauty of your kitchen or bathroom while offering essential protection against moisture and stains.
Common Mistakes to Avoid When Grouting a Backsplash
1. Applying Too Much Grout or Letting It Dry Before Cleaning
One of the biggest mistakes when grouting tile is applying excess grout and leaving it too long before wiping. This leads to a stubborn haze on the tiles, making cleanup difficult. Always work in small sections and wipe off excess grout with a damp sponge within 10–15 minutes for a smooth, professional finish.
2. Using the Wrong Type of Grout
Not all grout is the same! Choosing the wrong one for your grout backsplash can cause cracks or poor adhesion. Sanded grout is best for wider joints, while unsanded grout works for narrow gaps. If your backsplash is in a high-moisture area, epoxy grout is a durable, stain-resistant choice.
3. Skipping the Sealing Step
Even if you’ve mastered how to grout backsplash tiles, forgetting to seal it can lead to stains and moisture damage. Sealing protects the grout from spills and discoloration, keeping your backsplash looking fresh. Apply a quality grout sealer and reapply every few months for long-lasting results.
Why Choose SF Marble & Granite for Backsplash Installation?
When it comes to Backsplash Installation in Lowell, quality craftsmanship matters. SF Marble & Granite offers expert installation with precise attention to detail, ensuring a seamless and stylish finish. Whether you want a modern, classic, or custom backsplash, our team delivers flawless results that enhance your kitchen or bathroom.
We use high-quality materials and professional techniques to guarantee durability and long-lasting beauty. Our skilled installers work efficiently, minimizing disruption to your home while ensuring every tile is perfectly placed. With years of experience, we bring your vision to life with stunning designs tailored to your space.
Customer satisfaction is our top priority, which is why we offer personalized service, competitive pricing, and timely project completion. If you’re looking for reliable Backsplash Installation in Lowell, trust SF Marble & Granite for a hassle-free experience and exceptional results.
Conclusion
Learning how to grout backsplash properly ensures a polished look, prevents moisture damage, and extends the life of your tiles. From surface preparation and choosing the right grout to application, cleaning, and sealing, each step plays a crucial role in achieving a flawless finish. Taking the time to grout correctly will keep your backsplash looking stunning for years to come.
If you’re planning a new backsplash project but want professional results without the hassle, our experts at SF Marble and Granite Inc. are here to help! We offer top-quality Backsplash Installation in Lowell, ensuring precision and durability. Contact us today for a consultation, and let’s bring your kitchen or bathroom vision to life!
FAQs
Can I use sanded grout on a backsplash?
Sanded grout is ideal for grout lines wider than 1/8 inch, providing extra strength and crack resistance. However, for delicate surfaces like glass or polished tiles, unsanded grout is a better choice to prevent scratching.
How long does grout take to dry?
Grout typically takes 24–72 hours to fully cure, depending on humidity, temperature, and grout type. Avoid exposing it to moisture during this period for the best results.
Do I need to seal my backsplash grout?
Yes, sealing helps protect grout from stains, moisture, and mold. Use a high-quality penetrating sealer and reapply every 6–12 months for long-lasting protection.