
It is scary to cut granite for the first time. You have a saw over a slab of more than your monthly rent and one incorrect move and it’ll crack in two. I understand. That fear is normal and in fact, a healthy thing. That shows you appreciate the material and that respect is what keeps a project on track.
Here’s my promise: at the end of this guide, you’ll know how to cut granite securely, cleanly, and without losing a single block. I will show you the tools you need, and the procedures to take, the pitfalls that cause most people to fail the first time, and what to do when your project is finished. Here’s a quick response, I know you don’t have time for this. Mark your cut line. Clamp the slab so it doesn’t move. Use a diamond blade wet saw or angle grinder with diamond wheel. Cut carefully and steady. Keep the blade cool with water the entire time.

Understanding Granite Cutting
Granite cutting works by grinding through the stone with a diamond-tipped blade, not by slicing it like wood. Granite sits at a 6 to 7 on the Mohs hardness scale, which means regular blades wear out or shatter on contact. A diamond blade grinds a path through the crystal structure instead of cutting cleanly, which is why water cooling and slow pressure matter so much.
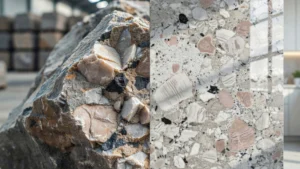
Granite forms from cooled magma, packed with quartz, feldspar, and mica crystals. That crystal structure gives granite its strength, but it also makes the stone brittle under sudden pressure. Push too fast, and the blade can bind and chip the edge. Go too slow, and heat builds up until the stone cracks from the inside.
Tools and Safety Gear You’ll Need Before You Start
You don’t need a shop full of equipment, yet most people get hurt or ruin a slab by ignoring the essentials. For straight cuts a wet tile saw with a diamond blade is the safest bet. Curved and smaller parts can be cut with an angle grinder fitted with a diamond cutting wheel but it demands a steadier hand.
You’ll also need safety glasses, a dust mask rated for silica particles, hearing protection and thick gloves, in addition to the saw. Granite dust has crystalline silica in it which is a major health hazard if inhaled over time. A clamp or vice to hold the slab still is equally as critical as the blade itself, since a slab that shifts mid cut is how injuries happen.
Lay the slab on a firm, flat surface before you contact the saw. A sawhorse configuration with foam padding underneath protects the stone and keeps it from swaying. One of the quickest ways to crack a slab you’ve already paid for is to skip this step.
Ventilation also is important when using a wet saw. Work outside whenever possible , open a garage door . Dust still goes further than you would think . If you’re renting equipment, ask the hardware shop which blade grit works best for the thickness you’re cutting, since a coarse blade rated for tile won’t hold up the same way on a thick countertop slab.
Step-by-Step Guide on How to Cut Granite
Once your tools are ready, the process itself is straightforward if you follow it in order. This is the core of how to cut granite without wasting material or hurting yourself, so read each step before you start cutting.
Step 1: Measure and mark your cut line. Use a straightedge and a grease pencil or chalk line, since regular pencil marks wipe off wet stone. Double check your measurements twice before marking, because granite doesn’t forgive a redo.
Step 2: Secure the slab. Clamp it to a stable surface or workbench so it cannot shift even slightly during the cut. Add foam or rubber padding underneath to absorb vibration.
Step 3: Set up water flow. If you’re using a wet saw, make sure the water reservoir is full and the blade gets a steady stream during the entire cut. Water keeps the blade cool and reduces dust, which protects both the stone and your lungs.
Step 4: Start the cut slowly. Let the blade do the work instead of forcing it through the stone. Apply light, even pressure and guide the saw along your marked line at a steady pace.
Step 5: Cut in short passes for thick slabs. For anything over three quarters of an inch thick, make a shallow first pass, then deepen it with a second and third pass. This reduces heat buildup and lowers the odds of a crack running through the slab.
Step 6: Smooth the edge. Once the cut is done, use a diamond hand pad or edge polisher to knock down any sharp or rough spots. This step also gives the edge a finished look if it’s staying visible.
Step 7: Clean and inspect. Rinse away dust and check the cut edge for chips or hairline cracks before moving the piece. A quick inspection now saves a bigger problem during installation later.
Common Mistakes That Crack or Chip Granite
Rushing the cut is the number one reason slabs crack. Granite needs steady, patient pressure, not speed. If you feel resistance, ease off instead of pushing harder.
Using a dry blade without water is another common error. Without cooling, the blade overheats, the stone heats unevenly, and stress cracks form that you won’t notice until later. Skipping a stable clamp setup is the third big mistake, since even a small shift mid cut can send a crack straight through an expensive slab.
Backsplash Ideas for Fantasy Brown Granite Countertops
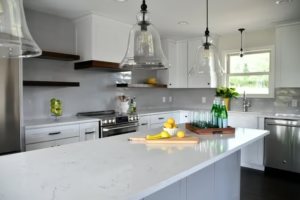
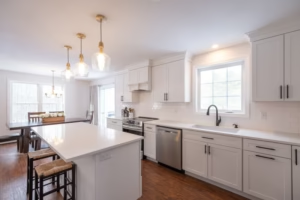
Fantasy Brown granite has soft grey, cream, and brown veining that looks closer to marble than typical granite. That soft pattern gives you a lot of room to play with backsplash choices without the kitchen feeling busy. A plain white subway tile backsplash lets the countertop stay the star of the room, which works well in smaller kitchens.
If you want more texture, a honed marble mosaic in cream or soft grey pulls color straight from the granite’s veining. For a bolder look, a herringbone pattern in matching neutral tones adds movement without clashing with the stone’s natural pattern. Large format porcelain slabs in a warm white also pair well, since they keep grout lines minimal and let the granite’s veining stand out as the main visual detail.
Lighting matters here too. Warm LED under-cabinet lighting brings out the gold and brown tones in Fantasy Brown granite, while cooler light tends to flatten the pattern.
Maintenance Tips for Granite Surfaces
Granite is tough, but it’s not maintenance free. Sealing the surface once a year keeps stains from soaking into the stone, especially around sinks and stovetops. A simple water droplet test tells you when it’s time to reseal: if water beads up, the seal is still working, and if it soaks in within a few minutes, it’s time to reseal.
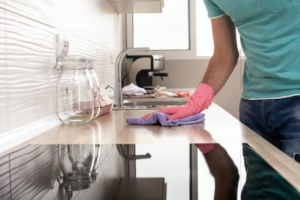
Clean spills quickly, especially acidic ones like wine, coffee, or citrus juice, since these can dull the surface finish over time. Stick to a pH neutral stone cleaner rather than harsh chemicals or vinegar based sprays, which slowly wear down the sealant. Avoid using abrasive scouring pads, since they can scratch the polished surface even on a hard stone like granite.
Cutting boards and trivets protect granite from scratches and heat marks, even though the stone can handle direct heat better than most surfaces. Small habits like these add years to how good your countertop looks.
Warm, soapy water and a soft cloth handle most day to day cleaning just fine. Save the pH neutral stone cleaner for a deeper weekly wipe down, especially near cooking areas where grease tends to build up.
Conclusion
Embarking on a granite project, whether it’s cutting slabs for countertops or selecting the perfect backsplash, is a journey that demands precision, creativity, and the proper guidance. In this comprehensive guide by SF Marble And Granite. we’ve covered every facet of working with granite, from cutting to selecting an exquisite backsplash that complements Fantasy Brown granite countertops.
Remember, the journey doesn’t end with installation. Proper maintenance is the key to preserving the allure of your granite surfaces. Follow our maintenance tips, from daily cleaning routines to periodic reapplication of sealant, to ensure your granite remains a timeless focal point in your home.
SF Marble And Granite Inc. is not just a supplier; we’re your collaborators in turning your vision into reality. If you have further questions or require assistance, refer to our FAQs or contact our team. Your satisfaction is our priority.
FAQs
Can you cut granite with a regular saw?
No, a regular saw won’t cut granite. Standard blades lack the diamond coating needed to grind through the stone’s hard mineral structure, and they’ll wear down or shatter almost immediately on contact. You need a diamond blade wet saw or an angle grinder fitted with a diamond cutting wheel to cut granite safely and cleanly.
Regular blades are built for softer materials like wood or drywall, and granite’s hardness destroys them within seconds. Even carbide blades, which handle some masonry work, aren’t hard enough for granite’s quartz content.
What is the best tool to cut granite at home?
The best tool for cutting granite at home is a wet tile saw fitted with a diamond blade. It keeps the blade cool with a steady water flow, reduces dust, and gives you the straightest, cleanest cuts for slabs and tiles. An angle grinder with a diamond wheel is a solid backup for curves or small pieces.
A wet saw also cuts down on airborne silica dust, which makes it the safer choice for indoor or garage projects. If you’re only making one or two cuts, renting a wet saw from a hardware store is often cheaper than buying one outright.
Does cutting granite make a lot of dust?
Yes, cutting granite creates a large amount of fine dust, and dry cutting makes it worse. That dust contains crystalline silica, which is harmful to breathe in over time. Using a wet saw with steady water flow cuts dust levels down dramatically compared to a dry blade.
Even with water, wearing a properly rated dust mask is worth the extra step. Silica exposure builds up over repeated projects, not just a single cut.
How thick is a standard granite countertop?
Standard granite countertops are usually cut to either two centimeters or three centimeters thick, with three centimeters being the more common choice in the United States. Thicker slabs resist cracking better during cutting and daily use, while thinner slabs need extra support underneath, like plywood backing.
If you’re cutting a thicker slab yourself, plan on multiple shallow passes rather than one deep cut, since a single pass through three centimeters of stone puts a lot of stress on both the blade and the slab.