Caulking a backsplash is essential for preventing water damage, mold growth, and maintaining a polished look in your kitchen or bathroom. Whether you’re working with granite, quartz, tile, or marble, the right caulking technique ensures a waterproof seal that preserves the beauty of your surfaces. This guide covers everything from choosing the best caulk for your material to achieving a professional finish, with tips tailored for homeowners and contractors in Lowell, MA.
Tools and Materials Needed for Caulking a Backsplash
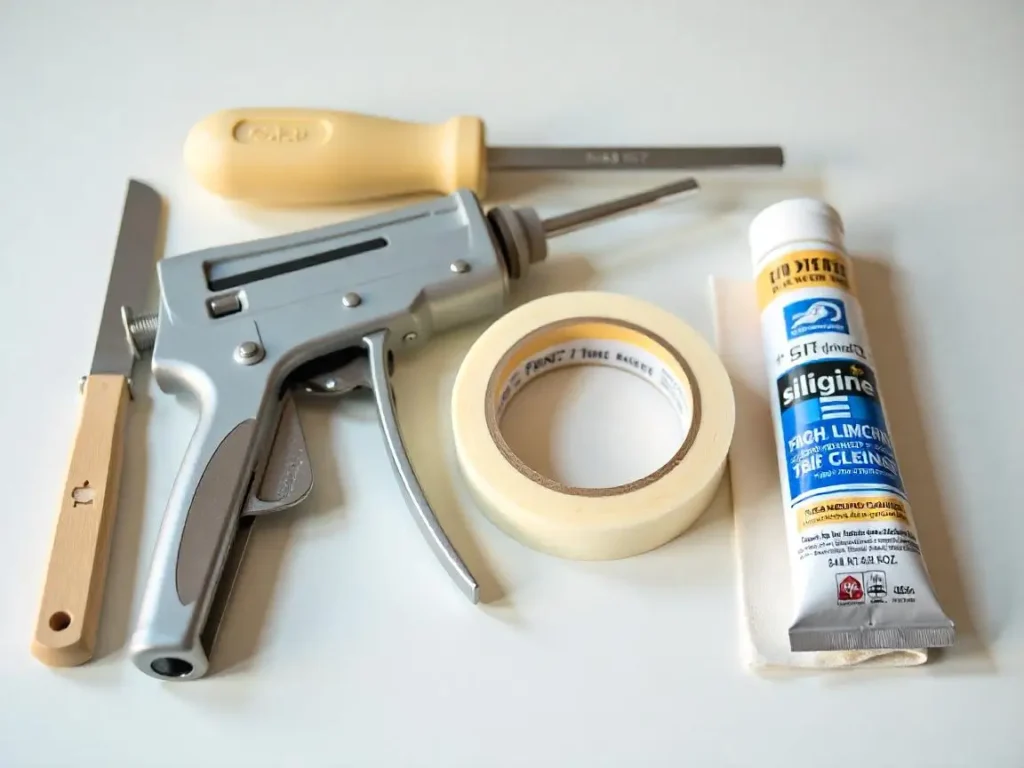
To caulk a backsplash like a pro, start by gathering the right tools. A 100% silicone caulk is ideal for natural stone surfaces like granite or marble due to its durability and water resistance. Pair this with a caulking gun for even application, and use a utility knife to remove old caulk or trim the tube tip. Painter’s tape helps create clean edges, while denatured alcohol ensures the surface is free of grease and debris before application. For smoothing, a caulk tool or damp finger works well, and paper towels are essential for quick cleanups.
Choosing the Right Caulk for Your Backsplash Material
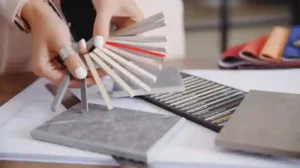
Not all caulks are created equal. Silicone-based caulk is the gold standard for kitchens and bathrooms because it resists mold and won’t shrink over time. For granite or marble backsplashes, opt for color-matched silicone to maintain a seamless appearance. Avoid latex caulk, which cracks easily and isn’t suitable for natural stone. If your backsplash borders a painted wall, paintable silicone allows for touch-ups without compromising the seal.
Preparing the Surface for Caulking
Proper preparation is key to a long-lasting seal. Begin by removing old caulk with a utility knife, taking care not to scratch the countertop or tile. Clean the joint with denatured alcohol to eliminate residue, and let it dry completely. For better adhesion, some experts recommend applying a primer designed for silicone caulk. Finally, frame the joint with painter’s tape to ensure sharp, mess-free lines.
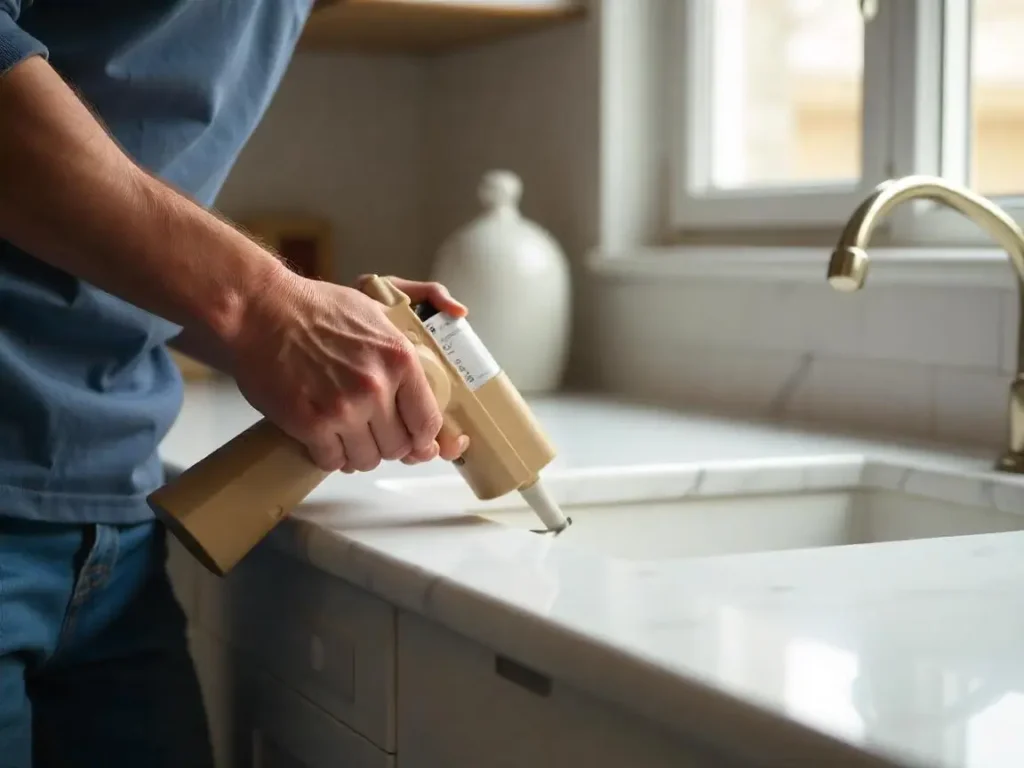
Step-by-Step Caulk Application Process
- Cut the Caulk Tube: Trim the tip at a 45-degree angle, making the hole slightly smaller than the joint width to control the bead size.
- Load the Caulking Gun: Insert the tube and press the plunger until caulk appears at the tip.
- Apply the Bead: Hold the gun at a 45-degree angle and glide it steadily along the joint, maintaining even pressure. Work in small sections to avoid drying too quickly.
- Smooth the Caulk: Mist the bead with water or use a damp finger to create a concave finish. A caulk tool can also achieve a polished look.
- Remove Tape Immediately: Peel off the painter’s tape before the caulk sets to preserve crisp edges.
Avoiding Common Caulking Mistakes
Even small errors can undermine your efforts. Overapplying caulk creates a bulky, uneven line that’s prone to cracking. Conversely, skipping surface cleaning leads to poor adhesion and premature failure. Using the wrong caulk type, like latex on granite, compromises water resistance. Finally, rushing the drying process-silicone requires at least 24 hours to cure-can result in a weak seal.
Maintaining Your Backsplash Caulk
Regular inspections prevent minor issues from becoming major problems. Check for cracks or gaps annually, especially in high-moisture areas. If mold appears, mix baking soda and bleach into a paste, apply it to the affected area, and cover with plastic wrap overnight. For natural stone, avoid harsh chemicals and opt for pH-neutral cleaners. When resealing, choose a penetrating sealer for porous materials like marble.
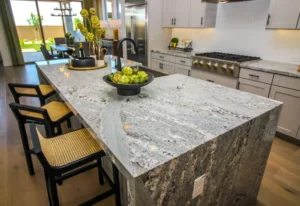
Why Choose Silicone Caulk for Granite and Marble in Lowell, MA
At SF Marble & Granite Inc., we recommend InnerBond C-770 silicone caulk for its flexibility and mold resistance. Its color-matching options ensure your backsplash remains visually cohesive, whether you’ve chosen a sleek quartz design or a classic marble finish. For Lowell homeowners, proper caulking is especially critical due to the region’s humidity, which accelerates mold growth if seals are compromised.
Elevate Your Kitchen with Expert Backsplash Installation in Lowell
At SF Marble & Granite Inc, we’re more than just a company offering backsplash installation in Lowell-we’re your neighbors who understand the unique style and charm of homes in this area. Whether your kitchen is in a historic Victorian or a modern condo, we tailor every backsplash installation to fit your space perfectly. Our team combines expert craftsmanship with local knowledge to bring you a beautiful, durable backsplash that protects your walls and elevates your kitchen’s look. Let us help you transform your kitchen with quality and care you can trust. Contact us today!
Conclusion
Caulking a backsplash might seem simple, but precision matters-especially with premium materials like granite or marble. By following these steps and using the right products, you’ll protect your investment and keep your kitchen looking pristine. For complex projects or color-matching needs, SF Marble & Granite Inc offers professional backsplash installation and caulking services in Lowell, MA. Contact us today to ensure your surfaces stay beautiful for years to come.
This guide blends practical DIY advice with expert insights, positioning SF Marble & Granite Inc as the authority on stone care in the Lowell area. By addressing local concerns like humidity. and emphasizing material-specific solutions, the content aligns with both SEO goals and user needs.
FAQs
How often should I recaulk my backsplash?
It’s a good idea to check your backsplash caulk every year. If you notice cracks, gaps, or mold, it’s time to remove the old caulk and apply a fresh bead to keep your kitchen protected.
Can I use any caulk for my backsplash?
Not really. For kitchen backsplashes, especially with granite, marble, or quartz, silicone caulk is best because it’s waterproof and flexible. Avoid latex caulk as it doesn’t hold up well in wet areas.
How do I remove old caulk without damaging my backsplash?
Use a sharp utility knife or a caulk removal tool carefully to scrape away the old caulk. Take your time and be gentle to avoid scratching your tiles or countertop.
Is painter’s tape really necessary when caulking?
Yes! Painter’s tape helps create clean, straight lines and prevents messy edges. It makes your caulking job look professional, even if you’re doing it yourself.
How long does it take for caulk to dry before I can use my kitchen?
Most silicone caulks need about 24 hours to fully cure. Avoid getting the area wet during this time to ensure a strong, lasting seal.
Can I caulk a backsplash myself, or should I hire a professional?
If you’re comfortable with DIY projects and have the right tools, you can definitely caulk your backsplash yourself. But for tricky corners, color matching, or natural stone surfaces, professional help from SF Marble & Granite Inc ensures a flawless finish.