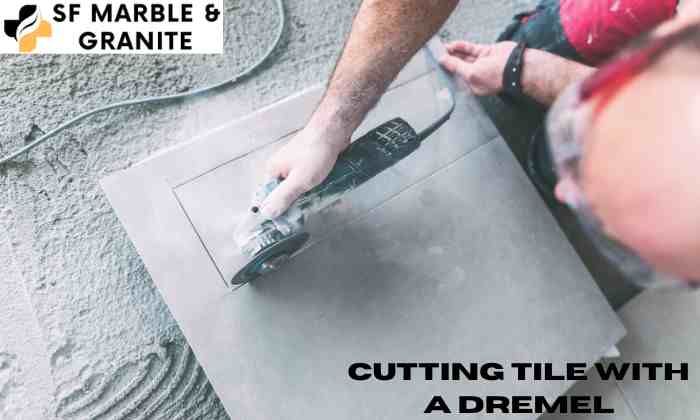
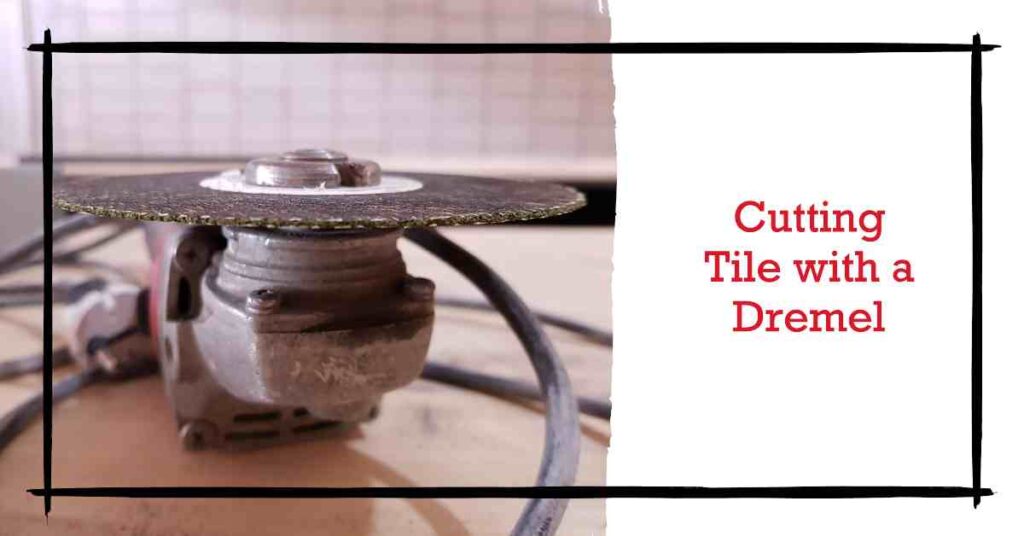
Mastering the Art of Cutting Tile with a Dremel: Tips and Techniques
When it comes to precision and finesse in tile cutting, there’s one tool that stands out: the Dremel. At SF Marble And Granite Inc, we understand the art of “Cutting Tile with Dremel” like no other. Our expert team is well-versed in the techniques and intricacies of using a Dremel tool to achieve flawless tile cuts. Whether you’re embarking on a DIY project or need professional assistance, our partnership with SF Marble And Granite Inc ensures that your tile cutting endeavors will be nothing short of exceptional. With a wide range of exquisite stone materials and a wealth of expertise, we’re here to help you turn your tile projects into true works of art.
Choosing the Right Dremel Bit for Tile Cutting
To embark on your tile-cutting journey, the first crucial step is selecting the appropriate Dremel bit. Dremel offers a variety of bits tailored for different materials and purposes, and when it comes to cutting tiles, precision is key. How to choose wisely is provided here:
Table of Contents
ToggleDiamond-Coated Wheel
For clean and precise tile cutting, a diamond-coated wheel is your best bet. These wheels are specifically designed to handle the hardness of tiles and offer excellent cutting precision.
Carbide Bit
Carbide bits are another suitable option for tile cutting. They provide a good balance of durability and cutting precision, making them ideal for DIY tile projects.Take into account the following elements when selecting between these options:
- Tile Type
Determine the type of tile you’ll be cutting. Ceramic, porcelain, and glass tiles have different levels of hardness. Ensure your chosen bit can handle the specific tile material.
- Project Complexity
If your project involves intricate cuts and curves, opt for a diamond-coated wheel as it excels in precision. For simpler cuts, a carbide bit may suffice.
- Bit Size
Choose a bit size that matches the size of the cut you need to make. Larger bits are suitable for straight cuts, while smaller ones are better for detailed work.
Safety Precautions: Protect Yourself
Safety should always be your top priority when working with a Dremel tool for tile cutting. Tile cutting can create debris and expose you to potential hazards. To ensure your safety, follow these essential precautions:
Wear Safety Gear
Before you begin, make sure you are equipped with the following safety gear:
- Safety Glasses:
Protect your eyes from tile shards and dust by wearing safety glasses with side shields.
- Dust Mask:
Prevent inhalation of harmful dust particles by wearing a dust mask or respirator.
- Gloves:
Use gloves to shield your hands from sharp tile edges and to maintain a firm grip on the tile.
- Ear Protection (Optional):
If your Dremel tool is particularly loud, consider wearing ear protection to safeguard your hearing.
Work in a Well-Ventilated Area
Tile cutting can generate dust and fumes, which can be harmful if inhaled. Ensure that you work in a well-ventilated space, such as a garage or outdoor area, to minimize the concentration of dust and fumes in the air.
Secure the Workspace
Before you start cutting, make sure your workspace is well-organized and secure:
- Stable Surface:
Work on a stable and level surface to prevent the tile from shifting during cutting.
- Adequate Lighting:
Ensure you have sufficient lighting to clearly see your cutting lines and work area.
- Secure Tile Placement:
Ensure the tile you are cutting is firmly secured in place to prevent movement.
Keep Others Away
While working with your Dremel tool, keep bystanders, especially children and pets, at a safe distance. This helps prevent accidents and distractions.
Proper Tool Handling
Handle your Dremel tool with care:
- Maintain a Firm Grip: Hold the tool securely with both hands and maintain control throughout the cutting process.
- Use the Right Bit: Ensure that you have the correct Dremel bit for tile cutting to avoid unnecessary risks.
Preparing Your Workspace
Before you begin cutting tiles with a Dremel tool, it’s crucial to prepare your workspace adequately. A well-organized and secure workspace not only enhances safety but also ensures precise and efficient tile cutting. To efficiently set up your workstation, follow these steps:
Select a Stable Surface
Choose a stable and level surface as your workspace. A sturdy workbench or table is ideal for this purpose. Ensure that it can support the weight of the tile and provides a comfortable working height.
Ensure Adequate Lighting
Proper lighting is essential for accurate tile cutting. Make sure your workspace is well-lit so that you can clearly see your cutting lines and work area. Use additional task lighting if needed.
Secure the Tile
Before cutting, ensure that the tile you intend to cut is securely fixed in place. You can use clamps or other suitable methods to prevent any movement during cutting. This stability is crucial for achieving precise cuts.
Gather Your Tools and Materials
Have all of the required equipment and supplies close at hand.This includes your Dremel tool with the selected cutting bit, safety gear, a measuring tape, a pencil or marker for marking the tile, and any additional accessories you might need.
Clear the Workspace
Remove any unnecessary items or debris from your workspace. A clutter-free environment ensures that you have ample space to maneuver the Dremel tool and reduces the risk of accidents.
Set Up Ventilation
Tile cutting can generate dust and fumes, which can be harmful to inhale. If you’re working indoors, ensure good ventilation by opening windows or using fans to help dissipate dust and fumes. Consider wearing a dust mask or respirator for added protection.
Organize Your Work Area
Arrange your tools and materials in an organized manner within easy reach. This saves you time and effort during the cutting process and minimizes disruptions.
Marking Your Tile
Before you begin cutting your tile with a Dremel tool, it’s essential to mark the precise location where you want to make the cut. Properly marking your tile helps ensure accuracy and reduces the likelihood of mistakes. Here’s how to do it effectively:
Gather Your Tools
Before you start marking, gather the following tools and materials:
- Tile: The tile you intend to cut.
- Measuring Tape: Use a measuring tape to determine the exact dimensions for your cut.
- Pencil or Marker: You’ll need a pencil or a washable marker to make clear and visible markings on the tile’s surface.
- Straight Edge or Square: A straight edge, such as a ruler or a carpenter’s square, helps you create straight lines for your cut. It’s especially useful for straight cuts.
Measure and Plan
Begin by measuring the tile and determining where you want to make the cut. Use the measuring tape to mark the precise starting and ending points of the cut. Ensure your measurements are accurate to avoid any discrepancies.
Use the Straight Edge
If you’re making a straight cut, align the straight edge or square along the marked cutting line. This will serve as a guide to ensure a straight and precise cut.
Mark the Tile
With the straight edge in place, use your pencil or marker to make a clear, visible line on the tile’s surface along the edge of the straight edge. This line represents the path of your cut.
Double-Check Your Marks
Before proceeding, double-check your markings to ensure they are accurate and align with your project’s requirements. Precision in this step is crucial for a successful cut.
Consider Curves and Angles
If your cut involves curves or angles, use the measuring tape and a steady hand to carefully mark these intricate shapes on the tile’s surface. Take your time to ensure accuracy.
Mark Both Sides
For some tile-cutting tasks, it may be necessary to mark both sides of the tile if the cut goes all the way through. This double marking helps you align the cut accurately from both sides.
Making the Initial Cut
With your tile marked and your workspace prepared, it’s time to begin the tile cutting process using your Dremel tool. The initial cut is a critical step, and it sets the foundation for the rest of your project. Follow these steps to make the initial cut effectively:
Safety First
Before you start cutting, ensure you’re wearing the necessary safety gear, including safety glasses, a dust mask or respirator, and gloves. Protecting yourself from potential hazards is paramount.
Select the Right Bit
Ensure that you’ve installed the appropriate Dremel bit for tile cutting. For most tile materials, a diamond-coated wheel or a carbide bit is suitable. Double-check that the bit is securely attached to your Dremel tool.
Set the Dremel Tool Speed
Start with a low to medium speed setting on your Dremel tool. Higher speeds can generate excessive heat and may cause chipping or cracks in the tile. You can adjust the speed as needed during the cutting process.
Position the Dremel
Hold the Dremel tool firmly with both hands, keeping it perpendicular to the tile’s surface. Position it at the starting point of your marked cutting line.
Begin the Cut
Activate the Dremel tool and slowly guide it along the marked cutting line. Apply gentle and steady pressure to allow the bit to cut through the tile gradually. Avoid pushing too hard, as this can result in uneven or jagged cuts.
Maintain a Steady Pace
Keep a consistent pace as you move the Dremel tool along the cutting line. Allow the tool’s rotation to do the cutting work, and resist the urge to rush. A slower, controlled pace typically yields better results.
Cool the Bit
Periodically pause to cool the Dremel bit by dipping it in water or using a cooling solution. This helps prevent overheating and prolongs the life of the bit.
Complete the Cut
Continue cutting along the marked line until you reach the endpoint. If your cut doesn’t go all the way through the tile, flip it over and repeat the process on the other side to complete the cut.
Smooth Edges
After the initial cut is made, you may notice rough or jagged edges. Use a sanding attachment on your Dremel tool to smooth these edges for a clean finish.
The initial cut is a crucial step in your tile-cutting journey. By following these steps and maintaining precision and control, you’ll achieve a clean and accurate cut that forms the basis for your tile project. As you gain confidence in your cutting skills, you can move on to more intricate cuts and designs.
Perfecting Curves and Angles
While straight cuts are relatively straightforward, achieving precise curves and angles with your Dremel tool can be a bit more challenging. However, with patience and practice, you can master the art of perfecting curves and angles in your tile cutting projects. Follow these steps for outstanding results:
- Safety Precautions
Before you begin working on curves and angles, ensure you’re wearing the necessary safety gear, including safety glasses, a dust mask or respirator, and gloves. Safety should always be a priority.
- Select the Right Bit
Ensure that you have the appropriate Dremel bit for the type of curve or angle you intend to create. For intricate curves, a smaller, fine-pointed bit may be necessary, while larger curves may require a bit with a wider cutting surface.
- Practice on Scrap Tile
If you’re new to cutting curves and angles, consider practicing on a scrap piece of tile first. This allows you to get a feel for how the Dremel tool responds to different curves and angles without the pressure of working on your main project.
- Make Guiding Marks
Use a pencil or marker to draw guiding lines directly on the tile. These lines will serve as your reference points for creating the desired curve or angle.
- Begin the Cut
Start the Dremel tool at a low to medium speed setting. Position it at the starting point of your guiding line, and gently guide it along the curve or angle you’ve marked. The key is to maintain a steady hand and a controlled pace.
- Pivot and Rotate
For curved cuts, pivot the Dremel tool smoothly as you follow the curve. For angles, make gradual and controlled rotations, adjusting your hand as needed to maintain the desired angle. Keep the tool perpendicular to the tile’s surface.
- Frequent Pauses
As you work on curves and angles, pause periodically to cool the bit in water or with a cooling solution. This helps prevent overheating and ensures smoother cutting.
- Check Your Progress
Regularly inspect your work to ensure that you’re following the guiding lines accurately.Stay on course by making any required modifications.
Perfecting curves and angles takes practice. If your first attempts aren’t perfect, don’t give up. With practice, your skills will improve, and you’ll become more adept at creating intricate designs.
Smoothing the Edges
After making the initial cut and perfecting curves or angles in your tile, you may find that the edges are rough or uneven. Smoothing the edges is a crucial step to ensure that your tiles fit together seamlessly and that your project looks polished and professional. Here’s how to smooth the edges effectively:
Safety Gear
Before you begin, remember to wear your safety gear, including safety glasses, gloves, and a dust mask or respirator. When using tools, safety is always the top consideration.
Choose the Right Attachment
For edge smoothing, you’ll need a suitable attachment for your Dremel tool. A sanding attachment or a grinding stone is often the best choice, as they can effectively smooth rough edges.
Set the Dremel Speed
Start your Dremel tool at a low to medium speed setting. You want enough power to smooth the edges effectively, but avoid high speeds that might cause overheating or damage.
Hold the Dremel at an Angle
Hold the Dremel tool at a slight angle to the tile’s edge. This angle allows the attachment to make contact with the edge for smoothing. Be sure to maintain a steady hand and a controlled pace.
Begin Smoothing
Activate the Dremel tool and gently move it along the rough edge of the tile. Apply even pressure, allowing the attachment to grind or sand away imperfections. Keep the tool moving to prevent overgrinding in one spot.
Check Your Progress
Frequently pause to check the smoothness of the edge. Run your finger lightly along the edge to feel for any remaining rough spots. Make additional passes as needed until the edge is uniformly smooth.
Rotate the Tile
If you’re working on the edge of a curved tile or need to smooth multiple sides, rotate the tile as necessary to access all areas. Ensure that you maintain the same angle and even pressure during the process.
Clean Up
As you work, you’ll generate dust and debris. Use a brush or a damp cloth to clean the tile and remove any dust buildup. This helps you maintain a clear view of your progress.
Final Inspection
Once you’re satisfied with the smoothness of the edges, inspect the tile thoroughly. It should have uniform, polished edges that will fit seamlessly with adjacent tiles in your project.

Cleaning Up the Mess
Tile cutting can be a messy process, with dust and debris accumulating in your workspace. Properly cleaning up after you’ve finished cutting tiles is essential to maintain a safe and organized environment. Follow these steps to clean up effectively:
Safety Gear
Before you begin cleaning, keep your safety gear on. Safety glasses and a dust mask or respirator should still be worn to protect yourself from any remaining dust or debris.
Collect Debris
Use a brush or a small broom to collect the tile debris, dust, and any loose particles from your workspace. Sweep them into a dustpan for easy disposal. Be thorough, as even tiny tile fragments can be hazardous if left behind.
Dispose of Debris
Dispose of the collected debris responsibly. Place it in a sturdy trash bag and tie it securely. If the debris contains sharp tile fragments, consider double-bagging to prevent punctures.
Vacuum (Optional)
For a more thorough clean, use a vacuum cleaner with a HEPA filter to capture fine dust particles that sweeping might miss. Pay special attention to corners and crevices where dust can accumulate.
Wipe Down Surfaces
Use a damp cloth or sponge to wipe down surfaces in your workspace. This helps remove any remaining dust and ensures a clean and tidy area.
Inspect Your Tools
Don’t forget to clean and inspect your Dremel tool and attachments. Dust and debris can accumulate in the tool’s vents and crevices, affecting its performance.Observe the cleaning and upkeep recommendations provided by the manufacturer.
Store Your Tools
Properly store your Dremel tool, attachments, and safety gear in a dry and secure location. Keeping your tools organized not only extends their lifespan but also ensures that they’re readily available for your next project.
Ventilate the Area
After cleaning, open windows or use fans to ventilate the area and remove any remaining dust or fumes. This step is especially important if you were cutting tiles indoors.
Dispose of Debris Responsibly
Dispose of the collected debris in accordance with your local waste disposal regulations. Some areas may have specific requirements for tile and construction debris.
Contact SF Marble And Granite Inc for Expert Advice
When it comes to mastering the art of cutting tile with a Dremel, expert advice and access to premium stone materials are essential. At SF Marble and Granite Inc, we understand the intricacies of cutting tile with precision and finesse. Our team of professionals is well-versed in the use of Dremel tools for tile cutting projects. Whether you’re looking for guidance, high-quality marble or granite for your project, or need assistance with tile selection, our experts are here to help. Contact SF Marble and Granite Inc to tap into our wealth of knowledge and resources, and let us elevate your tile-cutting endeavors to a whole new level of excellence.
Conclusion
Mastering tile cutting with a Dremel tool is a rewarding skill that opens up a world of possibilities for DIY enthusiasts and professionals alike. Whether you’re embarking on a home improvement project, crafting intricate designs, or tackling tile installations, the precision and versatility of a Dremel tool can be your greatest ally.
Throughout this guide, we’ve covered essential aspects of tile cutting with a Dremel, from selecting the right bit and preparing your workspace to making initial cuts, perfecting curves and angles, and achieving a smooth finish. We’ve also emphasized the importance of safety precautions and cleaning up after your project.Remember that practice is key to honing your tile-cutting skills. Don’t be discouraged by initial challenges; with each project, you’ll gain confidence and expertise.
Lastly, if you’re considering marble or granite for your tile projects, don’t hesitate to contact experts like SF Marble and Granite Inc. Their guidance and advice can elevate your projects to new levels of sophistication and beauty.
FAQs
What is a Dremel tool, and can it be used for cutting tiles?
A Dremel tool is a versatile rotary tool often used for various DIY and precision tasks. Yes, it can be used for cutting tiles, provided you have the right attachments and follow proper techniques.
What Dremel attachments are suitable for cutting tiles?
Diamond-coated cutting wheels or tile-cutting bits are ideal for cutting tiles with a Dremel tool. These attachments are designed to handle the hardness of tile materials.
Can a Dremel cut through all types of tiles, including ceramic and porcelain?
Yes, a Dremel can cut through various tile types, including ceramic, porcelain, and even glass tiles. However, the choice of Dremel bit and technique may vary depending on the tile material.
How do I set the Dremel tool’s speed for cutting tiles?
Start with a low to medium speed setting on your Dremel tool for cutting tiles. Higher speeds can generate excessive heat, potentially causing chipping or cracking.
What safety precautions should I take when cutting tiles with a Dremel?
Safety is crucial. Always wear safety glasses, a dust mask or respirator, and gloves to protect yourself from tile shards and dust. Ensure good ventilation in your workspace, and follow Dremel’s safety guidelines.
How do I prevent tiles from chipping while using a Dremel?
To prevent chipping, make sure the tile is securely fixed in place, use the appropriate Dremel bit, and maintain a steady hand with even pressure while cutting. Cooling the bit with water can also help.
Can I use a Dremel for intricate cuts and designs on tiles?
Yes, a Dremel is well-suited for intricate cuts and designs on tiles. With practice, you can achieve detailed and precise results.
What types of tile projects are best suited for Dremel cutting?
Dremel cutting is excellent for smaller tile projects, creating curves, notches, or making adjustments to fit tiles into tight spaces. It’s also useful for crafting decorative tile designs.
Can I cut mosaic tiles with a Dremel?
Yes, a Dremel is an excellent tool for cutting mosaic tiles due to its precision. Use a diamond-coated cutting wheel for intricate cuts on mosaic tiles.
Do I need to cool the Dremel bit while cutting tiles, and if so, how?
Cooling the Dremel bit is recommended to prevent overheating. You can dip the bit in water intermittently or use a cooling solution to keep it from getting too hot during the cutting process.
Contact Us