Can You Paint Fireplace Tile? A Comprehensive Guide to Fireplace Makeovers
Yes, you can achieve a fresh, long‑lasting look by following the right steps and materials. In this guide, you’ll discover how to choose heat‑resistant paint, prep and clean your tiles, prime for perfect adhesion, and pick the painting technique that suits your style from solid color to faux stone or stenciled accents. You’ll even learn how to seal the finish so it stands up to heat and wear. Ready to transform your hearth into a custom focal point? Let’s dive in.

Choosing the Right Paint
When it comes to painting fireplace tiles, selecting the correct paint is a critical decision. You need a paint that not only provides a beautiful finish but can also withstand the heat generated by the fireplace. These are some important factors to remember:
Table of Contents
Toggle- Heat Resistance: The area around your fireplace can get quite hot, especially if you use it regularly. Therefore, it’s crucial to choose a heat-resistant paint. Look for paints labeled as “fireplace paint” or “stove paint.” These are specially formulated to handle high temperatures and won’t peel or crack.
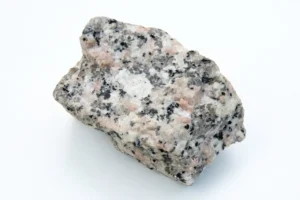
- Type of Tile: The type of tile you have on your fireplace may influence your paint choice. If your tiles are ceramic or porcelain, you have more flexibility in paint selection. However, if you have natural stone tiles, it’s essential to choose a paint that won’t negatively affect the stone’s texture or appearance.
- Color and Finish: Consider the color and finish you want for your fireplace. Paints come in various colors and finishes, such as matte, satin, or glossy. Your decision will be based on your sense of aesthetics and the design aesthetic of your property.
- Water-Based vs. Oil-Based: Paints are available in both water-based and oil-based formulations. Water-based paints are easier to clean up and emit fewer fumes, making them a more convenient choice for indoor projects. Oil-based paints, on the other hand, are known for their durability and resistance to wear and tear.
- Primer Compatibility: Check whether the paint you choose requires a specific type of primer. Some paints work best with a corresponding primer to ensure proper adhesion and longevity.
- Brand Reputation: Opt for reputable paint brands known for their quality and durability. Reading customer reviews and seeking recommendations can help you make an informed choice.
- Safety Precautions: Always prioritize safety when working with paints. Ensure you have proper ventilation in the room, wear appropriate safety gear like gloves and goggles, and follow the manufacturer’s instructions for safe usage.
- Sample Testing: Before applying the chosen paint to your entire fireplace, it’s a good practice to do a small test on a hidden or inconspicuous area of the tiles to ensure you are satisfied with the color and finish.
Preparing Your Fireplace
Preparing your fireplace is a crucial step in the process of painting fireplace tiles. Proper preparation ensures that the paint adheres well and that the final result is smooth and durable. Here are the key steps to prepare your fireplace:
- Clear the Area: Start by removing any furniture, decorations, or obstacles around the fireplace to create a clear workspace. This will prevent any accidental damage to your belongings and make the painting process more manageable.
- Protect Surroundings: Cover the nearby floor and any other surfaces that you want to protect from paint splatters. Use drop cloths, plastic sheets, or newspapers to create a barrier. Your decision will be based on your sense of aesthetics and the design aesthetic of your property.
- Ventilation: Ensure that the room is well-ventilated. Open windows and doors to allow proper airflow. Proper ventilation helps in dispersing paint fumes and ensures a safer environment for your project.
- Clean the Tiles: Thoroughly clean the fireplace tiles to remove dust, dirt, soot, and any residue. Use a mixture of warm water and mild detergent or a specialized tile cleaner. Scrub the tiles gently with a soft brush or sponge, paying extra attention to grout lines. Cleanly rinse the tiles, then let them air dry fully. Better paint adherence is guaranteed by a clean surface.
- Repair Any Damage: Inspect the tiles for any cracks, chips, or loose pieces. If you find any, repair them using an appropriate tile adhesive or filler. Ensure that the repaired areas are smooth and level before proceeding.
- Remove Hardware: If your fireplace has any removable hardware, such as handles or grates, it’s a good idea to take them off before painting. This allows you to paint the tiles without any obstructions.
- Mask Off Edges: Use painter’s tape to mask off the edges of the fireplace, including the mantel, surrounding walls, and any other areas where you don’t want paint to accidentally land. To achieve clear and accurate lines, take your time.
- Prepare Your Workspace: Set up your painting area by placing your chosen paint, primer (if needed), brushes, rollers, trays, and other painting supplies within easy reach. Having everything ready will make the process smoother.
- Check for Cracks in Mortar: If your fireplace has mortar between the tiles, inspect it for cracks. If you notice any, consider reapplying mortar or repairing it as necessary to maintain the structural integrity of the fireplace.
- Protect Yourself: Put on appropriate safety gear, including gloves and safety goggles, to protect yourself from paint and cleaning chemicals.
Once you’ve completed these preparation steps, your fireplace will be ready for the next phases of the painting project, such as priming and applying the paint. Proper preparation ensures that the paint adheres well and that the finished result looks professional and lasts for years to come.
Cleaning and sanding
Cleaning and sanding are essential steps in the process of painting fireplace tiles. These steps ensure that the tiles are properly prepared for paint application, resulting in a smooth and long-lasting finish. Here’s how to clean and sand your fireplace tiles effectively:
Cleaning:
- Gather Your Cleaning Supplies: Before you begin cleaning, gather the necessary supplies, including warm water, mild detergent or a specialized tile cleaner, a soft brush or sponge, a bucket, and clean, lint-free cloths.
- Dust Removal: Start by removing any loose dust or debris from the tiles. Use a dry cloth or a soft brush to gently sweep away loose particles. This initial step prevents dust from mixing with the cleaning solution and creating a muddy residue.
- Prepare a Cleaning Solution: In a bucket, mix warm water with a small amount of mild detergent or the recommended amount of a tile cleaner. Follow the manufacturer’s instructions if you’re using a specialized cleaner.
- Wash the Tiles: Dip the soft brush or sponge into the cleaning solution and gently scrub the tiles. Pay special attention to grout lines and any areas with visible stains or soot buildup. Avoid using abrasive scrubbers or harsh chemicals, as they can damage the tiles.
- Rinse Thoroughly: After cleaning, rinse the tiles with clean water to remove any soap or cleaning residue. Rinse with a different cloth or sponge. Make sure all of the cleaning agent has been completely wiped away.
- Dry the Tiles: Allow the tiles to air dry thoroughly. This step is crucial because painting on damp or wet tiles can lead to poor adhesion and paint peeling.
Sanding:
- Gather Your Sanding Supplies: For this step, you’ll need fine-grit sandpaper (typically around 220-grit), a sanding block or pad, and a dust mask for protection.
- Inspect the Tiles: Examine the tiles closely to identify any imperfections, rough spots, or uneven surfaces. Sanding is particularly useful for smoothing out rough areas and ensuring a uniform surface for paint.
- Wear Protection: Put on a dust mask to avoid inhaling dust particles generated during sanding.
- Begin Sanding: Take the fine-grit sandpaper and gently sand the tiles in a circular motion. Focus on areas with imperfections or roughness. The goal is to create a slightly rough texture on the surface of the tiles to help the paint adhere better.
- Avoid Over-sanding: Be cautious not to oversand, as this can damage the tiles. A light sanding is usually sufficient to achieve the desired surface texture.
- Clean Up: After sanding, use a clean cloth or vacuum cleaner with a brush attachment to remove any sanding dust from the tiles. It’s essential to have a clean surface before proceeding to priming and painting.
By following these cleaning and sanding steps, you’ll ensure that your fireplace tiles are free from dirt, grime, and imperfections, providing an ideal canvas for paint application. Properly cleaned and sanded tiles will help the paint adhere better and result in a more professional-looking finish for your fireplace makeover.
Priming Your Tiles
Priming your fireplace tiles is a crucial step in the painting process. The primer creates a stable and adhesive surface for the paint to adhere to, ensuring a long-lasting and professional-looking finish. Here’s how to properly prime your tiles:
Gather Your Supplies:
Before you begin, gather the necessary supplies:
- Primer: Choose a high-quality, latex-based or oil-based primer that is suitable for the type of paint you plan to use. For example, if you’re using latex paint, use a latex-based primer.
- Paintbrush or Roller: Select a paintbrush or roller appropriate for the size of your tiles. A brush with synthetic bristles is often preferred for a smooth finish.
- Painter’s Tape: Use painter’s tape to mask off any areas you don’t want to prime, such as the grout lines or adjacent surfaces.
- Drop Cloths or Plastic Sheets: Lay down drop cloths or plastic sheets to protect your surrounding area from primer splatters.
Prepare Your Workspace:
- Ventilation: Ensure proper ventilation in the room by opening windows and doors. This helps in dissipating fumes and providing a safer environment.
- Clean Tiles: Make sure your tiles are clean and free of dust, debris, and any residues from previous cleaning or sanding steps. A clean surface guarantees better primer adhesion.
Priming Process:
- Stir the Primer: Thoroughly stir the primer in its container to ensure a consistent and well-mixed product.
- Apply Painter’s Tape: Use painter’s tape to mask off any areas around the tiles that you want to protect, such as the surrounding walls or the fireplace mantel. To achieve clear and accurate lines, take your time.
- Start Priming: Dip your paintbrush or roller into the primer and start applying it evenly to the tiles. Begin with a section of tiles rather than trying to prime the entire surface at once. This allows you to work systematically and maintain control.
- Apply a Thin Coat: Apply a thin, even coat of primer to the tiles. Avoid overloading the brush or roller with primer, as excessive primer can lead to drips and uneven coverage.
- Brush or Roll in a Single Direction: For a smooth finish, try to brush or roll in a single direction, either horizontally or vertically. This helps reduce brush or roller marks.
- Work in Sections: Continue priming the tiles section by section until the entire surface is covered. Pay special attention to grout lines and any crevices, ensuring that the primer reaches all areas.
- Allow to Dry: Follow the manufacturer’s instructions for drying time. Typically, primer dries within a few hours, but it’s essential to wait until it’s completely dry before moving on to the next step.
- Inspect for Coverage: After the first coat of primer has dried, inspect the tiles to ensure that they are evenly covered. If necessary, apply a second coat of primer for added adhesion and coverage. Likewise, let this coat air dry.
- Clean Up: Clean your brushes or rollers and any other equipment with water (for latex-based primer) or the appropriate solvent (for oil-based primer). Dispose of used materials properly.
Once your tiles are properly primed and dried, they are ready for the next step: applying the paint. Proper priming sets the foundation for a successful painting project, ensuring that the paint adheres well and provides a beautiful, long-lasting finish for your fireplace tiles.
Painting Techniques
Painting fireplace tiles is where your creative vision can truly shine. There are various painting techniques you can use to achieve different looks and styles, transforming your fireplace into a stunning focal point. These are some popular painting methods to take into account:
Solid Color:
- Description: This is the simplest technique where you paint all the tiles with a single, solid color. It provides a clean and uniform appearance, making your fireplace look fresh and modern.
- Application: Apply the paint evenly using a paintbrush or roller. Be sure to cover the tiles and grout lines completely.
- Tips: Choose a color that complements your room’s decor and style. A neutral color can create an elegant look, while bold colors can make a statement.
Faux Stone Finish:
- Description: Create the illusion of natural stone tiles with a faux stone finish. This technique adds depth and texture to your fireplace, mimicking the appearance of real stone.
- Application: Start with a base coat that matches the color of your chosen stone. Once dry, use a sponge or a rag to apply a second color in a dabbing or stippling motion. Repeat with additional colors to achieve a realistic stone look.
- Tips: Research the type of stone you want to emulate for a more accurate finish. Experiment with different shades and textures to achieve the desired effect.
Ombre Effect:
- Description: Ombre is a gradient effect where one color gradually fades into another. This technique can add a unique and contemporary touch to your fireplace.
- Application: Choose two or more paint colors that blend well together. Start at the bottom of the fireplace with the darkest color and gradually transition to the lighter color as you move upwards. Blend the colors where they meet to create a seamless transition.
- Tips: Use a paint palette to mix and test the shades before applying them to the tiles. Ensure smooth blending for a professional look.
Stenciling:
- Description: Stenciling allows you to add intricate patterns or designs to your fireplace tiles. You can create a custom look that complements your home’s decor.
- Application: Use stencils designed for painting on tiles. Put the stencil in position and use a brush or sponge to apply paint. Lift the stencil carefully to reveal the design. Repeat the pattern across the tiles as desired.
- Tips: Practice on a spare tile or surface before applying the stencil to your fireplace. Ensure the stencil is clean and free of paint residue for each use.
Whitewashing:
- Description: Whitewashing is a technique that imparts a soft, faded look to your tiles. It’s ideal if you want to maintain the texture and character of the tiles while giving them a lighter appearance.
- Application: Dilute paint with water to create a translucent wash. Apply the wash to the tiles with a brush or rag, allowing some of the original tile color to show through. Build up the wash in layers until you achieve the desired effect.
- Tips: Experiment with the dilution ratio to control the level of opacity. Whitewashing works well with natural or rustic decor styles.
Remember to let each coat of paint dry thoroughly before applying additional layers or starting a new technique. The choice of painting technique depends on your personal style and the overall ambiance you want to create in your living space. Be creative, and don’t hesitate to mix and match techniques for a truly unique fireplace makeover.

Adding Accents
Adding accents to your fireplace tiles can elevate the overall look and create a stunning focal point in your living space. Accents provide an opportunity to personalize your fireplace and make it uniquely yours. Here are some ways to add accents to your fireplace tiles:
Stenciled Borders:
- Description: Stenciled borders are a great way to frame your fireplace and draw attention to it. You can choose from a variety of stencil designs, from geometric patterns to floral motifs.
- Application: Select a stencil that complements your room’s decor. Place the stencil at the edges of the fireplace tiles and use a contrasting color to create the border. Ensure the stencil is securely in place, and apply the paint using a brush or sponge.
- Tips: Experiment with different stencil designs and colors to find the combination that best suits your style.
Decorative Tiles:
- Description: Decorative tiles, also known as accent tiles, are specially designed tiles that feature intricate patterns or designs. They can be used strategically to add visual interest to your fireplace.
- Application: Choose a few decorative tiles that complement the overall color scheme and style of your fireplace. Insert these tiles at regular intervals within the field of solid-colored tiles. This creates a focal point and adds a touch of elegance.
- Tips: Mix and match decorative tiles with plain tiles to create a unique pattern. Consider using tiles with motifs that resonate with your personal taste.
Metallic Accents:
- Description: Metallic accents, such as gold or silver leaf, can add a touch of luxury to your fireplace. These accents catch the light and create a subtle shimmer.
- Application: Apply a thin layer of adhesive to the areas where you want to add metallic accents. Carefully place the metallic leaf onto the adhesive and gently press it down. Once it adheres, use a soft brush to remove excess leaf.
- Tips: Metallic accents work well on details like the edges of tiles or around decorative elements. Be precise when applying the adhesive to achieve a clean look.
Tile Mosaics:
- Description: Create intricate patterns or images by arranging smaller tiles to form a mosaic. Mosaics can be as simple or elaborate as you like, and they add an artistic flair to your fireplace.
- Application: Plan your mosaic design in advance, and cut or break tiles to fit the pattern. Use tile adhesive to attach the mosaic pieces to the tiles. Once the adhesive dries, grout the mosaic to hold the pieces together.
- Tips: Mosaics offer endless creative possibilities. You can incorporate colors and shapes that reflect your personal style.
Colored Grout:
- Description: Instead of focusing on the tiles themselves, consider using colored grout to create contrast and accents. Colored grout can highlight the grout lines and make the tiles stand out.
- Application: Choose a grout color that complements or contrasts with the tile color. Mix the grout according to the manufacturer’s instructions and apply it evenly between the tiles. Ensure that the grout lines are neatly filled.
- Tips: Colored grout can be an unexpected and eye-catching accent. It’s an excellent choice if you want to add a subtle pop of color to your fireplace.
When adding accents to your fireplace tiles, it’s important to maintain balance and harmony with the overall design of the room. Consider the color scheme, style, and ambiance you want to achieve, and use accents to enhance the fireplace’s aesthetics while blending seamlessly with your decor.
Sealing the Deal
Sealing the deal, in the context of painting fireplace tiles, refers to the crucial step of applying a protective sealant over the painted tiles. Sealing not only enhances the durability of the painted surface but also safeguards it from dirt, moisture, and wear and tear. Here’s how to effectively seal your fireplace tiles:
Choose the Right Sealant:
- Select a clear, water-based or oil-based tile and grout sealer that is suitable for your specific type of tiles and the type of paint you’ve used. Ensure that the sealer is heat-resistant, as it will be exposed to the warmth generated by the fireplace.
Gather Your Supplies:
- Before you begin, gather the necessary supplies, which include the tile and grout sealer, a paintbrush or foam roller, a clean and dry cloth, and a well-ventilated workspace.
Prepare Your Workspace:
- Make sure the room is properly ventilated by opening windows and doors. Adequate ventilation helps in dissipating fumes and speeding up the drying process. Also, protect the surrounding areas with drop cloths or plastic sheets to prevent accidental spillage.
Clean the Tiles:
- Ensure that the painted tiles are clean and free of dust or debris. Use a soft, dry cloth or a vacuum cleaner with a brush attachment to remove any loose particles.
Apply the Sealer:
- Dip your paintbrush or foam roller into the tile and grout sealer. Begin applying the sealer evenly over the painted tiles, starting from one corner and working your way across the surface. Pay extra attention to grout lines, as they are particularly vulnerable to moisture penetration.
Be Thorough:
- Ensure that the sealer is evenly distributed and that there are no streaks or uneven areas. Avoid overloading the brush or roller with sealer, as this can result in drips and an uneven finish.
Allow to Penetrate:
- Let the sealer penetrate the tiles and grout for the recommended time specified on the product’s label. This time allows the sealer to bond with the surface effectively.
Wipe Off Excess:
- After the recommended time has passed, use a clean and dry cloth to gently wipe off any excess sealer from the tiles. This step helps prevent a sticky residue from forming on the surface.
Apply Additional Coats (If Necessary):
- Depending on the type of sealer you’ve chosen and the level of protection you desire, you may need to apply a second coat. Follow the manufacturer’s instructions regarding the application of multiple coats, including drying times between coats.
Allow to Dry Completely:
- Ensure that the sealed tiles are allowed to dry completely before exposing them to any moisture or heat. Drying times can vary, so refer to the product label for guidance.
Perform a Water Test:
- Once the sealed tiles are dry, perform a water test by sprinkling a few drops of water on the surface. If the water beads up and doesn’t absorb into the tiles, the sealer is working effectively.
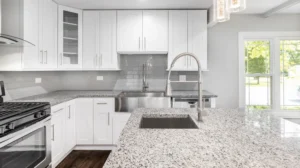
From Fireplace Tile Paint to Professional Backsplash Installation
Whether you’re refreshing your hearth with a fresh coat or planning a full kitchen upgrade, quality workmanship makes all the difference. At SF Marble & Granite Inc., our team turns DIY inspiration into lasting beauty just as you’ve learned to prep, prime, and paint your fireplace tile, we bring that same attention to detail when you choose our Backsplash Installation in Lowell services. From selecting heat‑resistant, easy‑clean materials to expert groutwork and sealing, we transform ordinary walls into striking focal points that stand up to everyday life.
Conclusion
Painting your fireplace tiles is a fantastic way to refresh and enhance the ambiance of your living space. Whether you’re aiming for a modern, traditional, or eclectic look, the transformation is in your hands. To realize your goal, get in touch with them.:
- Choosing the Right Paint: Select a heat-resistant paint that suits your tile type and desired finish. High-quality paint ensures a lasting and beautiful result.
- Preparing Your Fireplace: Proper preparation is essential. Clean the tiles, repair any damage, and protect the surrounding area before you begin.
- Cleaning and Sanding: Ensure the tiles are clean and smooth for optimal paint adhesion. Sanding creates a suitable surface texture.
- Priming Your Tiles: Primer provides a stable base for paint and enhances adhesion. It’s a crucial step in the process.
- Painting Techniques: Explore various techniques like solid color, faux stone finishes, ombre effects, and stenciling to achieve your desired look.
- Adding Accents: Accents like stenciled borders, decorative tiles, metallic elements, and tile mosaics add character and charm to your fireplace.
- Sealing the Deal: Seal your painted tiles to protect them from wear and tear, moisture, and heat. Choose the right sealant for durability.
- Maintenance Tips: Regular cleaning, gentle cleaning solutions, and prompt repairs help maintain the appearance of your painted fireplace.
- Call to Action: SF Marble And Granite Inc offers expert interior painting services to help you transform your fireplace. To realize your goal, get in touch with them.
FAQs
How long does professional backsplash installation take?
Most standard kitchen backsplashes can be installed in 1–2 days, depending on tile complexity and grout curing times.
Can I match my backsplash to my newly painted fireplace tiles?
Absolutely, you can coordinate colors, finishes, and grout hues for a seamless look.
Do I need to prep my walls before installation?
Yes, we always clean, level, and prime surfaces to ensure tile adhesion and a smooth finish.
What maintenance does a new backsplash require?
Simple cleaning with mild soap and water plus an annual grout sealant reapply will keep it looking pristine.
Contact Us