Swimming Pool Tile Grout Repair
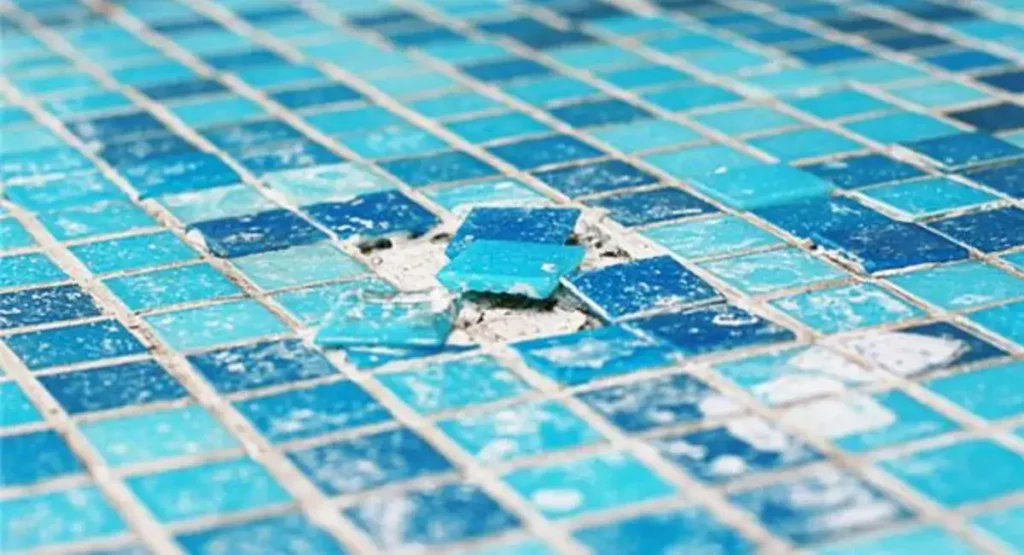
Any pool owner’s first focus is keeping their swimming pool immaculate. The tile grout in your collection can get discoloured, fractured, or worn out over time, so lessening the general appeal of the group. Nonetheless, you may rapidly fix swimming pool tile grout and get your pool back to its previous splendor with correct information and the correct methods. Including underwater tile restoration, pool coping grout repair, epoxy grout, and much more, this thorough tutorial will investigate many facets of swimming pool tile grout repair. So let’s get right in and learn how to use good grout repair to create a magnificent collection!
Understanding the Importance of Swimming Pool Tile Grout Repair
Maintaining the general integrity and beauty of your swimming pool depends critically on the tile grout. It keeps the tiles in place and stops water from seeping into the base construction. Furthermore guaranteeing a hygienic swimming environment is the grout’s barrier against dirt, algae, and other trash. Thus, it is imperative to take quick care of any grout problems to stop any damage and extend the lifetime of your pool.
Table of Contents
ToggleThe Process of Pool Tile Repair Underwater
Repairing pool tile grout underwater requires a unique set of techniques and tools. Underwater tile repair can be challenging, but with the right approach, it can be accomplished effectively. Here are the critical steps involved in pool tile repair underwater:
Drain the pool partially: Before starting any underwater repair work, it is crucial to lower the water level below the area that needs repair. This will give you better access to the grout and ensure a more straightforward repair job.
Clean the tile surface: Use a pool or specialized tile cleaning brush to remove any dirt, algae, or debris from the tile surface. Ensure that the area is thoroughly cleaned before proceeding with the repair.
Prepare the grout: Mix the grout according to the manufacturer’s instructions. It is recommended to use a high-quality grout specifically designed for swimming pools to ensure durability and water resistance.
Apply the grout: Using a grout float or a trowel, carefully apply the grout to the damaged or missing areas of the tile grout. Fill the gaps and create a smooth, uniform surface.
Smooth and clean the grout lines: Once applied, use a damp sponge to smooth the lines and remove any excess grout from the tile surface. This will give the repaired area a seamless appearance.
Allow the grout to cure: Follow the manufacturer’s instructions regarding the curing time of the grout. Giving the grout enough time to harden and set correctly before refilling the pool is essential.
Refill the pool: After the grout has cured, refill it to its average water level. Monitor the repaired area closely to ensure no leaks or further issues.
Pool Coping Grout Repair: Restoring the Beauty of the Pool Edge
In addition to the tile grout, the grout used in pool coping also requires periodic maintenance and repair. Pool coping refers to the edge or capstone of the pool, which provides a finished and aesthetically pleasing look. Over time, the coping grout may deteriorate, crack, or become dislodged. Here’s how you can repair pool coping grout effectively:
Inspect the coping: Thoroughly examine the pool coping to identify any areas of damaged or missing grout. Pay close attention to the joints between the coping stones.
Remove the damaged grout: Use a grout saw or a similar tool to carefully remove the damaged grout from the joints. Be cautious not to damage the coping stones in the process.
Clean the joints: After removing the damaged grout, clean the joints thoroughly using a brush or a vacuum cleaner to remove any debris or loose particles.
Apply new grout: Prepare the unique grout mixture according to the manufacturer’s instructions. Use a grout bag or float to apply the new grout to the cleaned joints. Ensure that the grout fills the gaps and is evenly distributed.
Smooth and clean the grout lines: Use a damp sponge to smooth the lines and remove any excess grout from the coping stones. This will give the repaired coping a clean and polished look.
Allow the grout to cure: Follow the manufacturer’s instructions regarding the curing time of the grout. Avoid any foot traffic or water contact during this period to ensure proper curing.
Protect the repair: Once the grout has cured, consider applying a grout sealer to protect the repaired areas from water penetration and future damage. This will help maintain the integrity of the pool coping grout for an extended period.
Epoxy Grout for Pool Tile: A Durable and Waterproof Solution
Due to its exceptional durability and water resistance, epoxy grout is a popular choice for pool tile installation and repair. Unlike traditional cement-based grouts, epoxy grout is highly resistant to stains, cracking, and chemical damage, making it an ideal option for swimming pools. Here are some key advantages of using epoxy grout for pool tile repair:
Waterproof: Epoxy grout forms an utterly watertight seal, preventing water from penetrating the tile grout and causing damage to the underlying structure. This significantly reduces the risk of water leaks and subsequent repairs.
Stain-resistant: Epoxy grout is highly resistant to staining, making it easier for your pool tiles to maintain a clean and pristine appearance. This is particularly beneficial in areas prone to algae or mineral deposits.
Chemical resistance: Epoxy grout can withstand exposure to harsh pool chemicals without deteriorating or discolouring. This ensures that your pool remains in excellent condition even with regular chemical treatments.
Long-lasting: Due to its superior durability, epoxy grout is known to last significantly longer than traditional grout. This reduces the frequency of grout repairs, saving you time and money in the long run.
When using epoxy grout for pool tile repair, following the manufacturer’s instructions is essential. Epoxy grout requires precise mixing and application techniques to achieve optimal results. Consider consulting a professional if you are unfamiliar with working with epoxy grout or if you have a complex repair project.
How Do You Repair Tile Grout in a Pool?
Repairing tile grout in a pool involves several steps to ensure a successful and long-lasting repair. Here’s a simple guide on how to repair tile grout in a collection. Assess the grout condition: Examine the tile grout in your pool to identify any areas that require repair. Look for cracks, discolouration, or missing grout lines.
Prepare the grout: Select a high-quality grout specifically designed for swimming pools. Mix the grout according to the manufacturer’s instructions, ensuring the right consistency for easy application.
Clean the tile surface: Use a pool or specialized tile cleaning brush to remove any dirt, algae, or debris from the tile surface. Clean the area around the damaged grout lines thoroughly.
Remove the damaged grout: Use a grout saw or a similar tool to carefully remove the damaged grout from the joints or gaps between the tiles. Be cautious not to damage the tiles themselves.
Apply the new grout: Using a grout float or a trowel, apply the new grout to the cleaned areas. Fill the gaps, ensuring a uniform and consistent appearance.
Smooth and clean the grout lines: Once the grout is applied, use a damp sponge to smooth out the grout lines and remove any excess grout from the tile surface. This will give the repaired area a seamless and polished look.
Allow the grout to cure: Follow the manufacturer’s instructions regarding the curing time of the grout. It is crucial to give the grout enough time to harden and set correctly before exposing it to water.
Inspect and maintain: Regularly inspect the repaired grout lines and address any issues promptly. Clean the tiles and grout regularly to prevent dirt, algae, or stains buildup.
What Do You Use to Regrout Pool Tile?
To regrout pool tile, you will need the following tools and materials:
Grout removal tool: A grout saw, or a grout removal tool is essential for removing the old grout from the gaps between the tiles. This tool allows for precise and controlled grout removal.
High-quality grout: Select a grout specifically designed for swimming pools. Consider using epoxy grout for its exceptional durability and water resistance.
Grout float or trowel: These tools apply the new grout to the cleaned gaps between the tiles. A grout float ensures smooth and even distribution of the grout.
Damp sponge: A wet sponge cleans and smooths the grout lines after the application. It helps remove excess grout and creates a neat and polished appearance.
Cleaning brush: Use a pool brush or a specialized tile cleaning brush to clean the tile surface and remove any dirt or debris before applying the new grout.
Do You Need Special Grout for Pool Tiles?
Yes, using special grout designed for pool tiles is highly recommended. Pool tile grout is exposed to unique conditions, including constant exposure to water, pool chemicals, and fluctuating temperatures. Ordinary grout may not withstand these conditions effectively, leading to premature deterioration, discolouration, and water leaks.
Special grout for pool tiles is specifically formulated to be waterproof, stain-resistant, and durable. It offers superior adhesion and flexibility, ensuring long-lasting and reliable performance. When selecting grout for your pool tiles, look for products labelled as “pool tile grout” or “swimming pool grout.” These grouts are manufactured to meet the specific requirements of pool environments and provide the best results.
Can Water Leak Through Pool Tile Grout?
Water can indeed leak through damaged or deteriorated pool tile grout. Over time, the grout in your pool can develop cracks and gaps or become dislodged, allowing water to seep. This can lead to various issues, including:
Structural damage: Water that penetrates through the grout can reach the underlying structure of the pool, potentially causing damage to the pool shell, support beams, or other components.
Tile displacement: If water continues to leak through the grout, it can gradually weaken the bond between the tiles and the pool surface. This may result in tiles becoming loose or dislodged.
Algae growth: Moisture trapped behind the tiles due to leaking grout creates a favourable environment for algae growth. Algae can quickly spread and affect the appearance and hygiene of your pool.
Increased maintenance: Water leaks through the grout can introduce additional debris, dirt, or chemicals into the pool, increasing the maintenance requirements and potentially affecting the water chemistry.
Inspecting and maintaining the grout lines regularly is essential to prevent water leaks through pool tile grout. Promptly address any issues by repairing or regrouting damaged areas to preserve the integrity of the pool and prevent further damage.
Restore Your Pool’s Sparkle
Every pool owner knows that a fresh look starts with solid Swimming Pool Tile Grout Repair, and with the right steps, you can tackle pool grout repair, pool tile grout repair, or even a full pool grout replacement without stress. Start by cleaning the tiles to remove buildup, mix high-quality grout formulated for swimming pool tile grout repair, and carefully apply it into the joints using gentle pressure to seal every gap. Once cured, this helps prevent leaks and keeps algae at bay, making routine swimming pool grout repair a breeze. For chips or loose pieces, consider expert pool tile and grout repairs to ensure longevity. Ready for a seamless upgrade? Pair your repair with professional Swimming Pool Tile Installation in Lowell to give your pool edge a flawless finish. Contact us today!
Conclusion
Repairing swimming pool tile grout is a vital aspect of pool maintenance to preserve the beauty and functionality of your pool. Whether it’s underwater tile repair, pool coping grout repair, or the use of epoxy grout, taking the time to address grout issues will ensure a stunning collection you can enjoy for years. By following the techniques and tips outlined in this guide and relying on the expertise of professionals like SF Marble and Granite, you can achieve a successful pool tile grout repair and maintain a pool that is the envy of all. Regular inspections, prompt repairs, and consistent maintenance are key to a beautiful and long-lasting pool.
FAQs
How do you repair tile grout in a pool?
Inspect for cracks or missing grout, clean the area thoroughly, remove damaged grout, mix and apply new pool-grade grout, smooth lines with a damp sponge, let cure, then refill and monitor.
What do you use to regrout pool tile?
Use a grout removal tool to clear old grout, a grout float or trowel to apply a high-quality, waterproof grout (epoxy is ideal), and a damp sponge to finish the lines.
Do you need special grout for pool tiles?
Yes, standard grout can crack or stain. Always choose a grout labeled for pools or waterproof epoxy grout to resist chemicals, temperature changes, and constant water exposure.