How to Treat Granite Countertops | A Complete Step-by-Step Guide
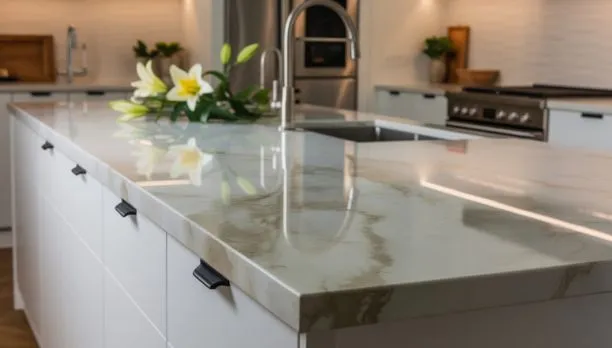
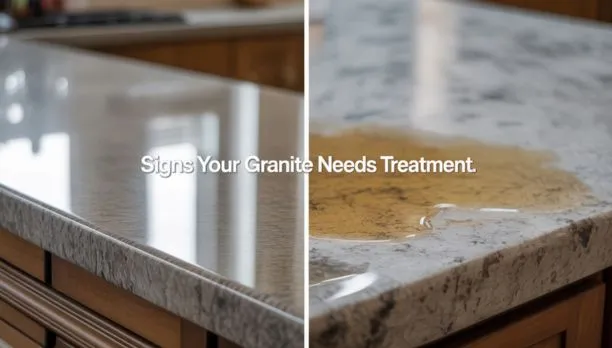
How to treat granite countertops is a question every homeowner should consider if they want to keep their kitchen surfaces strong, shiny, and stain-free. Granite is naturally durable, but as a porous stone, it requires proper care and sealing to maintain its beauty over time. Without regular treatment, spills from water, oil, or acidic liquids can seep into the surface, leaving stubborn marks. At SF Marble and Granite Inc., we’ve seen how consistent sealing and maintenance can protect countertops from everyday wear while enhancing their natural elegance. Proper treatment not only preserves the stone’s rich color and polished finish but also extends its lifespan, ensuring your investment continues to add value and style to your home. Signs Your Granite Needs Treatment When learning how to treat granite countertops, it’s important to spot early signs that your stone needs care. At SF Marble and Granite, we remind homeowners that knowing how to care for granite countertops starts with simple checks. Water Absorption Test Drop a little water on the surface. If it darkens or soaks in, it’s time to reseal. Stains or Dull Look Oil marks, water spots, or a faded shine show the seal is wearing off. Resealing Frequency Most granite needs sealing every 12–18 months. Usage, stone type, and cleaning products can shorten this timeline. If you’re looking for trusted stone suppliers or searching for granite countertops near me, make sure you work with experts who can guide you on the right maintenance schedule. Preparing the Countertop Surface Before beginning how to treat granite countertops, the surface must be correctly prepared. A clean and dry base ensures sealers work effectively while protecting the stone. Many homeowners ask How can you clean granite before sealing? The answer lies in using appropriate methods and tools. Steps to Prepare Granite Clean with warm water and mild dish soap Wipe using a soft microfiber cloth Let the surface dry completely before sealing Gather materials: gloves, sealer, cloths, spray bottle Check corners and edges for hidden moisture Proper preparation makes a big difference. Whether you’re planning to install granite, remove granite, or add appliances like a dishwasher, following these steps ensures your countertops stay in top shape for years. Choosing the Right Granite Sealer One of the most important steps in how to treat granite countertops is selecting the right sealer. Granite is durable, but being a natural stone, it needs proper protection to remain flawless over time. The right sealer not only safeguards against stains and moisture but also makes everyday care easier. Homeowners who want to know how to maintain granite countertops must start with this choice. Penetrating Sealers vs. Topical Sealers Penetrating Sealers: Absorb into the stone, protecting it from the inside out. Best for long-lasting defense. Topical Sealers: Sit on the surface, adding a temporary barrier and extra shine. They may wear off faster. Factors to Consider Porosity: More porous stones need stronger, penetrating sealers. Finish: Polished granite may need a lighter seal, while honed finishes absorb more. Usage: Kitchens with heavy cooking require stronger protection compared to low-use spaces. Safety Precautions When Handling Sealers Always work in a well-ventilated area Wear gloves to protect your hands Keep sealers away from children and pets Follow the manufacturer’s directions carefully Choosing the right sealer ensures your popular granite surfaces stay vibrant and smooth. With proper sealing and regular countertop installation support from experts, your stone will remain both practical and beautiful. Taking the time to pick wisely guarantees that your granite looks flawless and stays protected for years to come. Step-by-Step Sealing Process Learning the proper way to treat granite countertops requires understanding their sealing process as well. This step is what gives your stone lasting protection and keeps it looking polished, whether you have grey or black granite in your kitchen. Even during granite fabrication, sealing is recommended as a finishing touch to strengthen the stone. Key Steps in Sealing Granite Applying the First Coat Evenly – Use a clean cloth or applicator pad to evenly spread sealer across the entire surface, working in small sections to avoid missing spots. Allowing Absorption Time – Let the sealer sit for about 15–20 minutes so it can penetrate the pores of the granite. Wiping Off Excess – Remove any leftover sealer with a soft cloth to prevent cloudy marks or haze. Applying a Second Coat if Needed – For lighter or more porous stones, repeat the process for extra protection. Sealing your countertops correctly ensures the stone stays strong against stains, spills, and daily wear. Whether your kitchen design includes black granite for bold style or grey granite for a softer look, following these steps will help your countertops stay beautiful and well-protected for years. Curing and Post-Sealing Care Understanding how to treat granite countertops doesn’t stop with applying a sealer; the curing stage is equally essential in creating an impenetrable shield against stains, spills, and everyday wear-and-tear. Whether your granite has an undermount sink cut or a custom edge, proper curing makes the difference between short-term protection and long-lasting results. Post-Sealing Guidelines Recommended Curing Time – Allow the countertops to rest for at least 24 hours before heavy use. Avoid placing appliances, cooking, or cleaning during this period. Re-Testing the Seal – After curing, perform the simple water test again. If water beads on the surface, the seal is effective. If it absorbs, another coat may be required. Giving your granite enough time to cure prevents the surface from looking decomposed or patchy over time. By following these steps, you ensure that every cut of your stone, from smooth edges to detailed finishes, remains well-protected and beautiful. Daily and Routine Maintenance A big part of learning how to treat granite countertops is practicing daily care. Even the toughest stones, like white granite, can lose their shine or even change colour over time if not maintained properly. Consistent cleaning and timely granite repair when needed will keep your countertops looking new for years. Proper Cleaning Methods Use warm water with a
How to Treat Granite Countertops | A Complete Step-by-Step Guide Read More »