A granite backsplash adds elegance and durability to any kitchen or bathroom, protecting walls from splashes and stains while enhancing the overall design. Its sleek and natural appearance makes it a popular choice for homeowners looking for a timeless upgrade. However, as design trends evolve or renovation needs arise, many consider replacing their existing backsplash with a fresh, modern alternative. Knowing how to remove granite backsplash properly is crucial to preventing unnecessary damage to the walls and surrounding surfaces. Whether you’re updating your kitchen, repairing damage, or switching to a different material, careful removal ensures a smooth transition. Without the right approach, you risk cracked drywall, stubborn adhesive residue, or even broken granite pieces that could complicate the process.
What Is a Granite Backsplash?

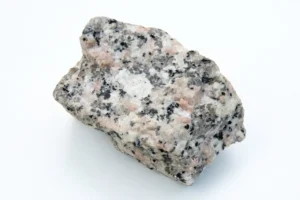
A granite backsplash is a protective slab installed on the wall behind sinks, stoves, or countertops to shield against water, grease, and stains. Made from natural stone, it seamlessly extends the beauty of your countertops while adding durability and elegance to your kitchen or bathroom. Homeowners often choose granite as backsplash because of its luxurious look and ability to complement various design styles, from modern to traditional.
Table of Contents
ToggleOne of the biggest advantages of a granite backsplash is its resilience against heat, moisture, and everyday wear. Unlike tile backsplashes with grout lines that trap dirt, granite offers a smooth, low-maintenance surface that is easy to clean. It comes in various styles, from full-height slabs that create a bold statement to smaller, 4-inch backsplashes for a subtle touch. Additionally, you can choose from different edge profiles like beveled, bullnose, or ogee to enhance the design and achieve a custom look.
How to Choose the Right Backsplash?
Choosing the right backsplash is essential for achieving a cohesive and stylish kitchen design. Factors like style, color, material, and budget play a crucial role in making the best choice. A granite backsplash in kitchen settings creates a seamless, high-end look, but it’s important to ensure it complements your countertops and cabinetry. Lighter granite tones pair well with dark cabinets for contrast, while darker granites add depth to a bright, airy kitchen. Your backsplash should not only enhance aesthetics but also offer durability and easy maintenance.
While a granite backsplash is a top choice for elegance and strength, there are other materials to consider. Quartz backsplashes provide a uniform look with minimal maintenance, while marble offers a luxurious, veined appearance. If you prefer a textured design, tile backsplashes offer endless patterns and colors, and glass adds a modern, reflective touch. Each option has its pros and cons, but selecting a material that balances beauty, functionality, and longevity ensures the perfect fit for your space.
How to Remove a Granite Backsplash

Removing a granite backsplash in kitchen spaces requires careful planning and the right approach to avoid damage to your walls. Whether you’re upgrading your kitchen design or replacing damaged stone, following a step-by-step process ensures a smooth removal. Since granite is a heavy and durable material, improper handling can lead to cracked drywall, stubborn adhesive residue, or even personal injury. By using the correct tools and techniques, you can make the granite backsplash removal process easier and safer.
Tools and Materials Needed
Before starting, gather the following tools to ensure an efficient removal process:
- Utility knife – To cut through caulk and adhesive
- Pry bar – To carefully lift the backsplash off the wall
- Putty knife – For loosening edges and removing residual adhesive
- Hammer – To tap and ease the backsplash away from the wall
- Safety gloves – To protect your hands from sharp edges
- Safety goggles – To shield your eyes from debris
- Drop cloth or plastic sheeting – To cover countertops and floors
- Painter’s tape – To secure protective coverings
- Dust mask – To avoid inhaling dust or small debris
Having these tools on hand will make the granite backsplash removal process safer and more efficient.
Step-by-Step Guide to Removing a Granite Backsplash
Preparation
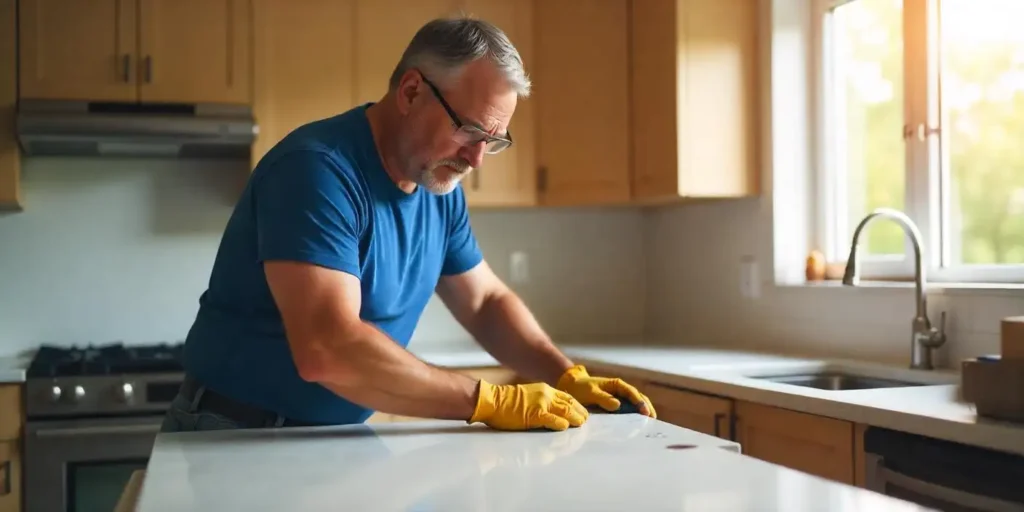
Before removing a granite backsplash, it’s essential to prepare the workspace:
- Turn off power – If there are electrical outlets or switches near the backsplash, switch off the power to avoid hazards.
- Protect surrounding areas – Cover countertops, floors, and appliances with plastic sheeting or drop cloths to prevent damage from falling debris.
- Wear protective gear – Safety gloves, goggles, and a dust mask will help protect you from sharp edges and dust particles.
- Inspect the backsplash – Check how the granite is attached to the wall whether with adhesive, screws, or brackets to determine the best removal method.
Loosening the Edges
Once the area is ready, the next step is to loosen the granite backsplash from the wall:
- Use a utility knife to cut through the caulk or adhesive along the edges where the backsplash meets the wall and countertop.
- Insert a putty knife or pry bar behind the backsplash, starting at one end or corner.
- Gently wiggle the tool to loosen the granite without applying excessive force, which can crack the drywall.
- Work along the edges to separate the backsplash gradually rather than pulling it off in one motion.
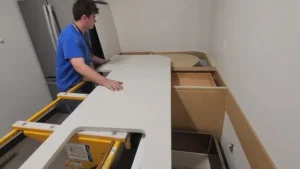
Prying Off the Backsplash
Once the edges are loose, it’s time to remove the granite backsplash in kitchen spaces carefully:
- Position the pry bar behind the loosened backsplash and apply steady, even pressure.
- Work in small sections, gently pulling the granite away from the wall to prevent it from snapping or causing drywall damage.
- If the backsplash is heavily glued, use a hammer to tap the pry bar lightly, increasing leverage.
- Continue this process until the entire granite backsplash is detached from the wall.
Removing Residual Adhesive
After removing the backsplash, leftover adhesive or caulk may remain on the wall:
- Use a putty knife or scraper to carefully remove excess adhesive without gouging the drywall.
- If the adhesive is particularly stubborn, use a heat gun or hairdryer to soften it before scraping.
- Lightly sand the surface to smooth out any remaining residue, ensuring a clean wall for the next backsplash installation.
Final Cleanup and Inspection
- Wipe down the entire area with a damp cloth to remove dust and debris.
- Inspect the wall for any damage such as holes, cracks, or uneven spots that may need patching before installing a new backsplash.
- Dispose of the old granite properly or repurpose it if possible.
By following these steps, you can complete a granite backsplash removal efficiently while minimizing damage and mess.
Common Challenges and Solutions
How to Remove a Backsplash Without Damaging Drywall
- Use a putty knife or pry bar with gentle pressure to avoid tearing the drywall.
- Cut through all caulk and adhesive before attempting to pull the backsplash off.
- If damage occurs, use spackle or joint compound to repair small holes or cracks.
Dealing with Stubborn Adhesives or Excessive Caulk
- Apply heat using a hairdryer or heat gun to soften the adhesive.
- Use a solvent-based adhesive remover for particularly tough spots.
- Work in small sections to make scraping easier.
What to Do If the Granite Breaks During Removal
- Wear thick gloves to handle sharp granite pieces safely.
- Use a tarp or drop cloth to catch falling debris.
- If a large piece breaks, remove it in sections rather than attempting to pull it off all at once.
By using the right tools and following a careful step-by-step process, you can successfully complete a granite backsplash removal without damaging your walls or surrounding areas. Whether you’re replacing it with a new backsplash or simply upgrading your kitchen’s look, proper removal ensures a smooth transition for your next renovation project.
Why Choose SF Marble & Granite for Backsplash Installation?
At SF Marble & Granite, we specialize in expert backsplash installation in Lowell, ensuring a seamless and elegant upgrade to your kitchen or bathroom. With years of experience, our skilled team delivers flawless installations and precise removals, minimizing damage and hassle.
We offer a wide range of premium materials, including granite, quartz, marble, and more, tailored to match your unique style. Whether you need a modern full-height backsplash or a classic 4-inch design, we provide custom solutions to enhance your space. Trust SF Marble & Granite for quality craftsmanship and outstanding service!
Conclusion
Removing a granite backsplash requires patience, the right tools, and careful technique to avoid damage. By following a step-by-step approach loosening the edges, prying off the backsplash, and cleaning residual adhesive you can ensure a smooth and successful removal. Taking precautions, such as turning off power and protecting surrounding areas, also helps prevent unnecessary repairs.
Once the backsplash is removed, it’s the perfect time to explore new design options. Whether you prefer a sleek quartz, a timeless marble, or another granite backsplash, selecting a material that complements your countertops and cabinetry is key. If you’re unsure about the removal or installation process, seeking professional assistance can save time and prevent costly mistakes. For expert guidance and flawless backsplash installation in Lowell, trust SF Marble & Granite to bring your vision to life!
FAQs
What is a granite backsplash?
A granite backsplash is a protective stone slab installed behind sinks, stoves, or countertops to prevent stains, grease, and moisture, while adding durability and elegance to kitchens and bathrooms.
How do I remove a granite backsplash?
To remove a granite backsplash, use tools like a utility knife to cut through adhesive, a pry bar to gently lift the backsplash, and a putty knife to remove any leftover adhesive. Make sure to protect surrounding areas and use safety gear.
Can I remove a granite backsplash without damaging the drywall?
Yes, by applying gentle pressure with a pry bar and utility knife, you can loosen the backsplash carefully without damaging the drywall. Avoid pulling too hard and work in small sections to minimize damage.
What should I do if the granite breaks during removal?
If the granite breaks, wear protective gloves and handle sharp pieces carefully. Use a tarp to catch falling debris and remove broken pieces in manageable sections rather than all at once.
How do I remove stubborn adhesive from the wall after removing the backsplash?
To remove stubborn adhesive, use a heat gun or hairdryer to soften the residue, then scrape it off with a putty knife. If needed, use a solvent-based adhesive remover or lightly sand the area for a smooth finish.
What materials can I choose for a new backsplash after removing granite?
After removing a granite backsplash, consider materials like quartz, marble, tile, or glass, depending on your desired aesthetic, durability, and maintenance preferences. Each material offers a unique look and function.